
Ask AI
— answers from the official manualAnswers from the official manual.
Common questions
Common Questions
10 totalHow do I adjust the tension on my Blinds2go Perfectfit?
Lay the blind face down and find the small spring at the bottom frame where the cord ends are secured through a small eyelet with a screw. Loosen the screw, then pull through the cord to increase or decrease tension by 5-10mm. (Page 2)
How do I assemble the frame for Blinds2go Perfectfit?
First, lay out all parts (frames and side frames) to ensure cords are not tangled. Attach corner cover pieces firmly to corner joints, then insert pegs on each corner section into their corresponding channels in top and bottom frames. Press pegs securely; blind tension holds frame together upon assembly completion.
How do I install the brackets for a Blinds2go Perfectfit?
To determine bracket position, hold a card vertically in window corner with bracket sitting at card’s edge. Line assembled blind up with brackets so that center prong of each is aligned with frame slots located between glass and brackets.
How do I install the Blinds2go Perfectfit blind?
Place the assembled blind along brackets ensuring alignment between frames, brackets, and window. Push the blinds towards the window until oval slots lock onto bracket prongs. The installation is complete when all slots are locked.
How do I factory reset my Blinds2go Perfectfit?
Blinds2go Perfectfit does not have a hardware-based factory reset feature described in this manual.
What is the correct way to test the blind's tension after assembly?
Stand the assembled frame upright and raise it fully. If the blind moves down slightly, adjust by loosening the screw attachment of cord through eyelet at bottom spring, pulling cord out 5-10mm for adjustment.
Show 4 more questions
Where can I find step-by-step video instructions for assembling my Blinds2go Perfectfit?
Do I need to ensure there are no tangled cords before assembling my Blinds2go Perfectfit blind frame?
How do I align the brackets correctly for a Blinds2go Perfectfit installation?
What is the final step after installing brackets for my Blinds2go Perfectfit blind?
Full Manual
2 pages
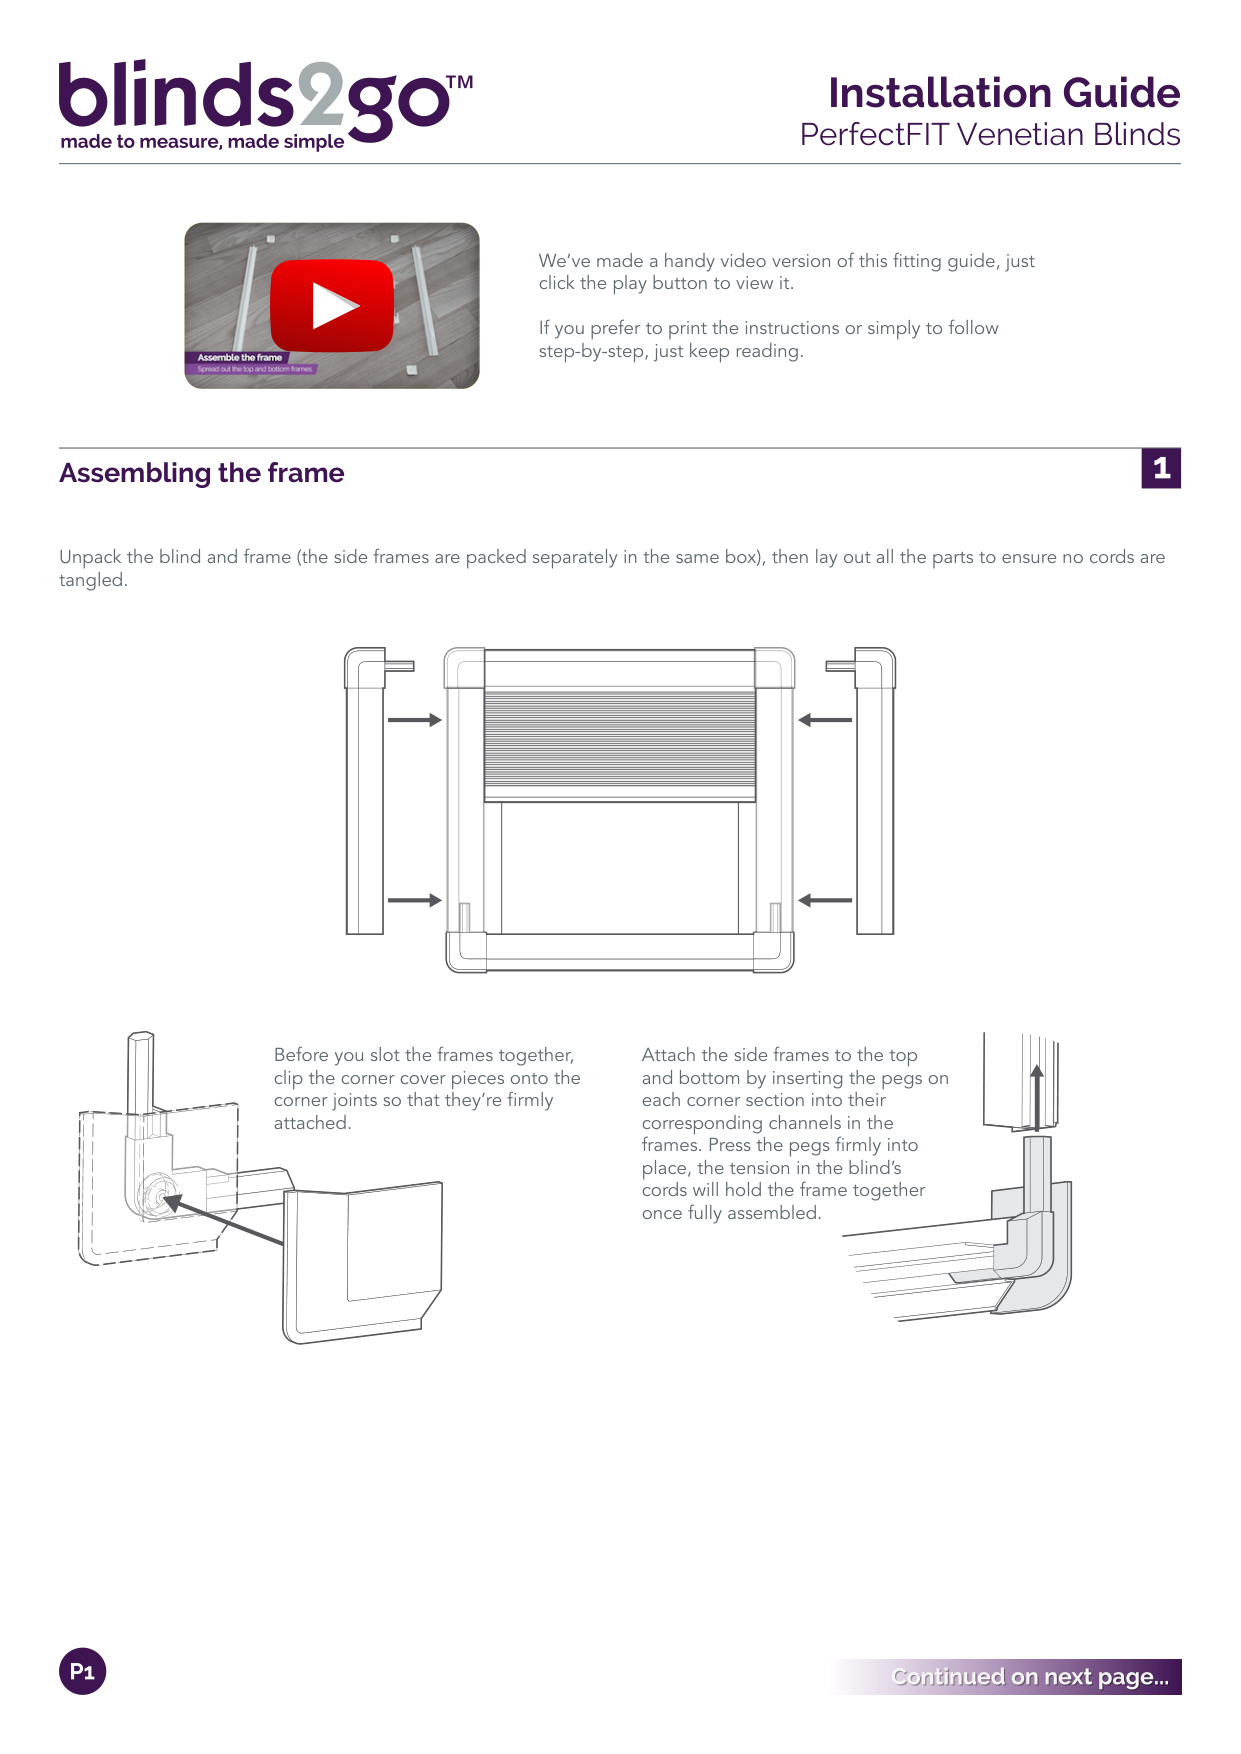


We’ve made a handy video version of this fitting guide, just click the play button to view it.
If you prefer to print the instructions or simply to follow step-by-step, just keep reading.
Assembling the frame
Unpack the blind and frame (the side frames are packed separately in the same box), then lay out all the parts to ensure no cords are tangled.
Before you slot the frames together, clip the corner cover pieces onto the corner joints so that they’re firmly attached.
Attach the side frames to the top and bottom by inserting the pegs on each corner section into their corresponding channels in the frames. Press the pegs firmly into place, the tension in the blind’s cords will hold the frame together once fully assembled.
Testing the tension
Stand the assembled frame upright and raise it fully to the top. If the blind starts to lower slightly of its own accord, the tension will need a small adjustment.
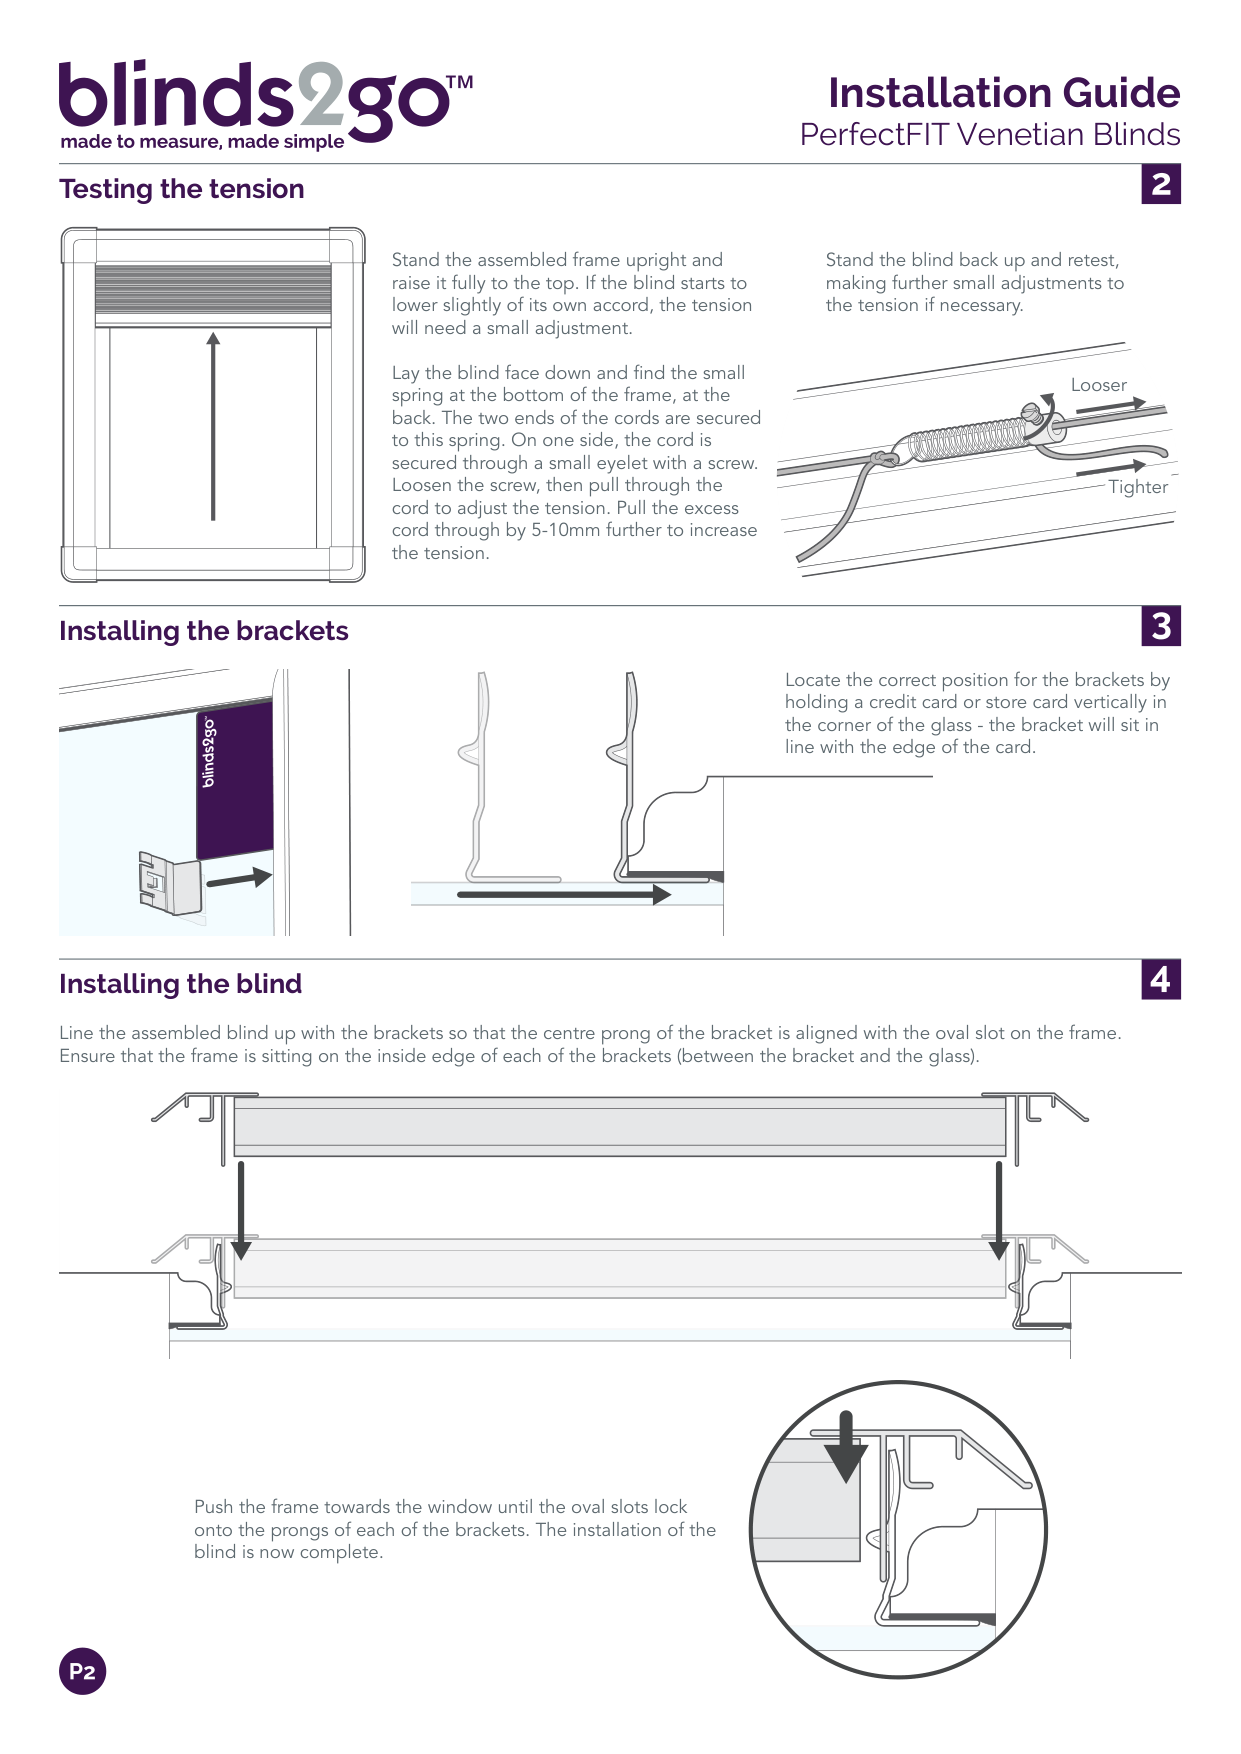
Stand the blind back up and retest, making further small adjustments to the tension if necessary.
Lay the blind face down and find the small spring at the bottom of the frame, at the back. The two ends of the cords are secured to this spring. On one side, the cord is secured through a small eyelet with a screw. Loosen the screw, then pull through the cord to adjust the tension. Pull the excess cord through by 5-10mm further to increase the tension.
Looser
Tighter
Installing the brackets
Locate the correct position for the brackets by holding a credit card or store card vertically in the corner of the glass - the bracket will sit in line with the edge of the card.
Installing the blind
Line the assembled blind up with the brackets so that the centre prong of the bracket is aligned with the oval slot on the frame. Ensure that the frame is sitting on the inside edge of each of the brackets (between the bracket and the glass).
Push the frame towards the window until the oval slots lock onto the prongs of each of the brackets. The installation of the blind is now complete.