
Ask AI
— answers from the official manualAnswers from the official manual.
Common questions
Common Questions
4 totalWhat are the safety instructions for using my Corsair Relaxed TC100?
Use the chair in a non-abusive manner and ensure all components are properly installed. Never use excessive force when making adjustments to avoid damaging the chair or causing personal injury.
How do I install covers on hinges of my Corsair Relaxed TC100?
Place a hinge cover over each hinge and secure it with a small screw. Use the plug to hide the screw hole for aesthetic purposes.
How can I install optional neck and lumbar pillows on my Corsair Relaxed TC100?
Add the provided neck and/or lumbar pillow by positioning them securely where needed for additional support during extended use.
How can I adjust the tilt tension on my Corsair Relaxed TC100?
Rotate the tilt tension knob clockwise to increase resistance or counterclockwise to decrease it. Adjust this setting based on how easily you want your chair to recline.
Full Manual
9 pages
GAMING CHAIR
QUICK START GUIDE
ENGLISHEN
INTRODUCTION
Congratulations on your new CORSAIR chair! This quick start guide will walk you through assembly and get you sitting and comfortable as quickly as possible.
There may be differences in the shape, color, or design of your specific chair, but be assured the assembly techniques shown here are compatible for all CORSAIR chairs.
We also have a video guide for most of our chairs on the CORSAIR LAB YouTube Channel, found here: www.youtube.com/CORSAIRHowTo
Thanks for choosing CORSAIR and we hope you enjoy your new chair!
PACKAGE CONTENTS
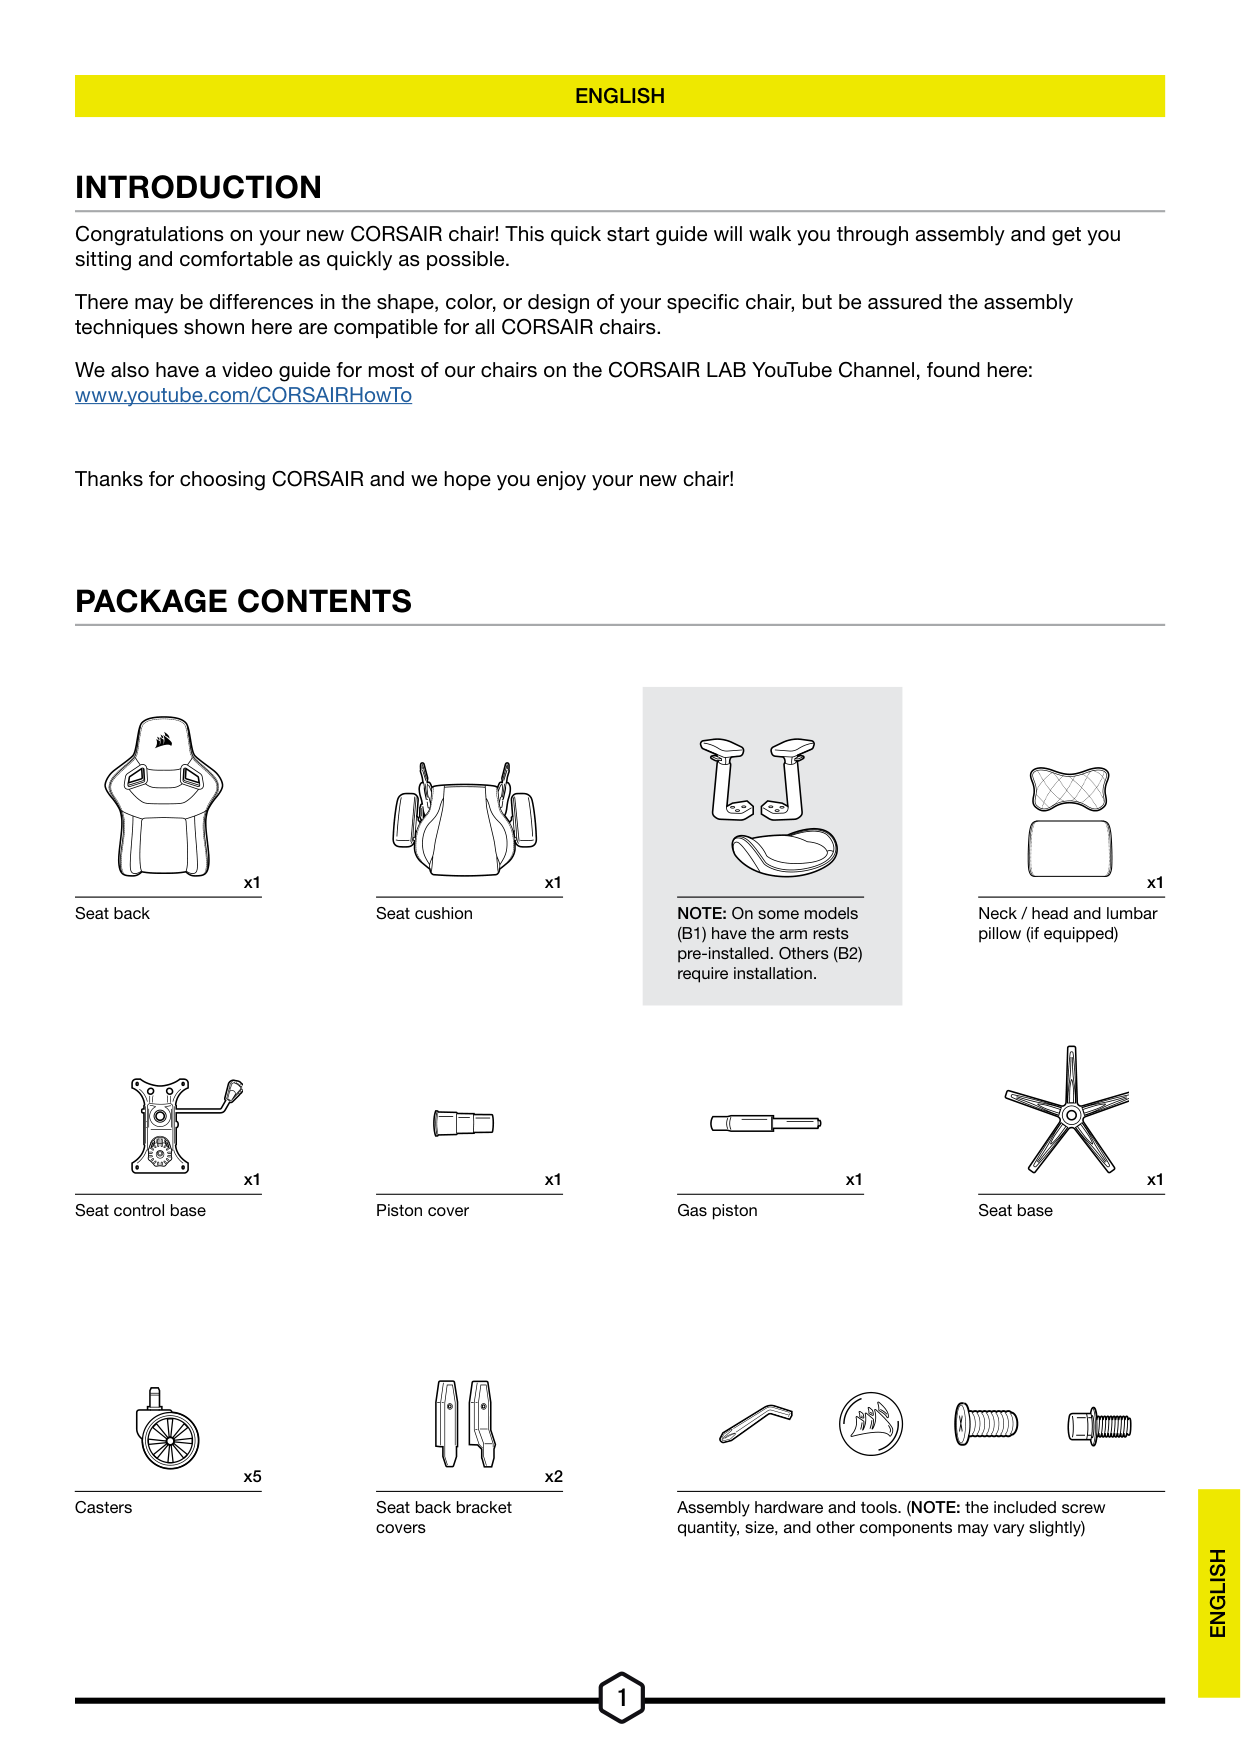
x1 Seat back
x1
Seat control base
x1 Seat cushion
x1 Piston cover
NOTE: On some models (B1) have the arm rests pre-installed. Others (B2) require installation.
x1 Gas piston
x1
Neck / head and lumbar pillow (if equipped)
x1 Seat base
x5 x2
Casters Seat back bracket covers
Assembly hardware and tools. (NOTE: the included screw quantity, size, and other components may vary slightly)
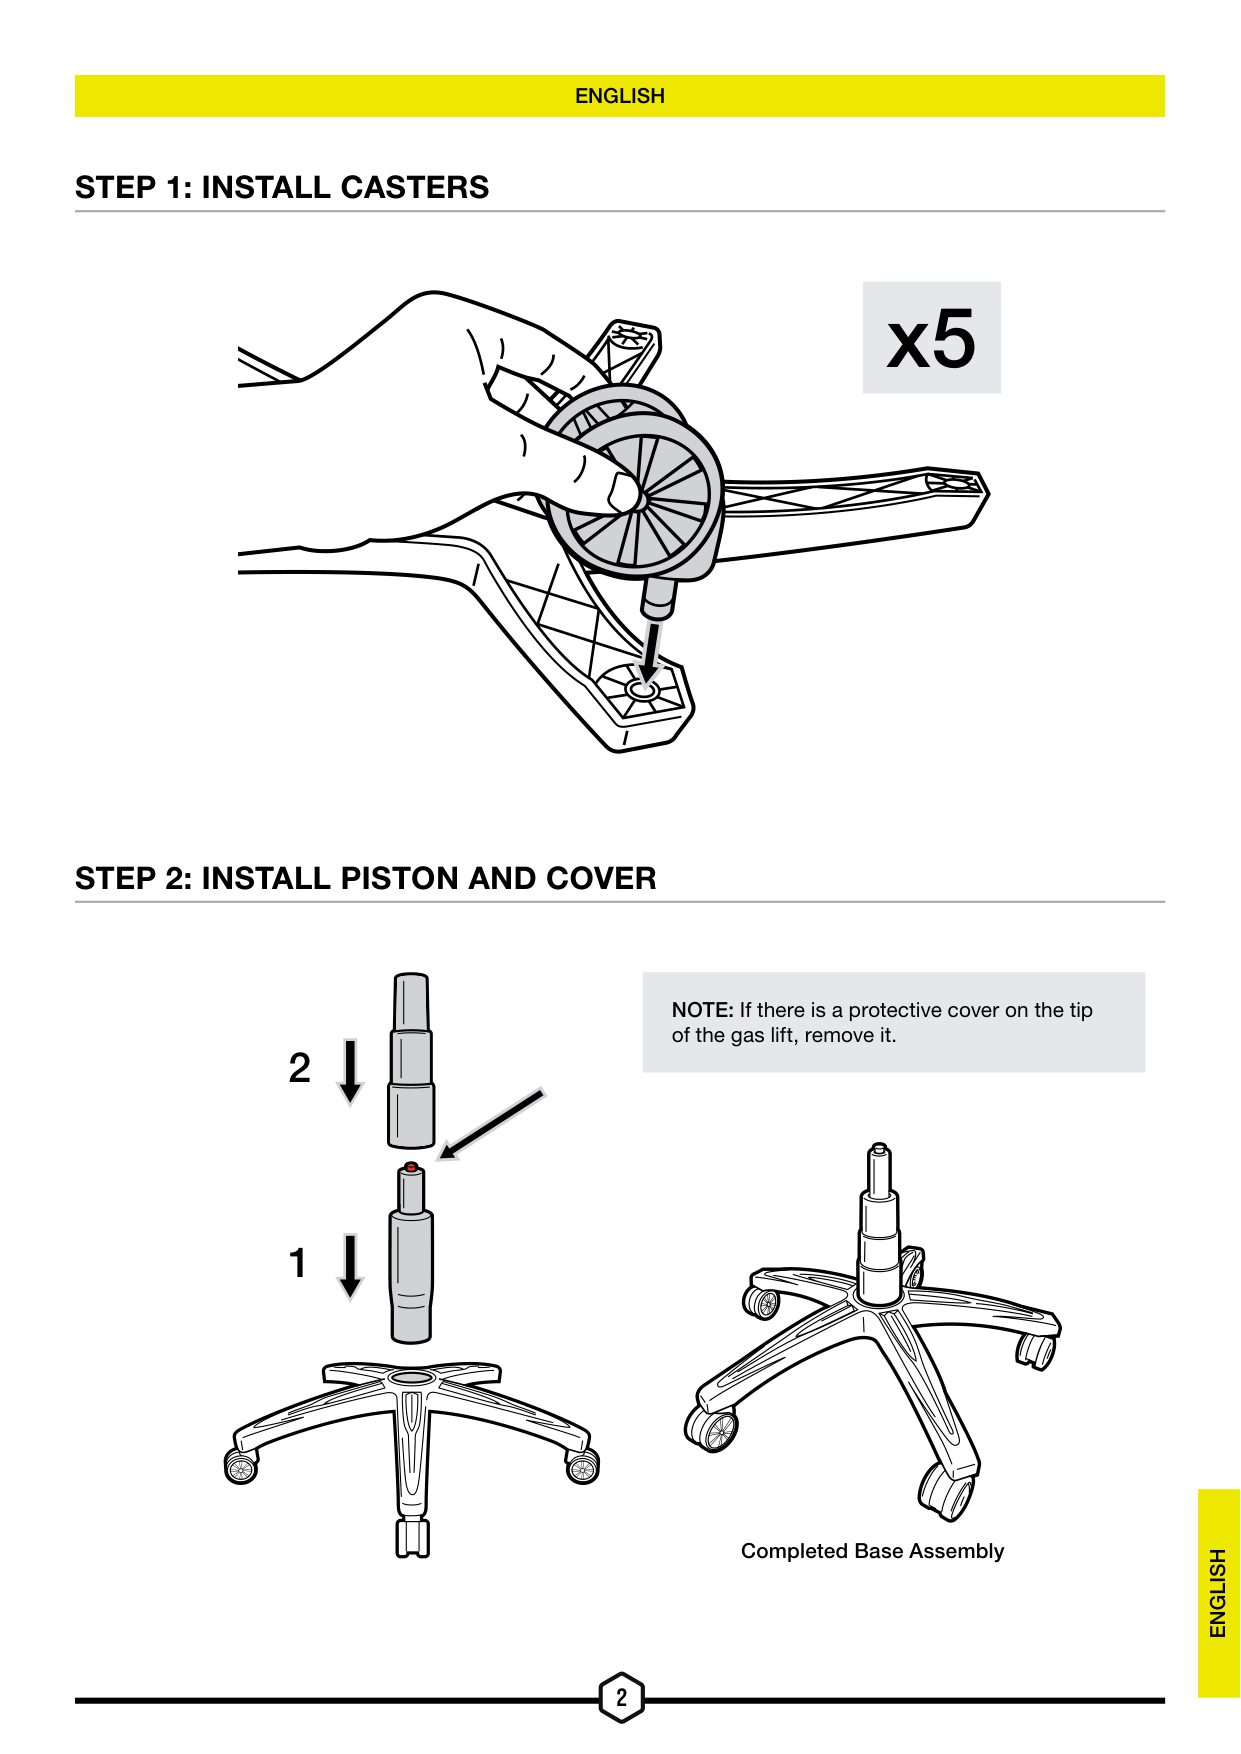
STEP 1: INSTALL CASTERS
x5
STEP 2: INSTALL PISTON AND COVER
NOTE: If there is a protective cover on the tip of the gas lift, remove it.
Completed Base Assembly
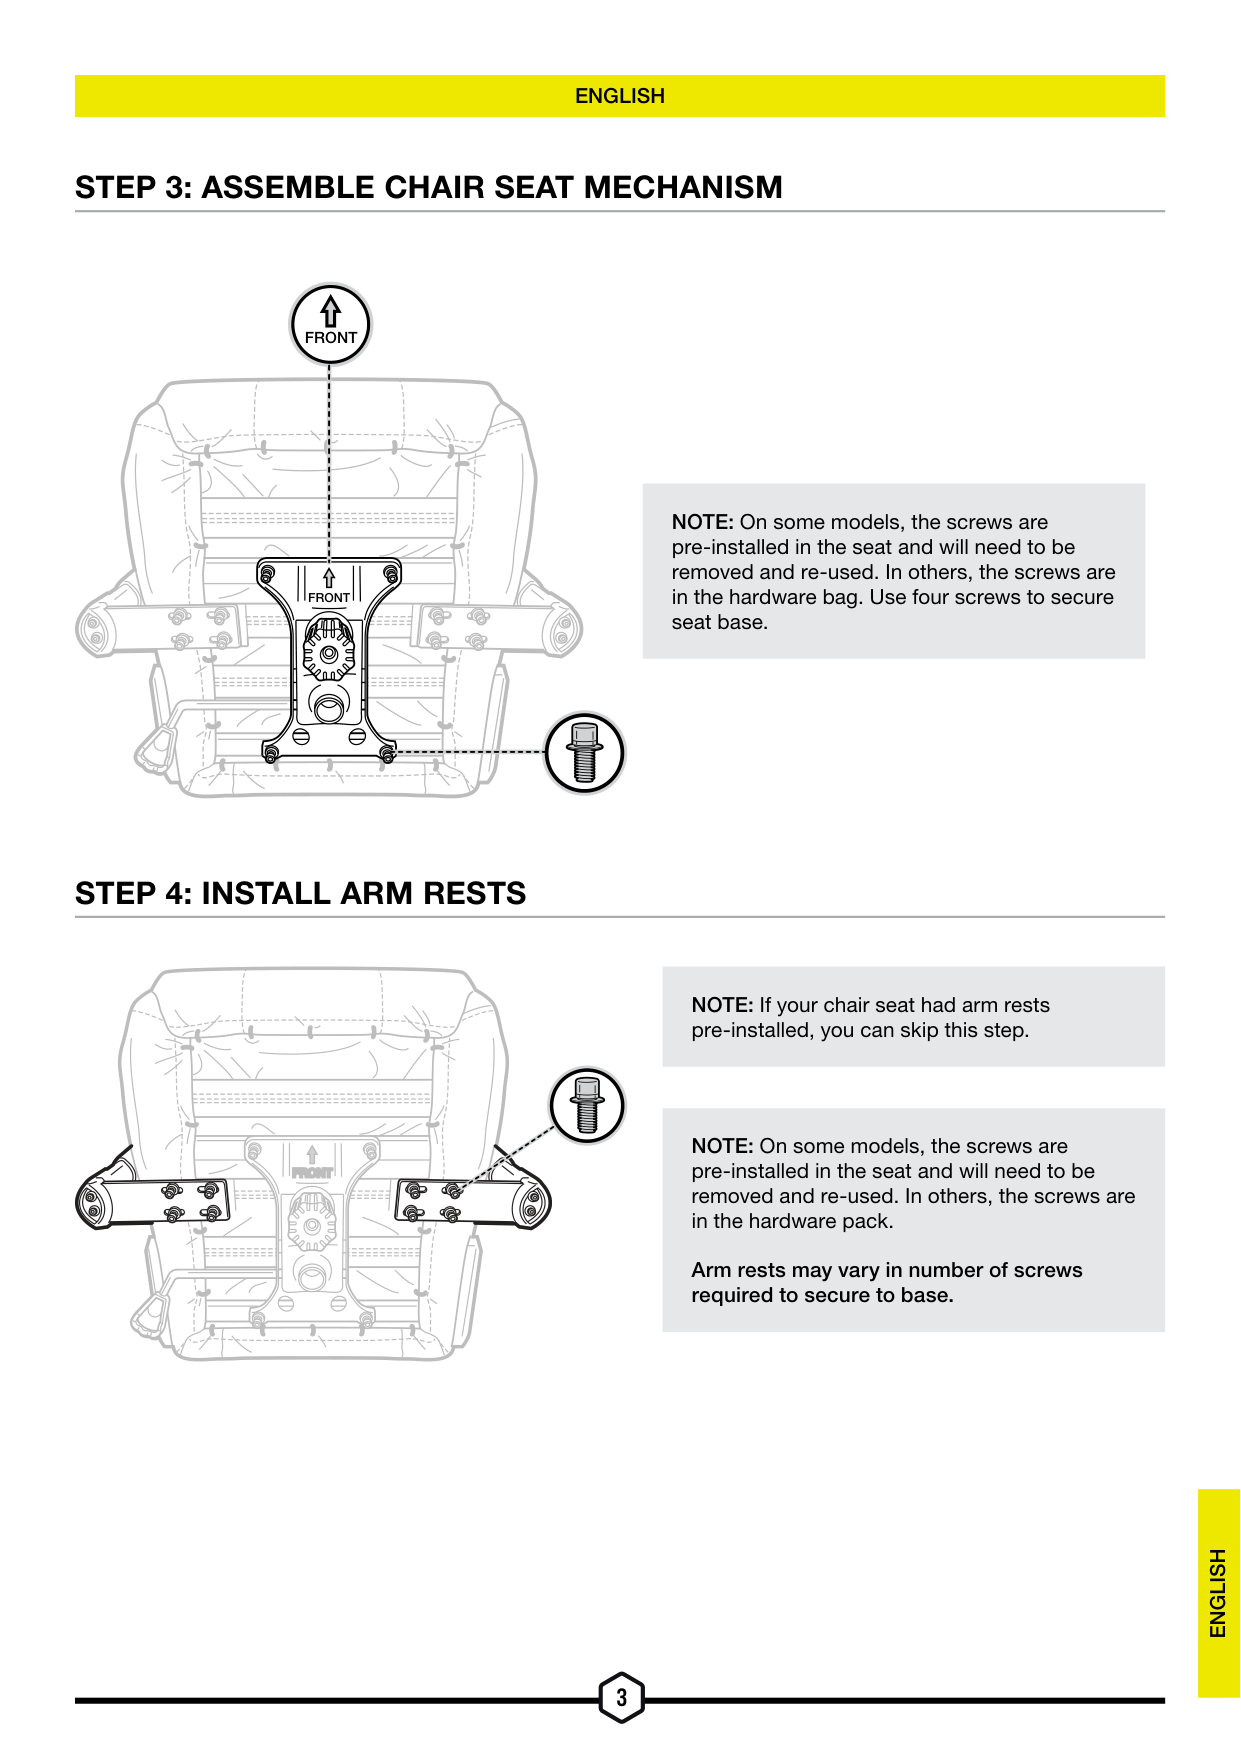
STEP 3: ASSEMBLE CHAIR SEAT MECHANISM
##### FRONT
| | | |---|---| | | | | | | | | |
###### FRONT
NOTE: On some models, the screws are pre-installed in the seat and will need to be removed and re-used. In others, the screws are in the hardware bag. Use four screws to secure seat base.
STEP 4: INSTALL ARM RESTS
FRONTFRONT
NOTE: If your chair seat had arm rests pre-installed, you can skip this step.
NOTE: On some models, the screws are pre-installed in the seat and will need to be removed and re-used. In others, the screws are in the hardware pack.
Arm rests may vary in number of screws required to secure to base.
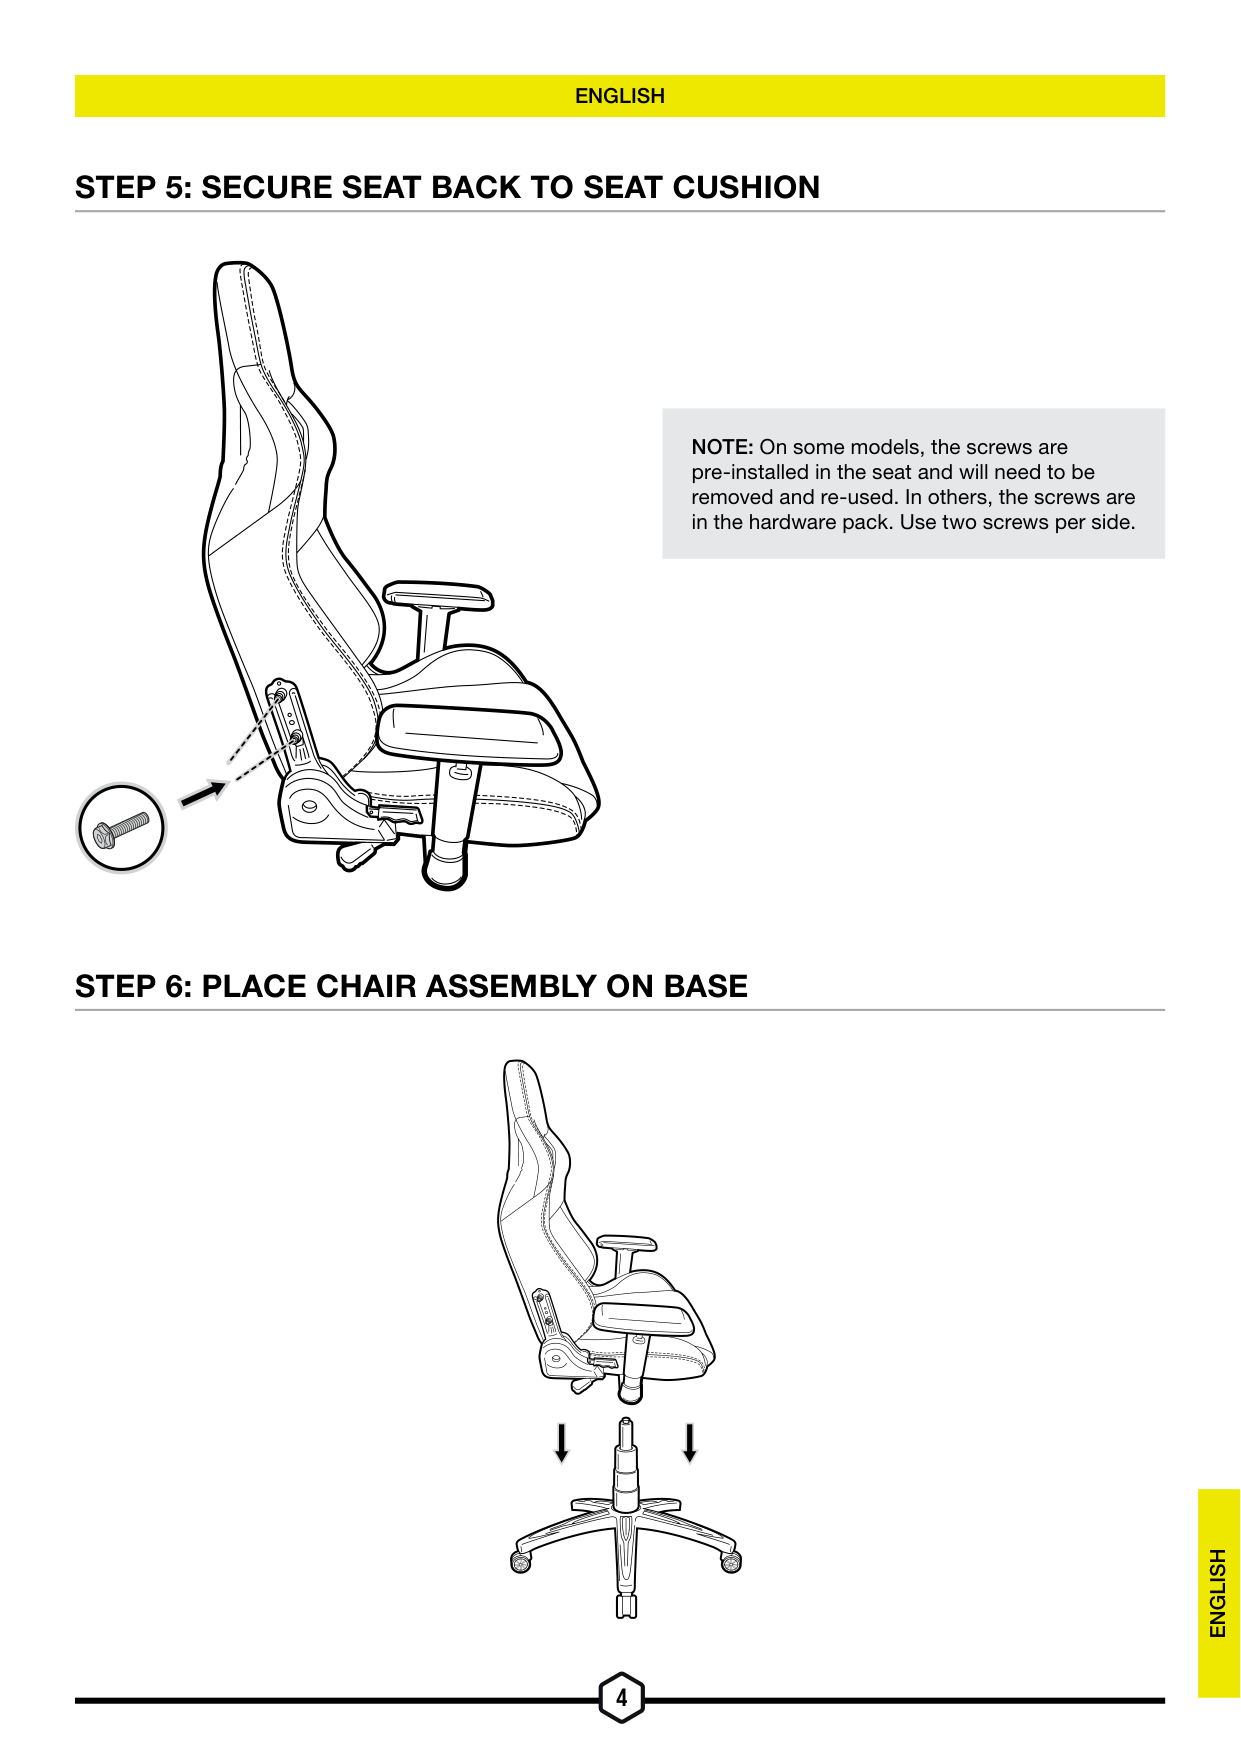
STEP 5: SECURE SEAT BACK TO SEAT CUSHION
NOTE: On some models, the screws are pre-installed in the seat and will need to be removed and re-used. In others, the screws are in the hardware pack. Use two screws per side.
STEP 6: PLACE CHAIR ASSEMBLY ON BASE
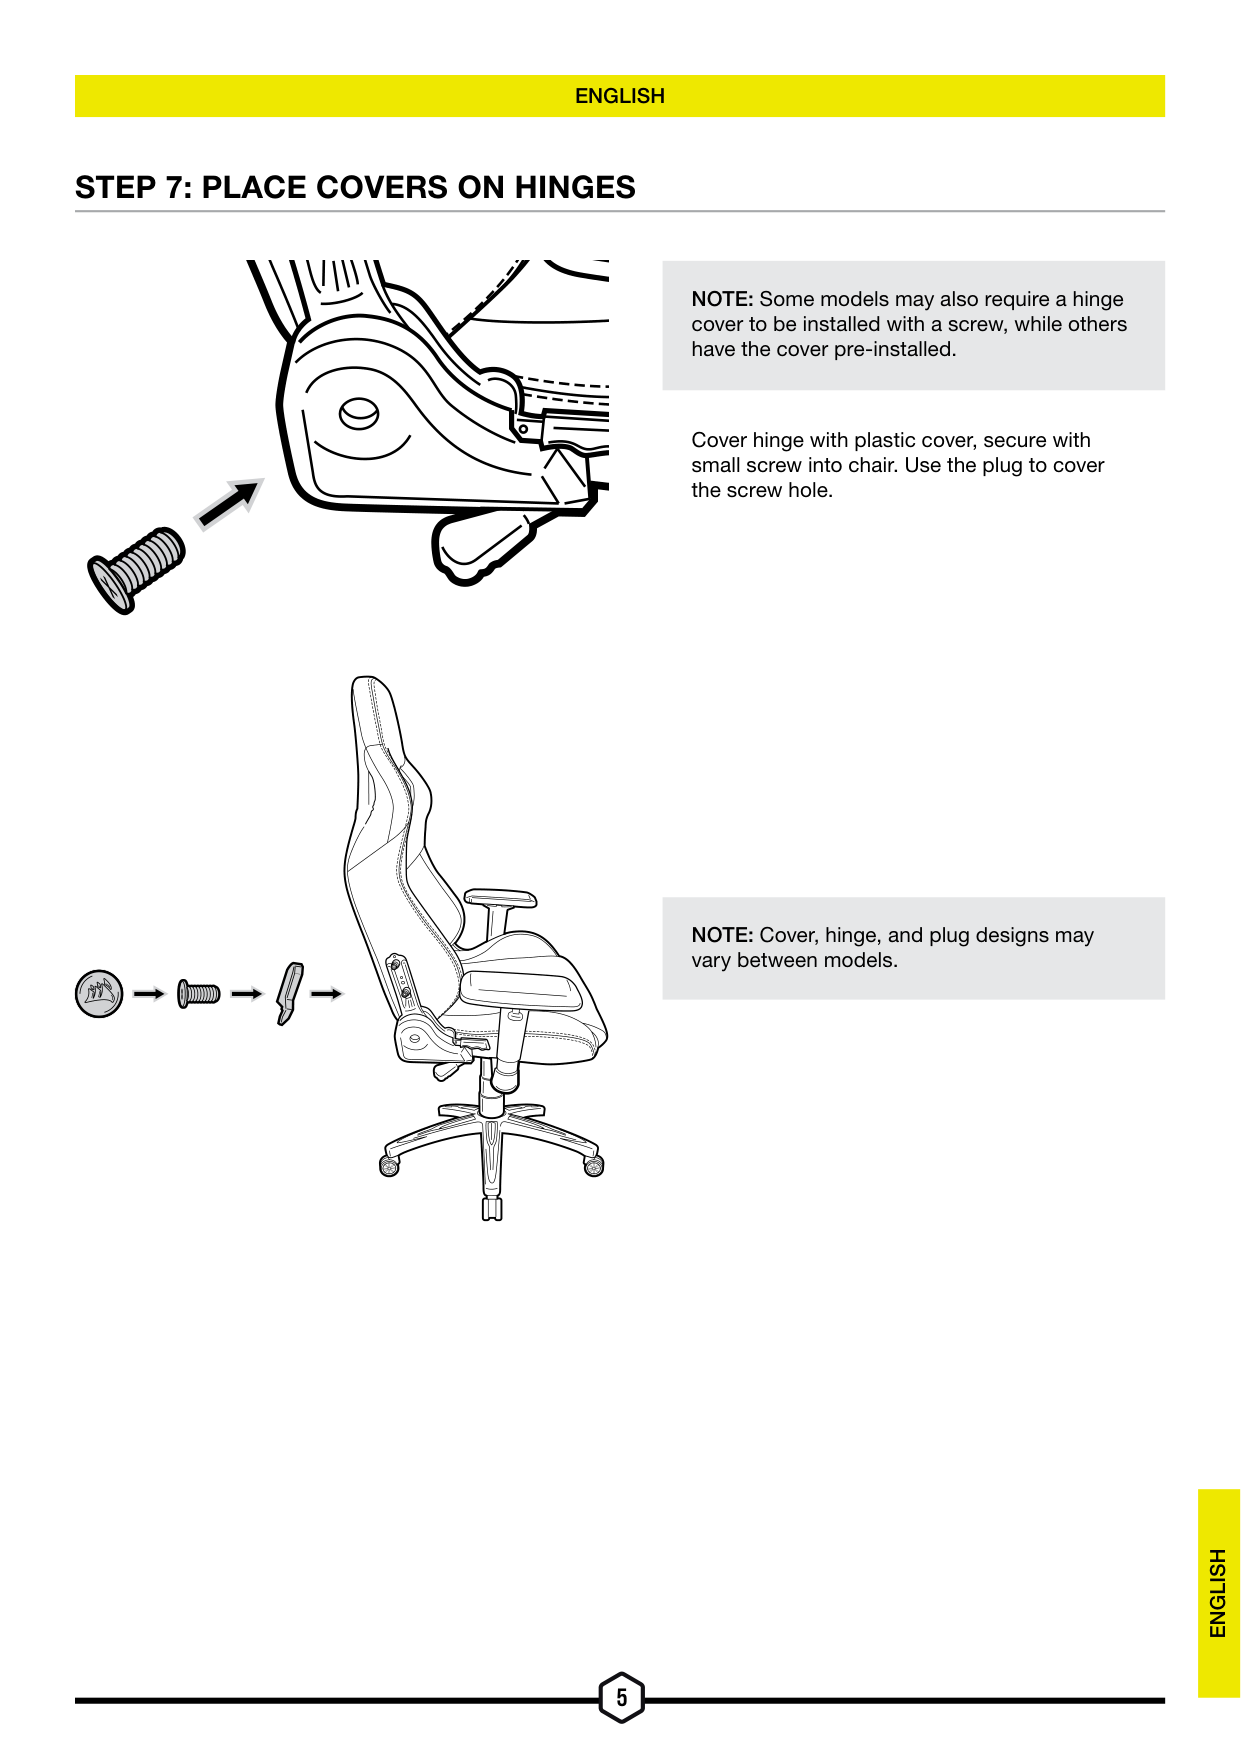
STEP 7: PLACE COVERS ON HINGES
NOTE: Some models may also require a hinge cover to be installed with a screw, while others have the cover pre-installed.
Cover hinge with plastic cover, secure with small screw into chair. Use the plug to cover the screw hole.
NOTE: Cover, hinge, and plug designs may vary between models.
STEP 8: ADD NECK AND LUMBAR PILLOWS (OPTIONAL)

USER MANUAL
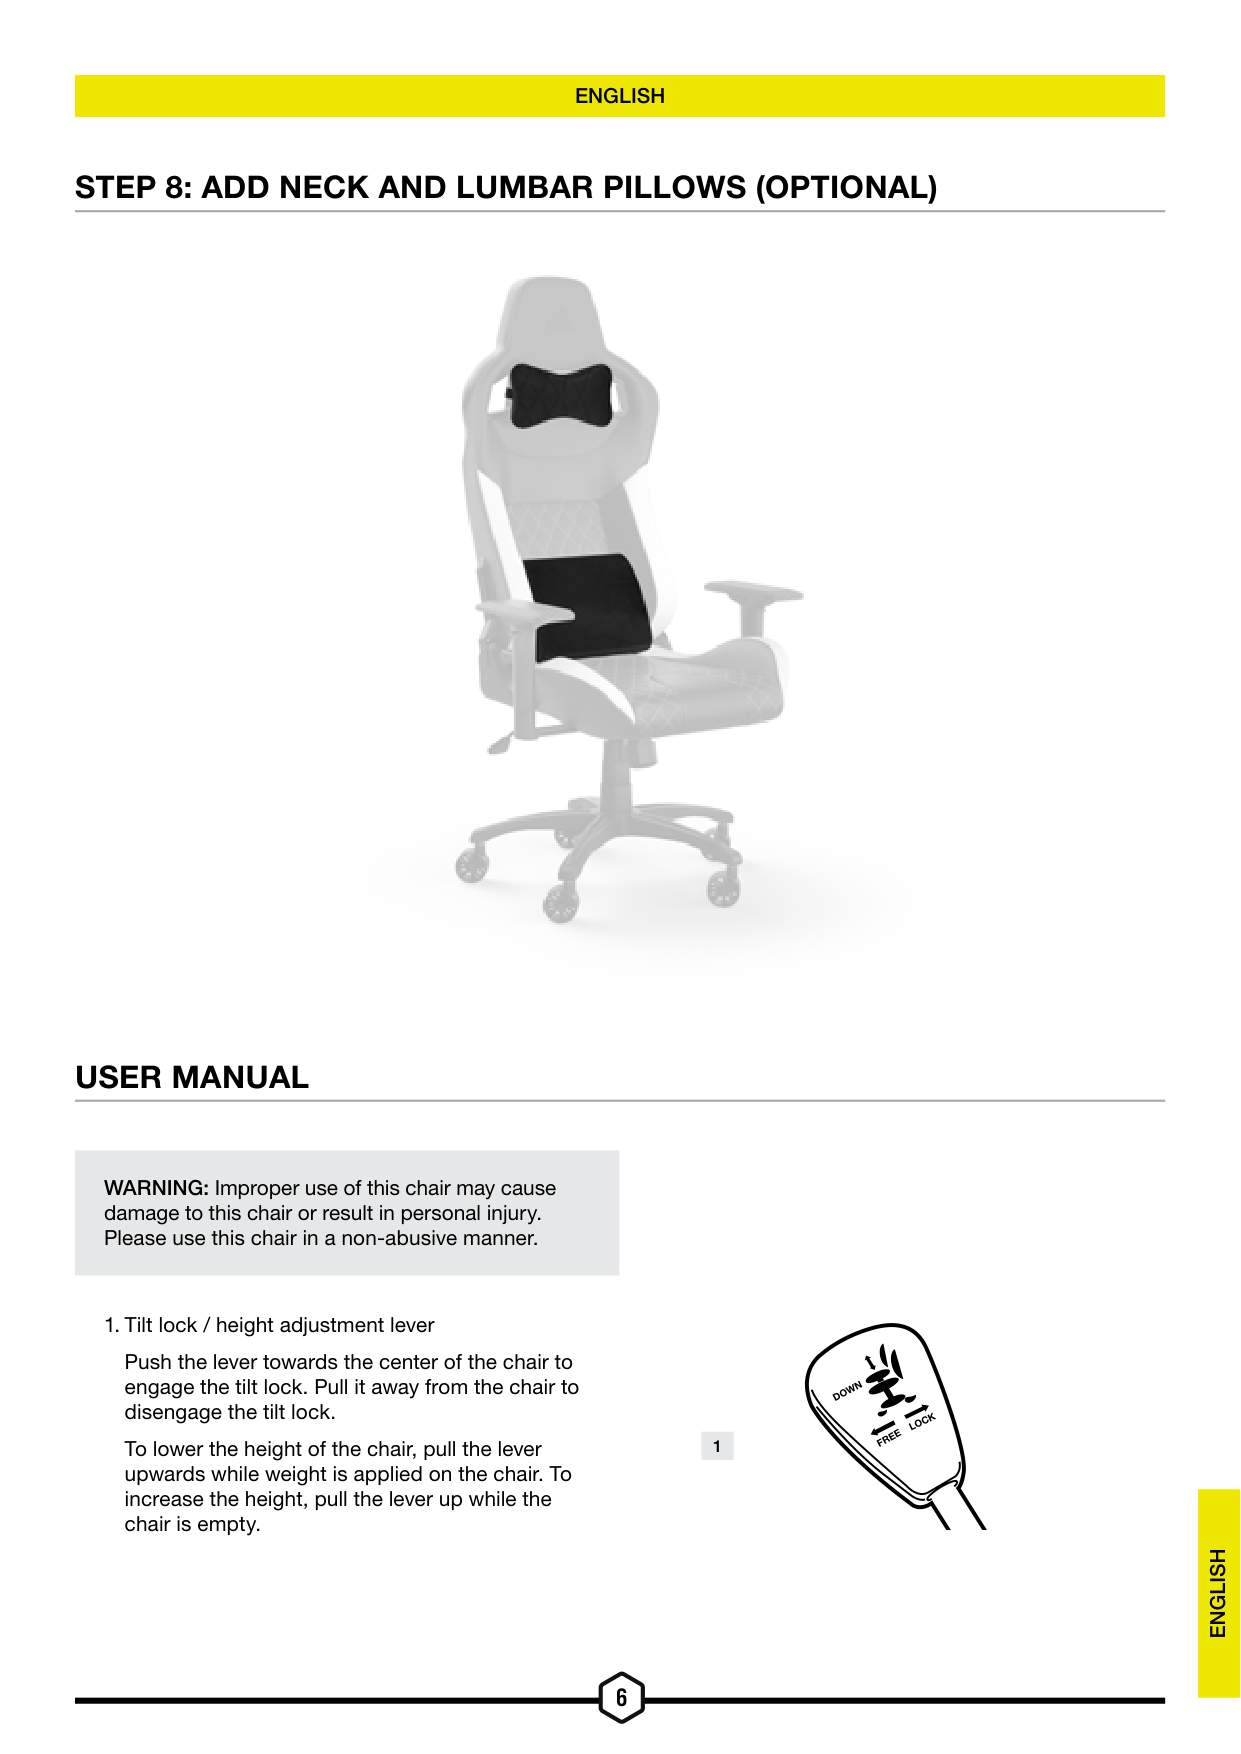
WARNING: Improper use of this chair may cause
damage to this chair or result in personal injury. Please use this chair in a non-abusive manner.
Push the lever towards the center of the chair to engage the tilt lock. Pull it away from the chair to disengage the tilt lock.
WN
DO
LOCK 1
FREE
To lower the height of the chair, pull the lever upwards while weight is applied on the chair. To increase the height, pull the lever up while the chair is empty.
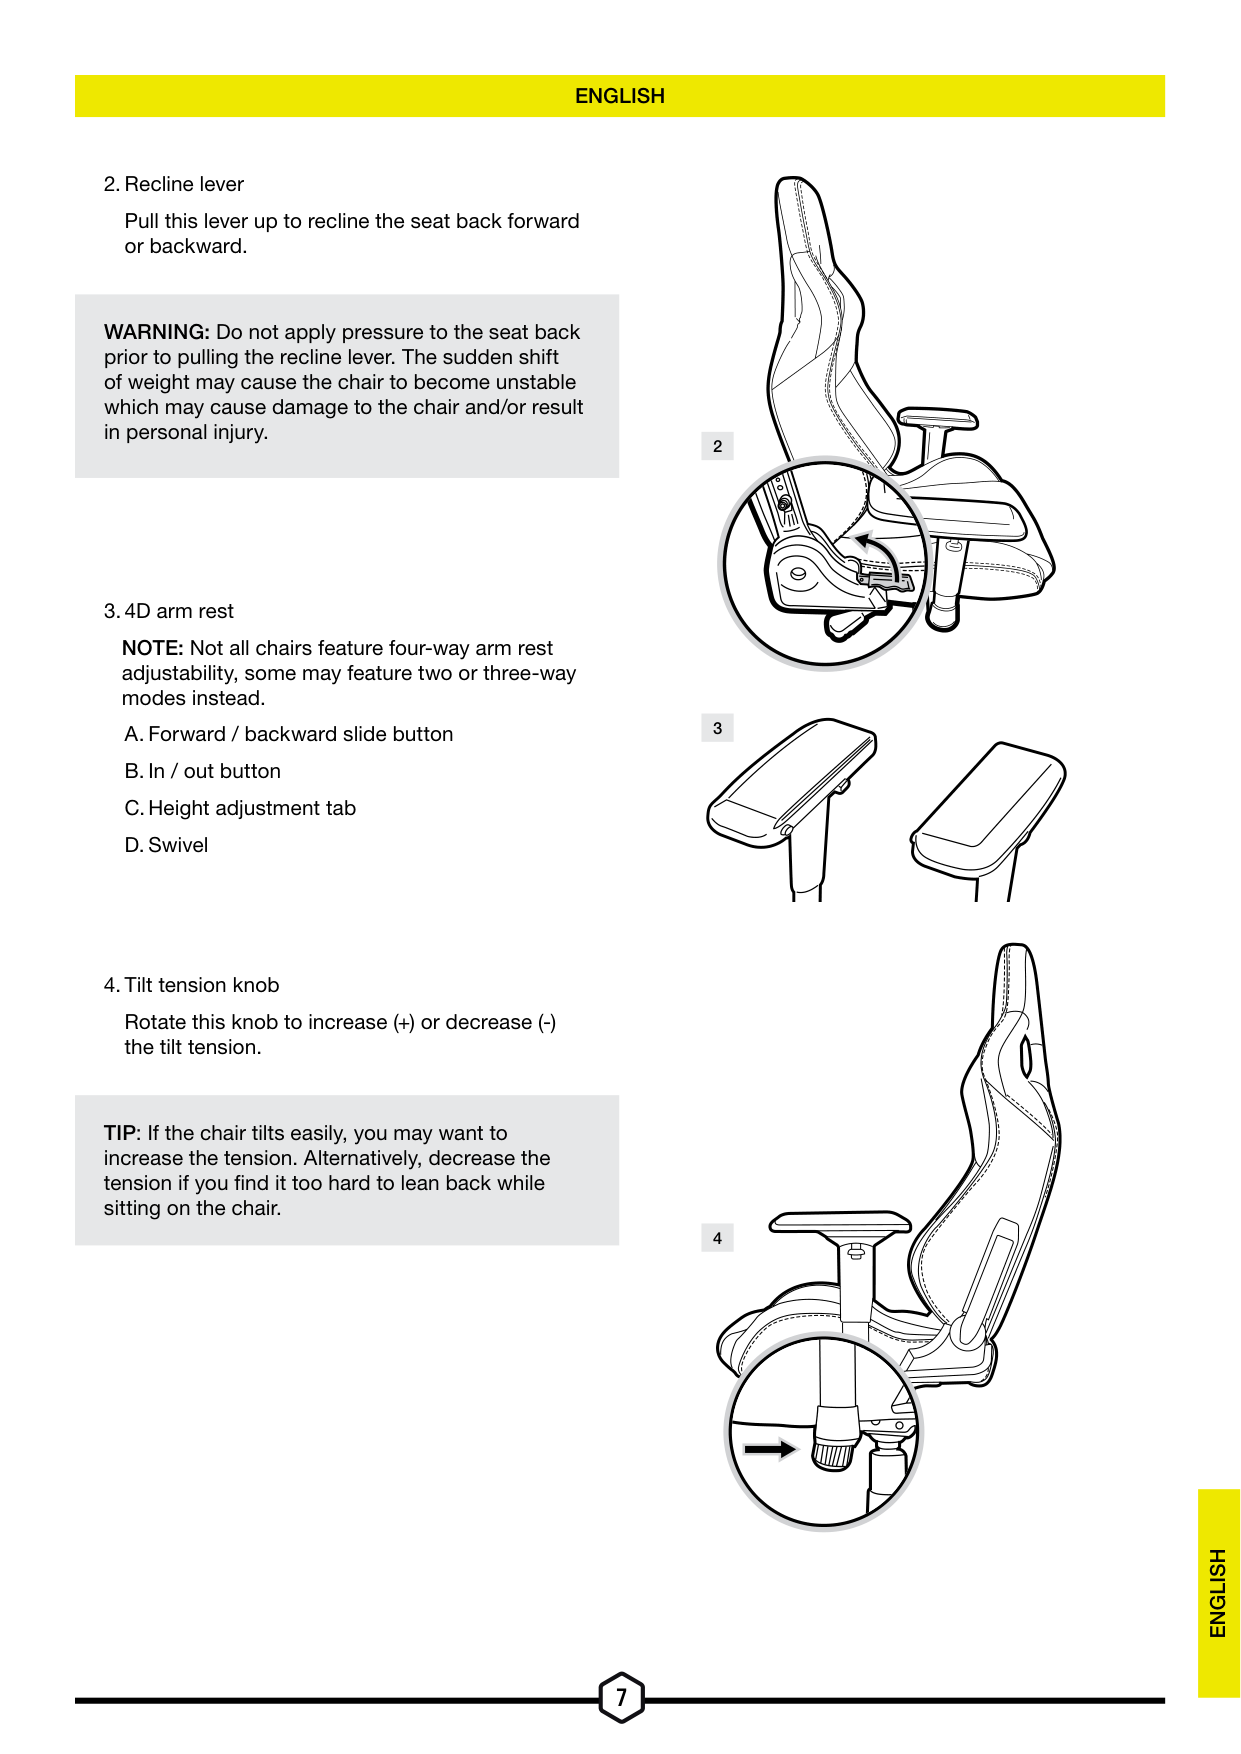
Pull this lever up to recline the seat back forward or backward.
WARNING: Do not apply pressure to the seat back prior to pulling the recline lever. The sudden shift of weight may cause the chair to become unstable which may cause damage to the chair and/or result in personal injury.
NOTE: Not all chairs feature four-way arm rest adjustability, some may feature two or three-way modes instead.

Rotate this knob to increase (+) or decrease (-) the tilt tension.
TIP: If the chair tilts easily, you may want to increase the tension. Alternatively, decrease the tension if you find it too hard to lean back while sitting on the chair.
Web: corsair.com Support: support.corsair.com Blog: corsair.com/blog Forum: forum.corsair.com YouTube: youtube.com/corsairhowto
Phone: (888) 222-4346
Warranty: corsair.com/support/warranty
© 2023 CORSAIR MEMORY, Inc. All rights reserved. CORSAIR and the sails logo are registered trademarks of CORSAIR in the United States and/or other countries. All other trademarks are the property of their respective owners. Product may vary slightly from those pictured. 49-002681 AA