
Ask AI
— answers from the official manualAnswers from the official manual.
Common questions
Common Questions
10 totalHow do I set water hardness for my machine?
Set water hardness according to the measured value using the indicator paper. Press and hold the button for at least 6 seconds until lights come on, then select the correct hardness level with the dial (measure water hardness by immersing the test paper in a glass of water). The machine is now reprogrammed with the new setting.
What should I do if my coffee is thin or not creamy enough?
If the coffee is ground too coarsely, turn the grinding adjustment dial one click anticlockwise while the mill is in operation. Continue adjusting one click at a time until delivery is satisfactory; changes take effect after delivering two coffees.
How do I clean the coffee spouts?
Clean the coffee spouts with a sponge or cloth to remove any deposits. Ensure holes in the coffee spout are not blocked using a toothpick if necessary.
Where can I find troubleshooting information for error codes?
Refer to "Explanation of lights" and "Troubleshooting" sections on pages 17 and 18 respectively. Common issues like insufficient water, full grounds container or descaling required have specified remedies.
How do I descale my machine?
To begin descaling, empty the water tank and pour in the descaler solution as specified on page 32. Turn the steam dial to position 'I' when prompted by lights to start the descale procedure; allow it to run for about 30 minutes followed by rinsing through with clean water.
How do I replace or remove the coffee bean container?
Locate A7 on page 2 of the manual, where it describes removing and replacing the beans container lid. Do this gently to avoid damaging the machine.
Full Manual
14 pages
Contents IMPoRtAnt sAFeGUARDs 7
SAVE THESE INSTRUCTIONS 7 shoRt CoRD InstRUCtIons 7 IntRoDUCtIon 8
Symbols used in these instructions 8 Letters in brackets 8 Troubleshooting and repairs 8 DESCRIPTION 8 Description of the appliance 8 Description of the control panel 8 Description of the accessories 8 Description of lights 9
PRelIMInARy CheCks 9 Checking the appliance 9 Installing the appliance 9 Connecting the appliance 9 Using the appliance for the first time 9
tURnInG the APPlIAnCe on 10 tURnInG the APPlIAnCe oFF 10 AUto-oFF 10 eneRGy sAVInG 10 WAteR soFteneR FIlteR 11
Installing the filter 11 Removing and replacing the filter 11
MAkInG CoFFee 11 Selecting the coffee taste 11 Selecting the quantity of coffee in the cup 11 Adjusting the coffee mill 12 Setting the temperature 12 Tips for a hotter coffee 12 Making coffee using coffee beans 12 Making coffee using pre-ground coffee 13
MAkInG CAPUCCIno 13
Cleaning the cappuccino maker after use 13 heAtInG WAteR 13 CleAnInG 14
Cleaning the coffee maker 14 Cleaning the drip tray and condensate tray 14 Cleaning the inside of the coffee maker 14 Cleaning the water tank 14 Cleaning the coffee spouts 14 Cleaning the pre-ground coffee funnel 14 Cleaning the infuser 14
DesCAle 15
settInG WAteR hARDness 16 Measuring water hardness 16 Set water hardness 16
#### teChnICAl sPeCIFICAtIon 16 eXPlAnAtIon oF lIGhts 17 tRoUBleshootInG 18 GARAntIe lIMItèe 19
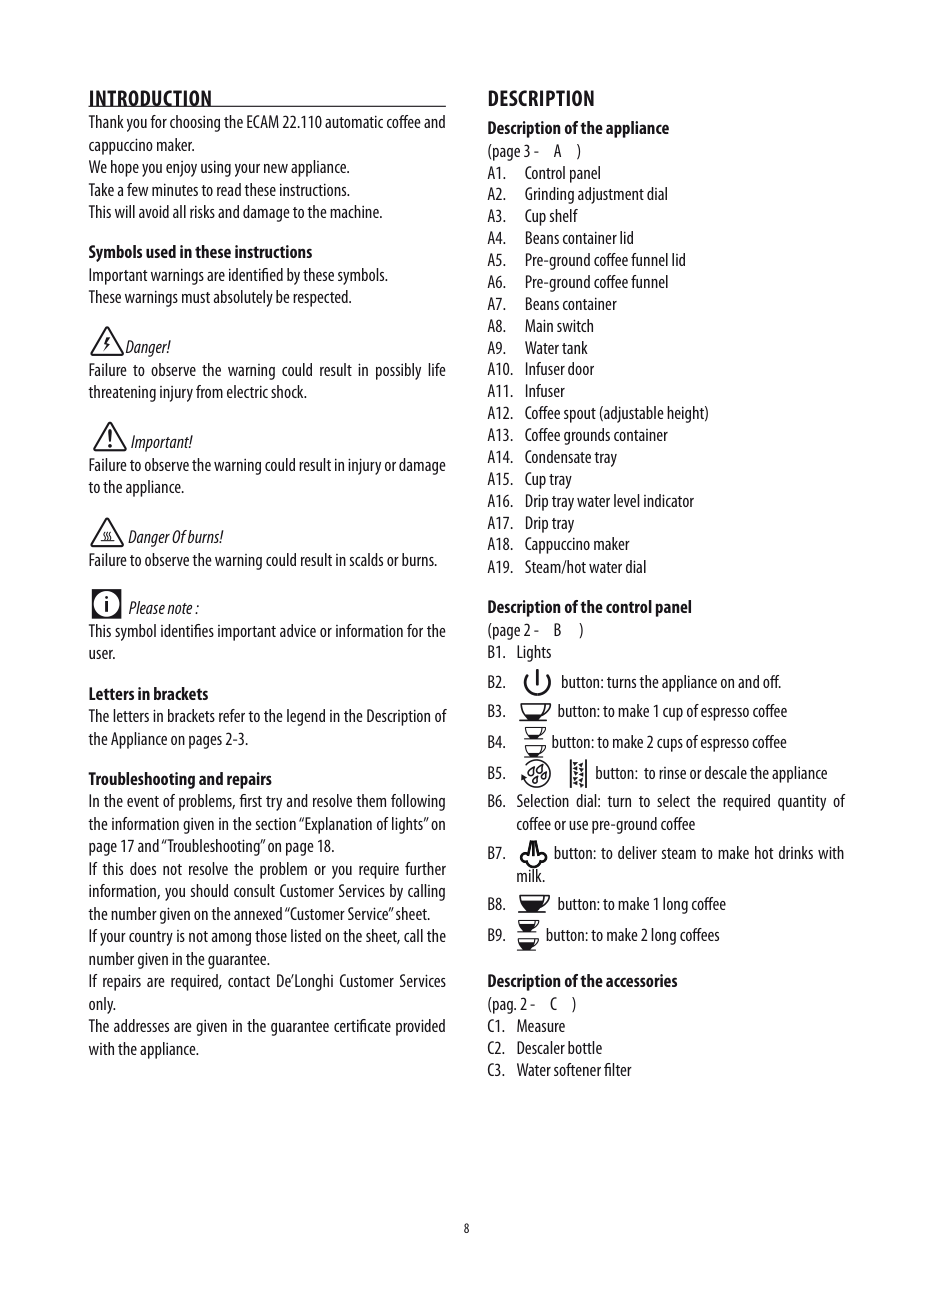
|IMPoRtAnt sAFeGUARDs
When using electrical appliances, basic safety precautions should always be followed, including the following
• Read all instructions carefully.
• Make sure the voltage of your electrical system corresponds to the voltage shown on the bottom of the machine.
• Do not touch hot surfaces. Use handles or knobs.
• To protect against fire, electrical shock and personal injury, do not immerse cord, plug or appliance in water or other liquid
• Keep the appliance out of the reach of children and do not leave appliance unattended while in operation.
• Unplug from the outlet when not in use and before cleaning.
• Do not operate with a damaged cord or plug, or after the appliance malfunctions, or has been damaged in any manner Return the appliance to the nearest authorized service facility for examination, repair or adjustment
• The use of accessory attachments not recommended by the manufacturer may result in fire, electrical shock, or personal injury
• Do not use outdoors.
• Make sure the power cord does not hang over the edge of the table or counter-top to avoid getting accidentally caught or entangled
• Do not place the appliance or its electrical parts on or near electric stoves, cooking surfaces, or gas burners.
• Plug cord into the wall outlet. To disconnect, first turn machine “off”, then remove plug from wall outlet.
• Do not use the appliance for other than the intended use. This appliance is to be utilized for domestic use only. The manufacturer declines all responsibility for any damage caused by improper, incorrect, or irresponsible use
WARnInG: to reduce the risk of fire or electric shock, do not remove the cover or the exterior of the unit Don’t attempt to repair or modify the machine, doing so will void the warranty Repair should be done by authorized service personnel only!
sAVe these InstRUCtIons
THIS APPLIANCE IS FOR HOUSEHOLD USE ONLY| |---|
shoRt CoRD InstRUCtIons
A short power cord is provided to reduce risks resulting from becoming entangled in or tripping over a longer cord
IntRoDUCtIon Thank you for choosing the ECAM 22 110 automatic coffee and cappuccino maker We hope you enjoy using your new appliance Take a few minutes to read these instructions This will avoid all risks and damage to the machine
DesCRIPtIon Description of the appliance (page 3 - A )
symbols used in these instructions Important warnings are identified by these symbols These warnings must absolutely be respected
Danger! Failure to observe the warning could result in possibly life threatening injury from electric shock
Important! Failure to observe the warning could result in injury or damage to the appliance
Danger Of burns! Failure to observe the warning could result in scalds or burns
Description of the control panel (page 2 - B )
Please note : This symbol identifies important advice or information for the user
letters in brackets The letters in brackets refer to the legend in the Description of the Appliance on pages 2-3
troubleshooting and repairs In the event of problems, first try and resolve them following the information given in the section “Explanation of lights” on page 17 and “Troubleshooting” on page 18. If this does not resolve the problem or you require further information, you should consult Customer Services by calling the number given on the annexed “Customer Service” sheet. If your country is not among those listed on the sheet, call the number given in the guarantee If repairs are required, contact De’Longhi Customer Services only The addresses are given in the guarantee certificate provided with the appliance
Description of the accessories (pag 2 - C ) C1 Measure C2 Descaler bottle C3 Water softener filter
PRelIMInARy CheCks Checking the appliance After removing the packaging, make sure the product is complete and undamaged and that all accessories are present Do not use the appliance if it is visibly damaged Contact De’Longhi Customer Services
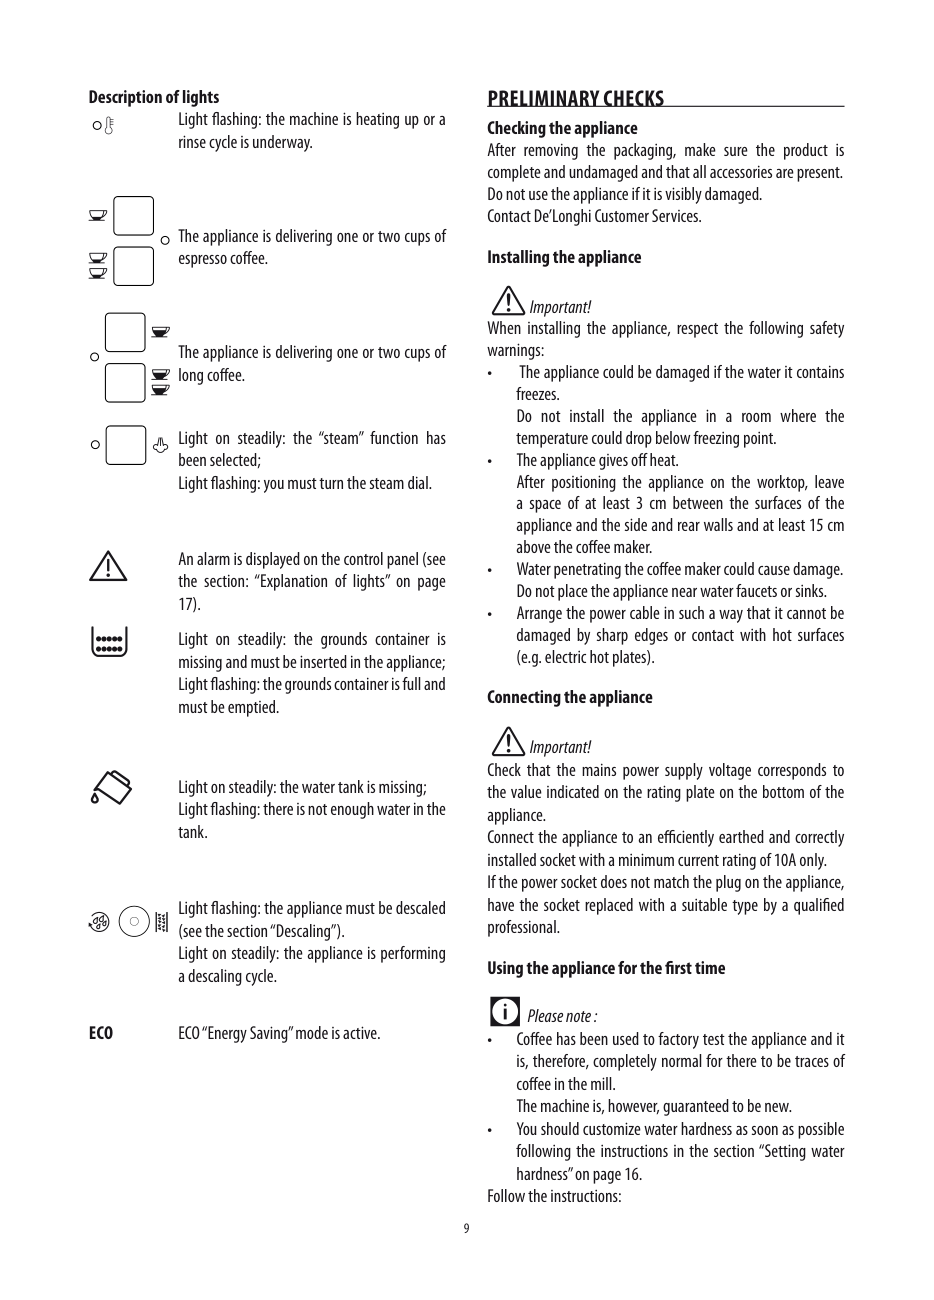
Description of lights Light flashing: the machine is heating up or a rinse cycle is underway
The appliance is delivering one or two cups of espresso coffee
#### Installing the appliance
Important! When installing the appliance, respect the following safety warnings:
The appliance is delivering one or two cups of long coffee
Light on steadily: the “steam” function has been selected; Light flashing: you must turn the steam dial
An alarm is displayed on the control panel (see the section: “Explanation of lights” on page 17)
Light on steadily: the grounds container is missing and must be inserted in the appliance; Light flashing: the grounds container is full and must be emptied
#### Connecting the appliance
Important! Check that the mains power supply voltage corresponds to the value indicated on the rating plate on the bottom of the appliance Connect the appliance to an efficiently earthed and correctly installed socket with a minimum current rating of 10A only If the power socket does not match the plug on the appliance, have the socket replaced with a suitable type by a qualified professional
Light on steadily: the water tank is missing; Light flashing: there is not enough water in the tank
Light flashing: the appliance must be descaled (see the section “Descaling”). Light on steadily: the appliance is performing a descaling cycle
#### Using the appliance for the first time
Please note :
eCo ECO “Energy Saving” mode is active.
Follow the instructions:
Avoid contact with splashes of water To turn the appliance off, press the button (fig 6) The appliance performs a rinse cycle, then goes off
Please note : If the appliance is not used for an extended period, also place the main switch in the0position (fig 3)
Important!
To avoid damaging the appliance, do not place the main switch (fig 3) in the 0 position until the appliance has been turned off using the button
Please note :
AUto-oFF The appliance is set to turn off automatically if not used for 2 hours The time can be changed so that the appliance switches off after 15 or 30 minutes, or after 1, 2 or 3 hours The set the auto-off, proceed as follows:
• When using the appliance for the first time, you need to make 4-5 cups of coffee or 4-5 cappuccinos before the appliance starts to give satisfactory results
tURnInG the APPlIAnCe on
Please note :
3)
Danger Of burns! During rinsing, a little hot water comes out of the coffee spouts and is collected in the drip tray underneath Avoid contact with splashes of water
• To turn the appliance on, press the (fig 6): The corresponding light flashes while the appliance is heating up and performing an automatic rinse cycle (by circulating hot water, the appliance heats both the boiler and the internal circuits)
eneRGy sAVInG Use this function to enable or disable energy saving mode When enabled, the function reduces energy consumption in compliance with European regulations Energy saving mode is active when the green ECO light is on (fig 7)
The appliance is at temperature when the light goes off and the lights corresponding to the coffee buttons come on
tURnInG the APPlIAnCe oFF Each time the appliance is turned off, it performs an automatic rinse cycle which cannot be interrupted
Danger Of burns! During rinsing, a little hot water flows from the coffee spouts
confirm the selection TheeColight goes off
Please note :
A few seconds may elapse between energy saving mode and delivery of the first coffee as the appliance must heat up again
WAteR soFteneR FIlteR
Certain models are fitted with a water softener filter If this is not the case with your model, you are recommended to purchase one from De’Longhi Customer Services
Important:
Please note:
The filter lasts about two months if the appliance is used normally If the coffee maker is left unused with the filter installed, it will last a maximum of three weeks
Please note: It may happen that a single hot water is not sufficient to install the filter: the lghts come on
In this case, repeat the installing operation from step 8 The new filter is active and you can now use the coffee maker
Removing and replacing the filter
After rwo months (see date indicator) or when the appliance has not been used for 3 weeks, you should remove the filter and replace with a new one, proceeding as described at the previous paragraph
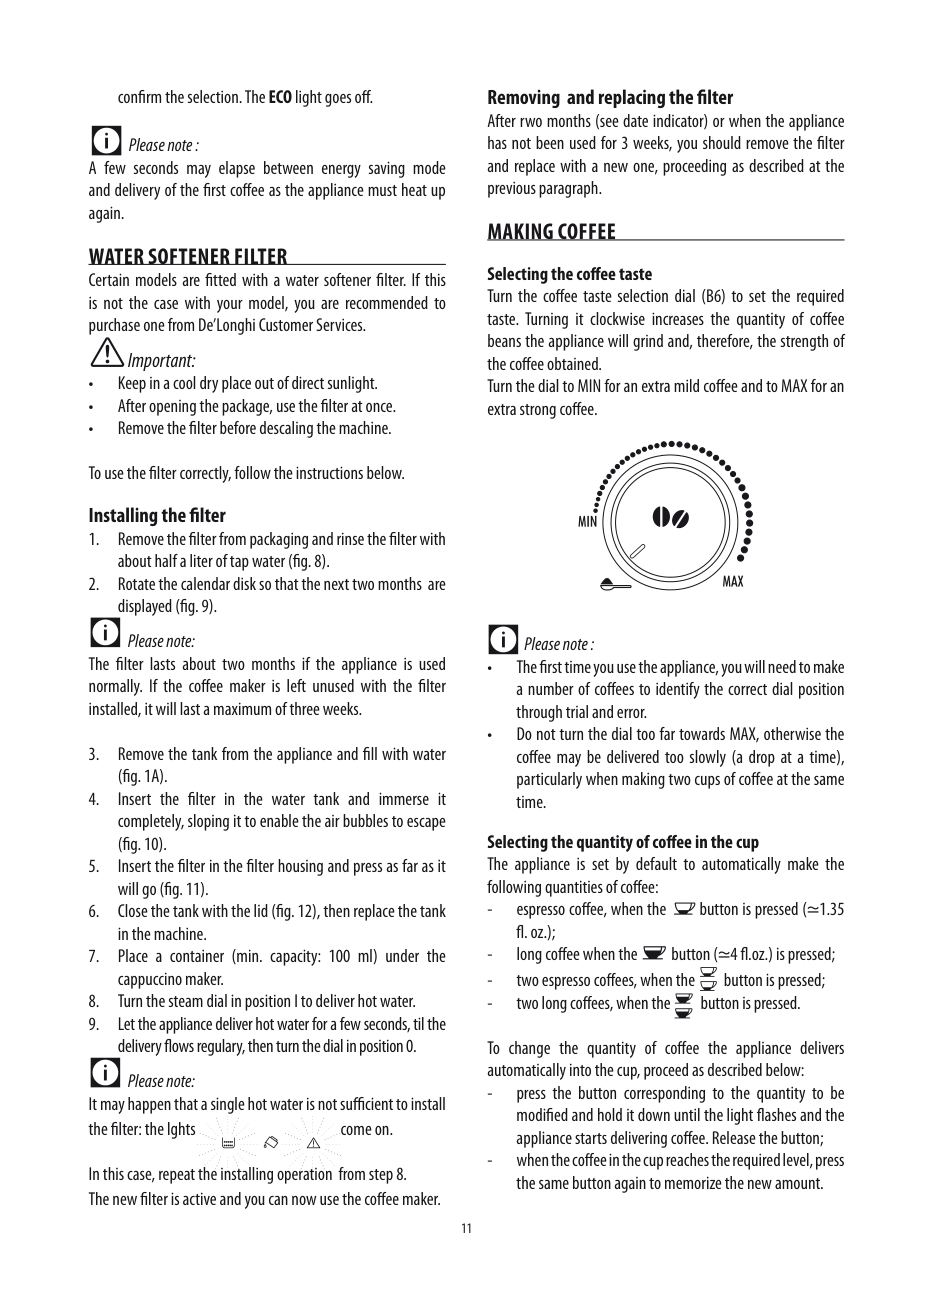
MAkInG CoFFee selecting the coffee taste Turn the coffee taste selection dial (B6) to set the required taste Turning it clockwise increases the quantity of coffee beans the appliance will grind and, therefore, the strength of the coffee obtained Turn the dial to MIN for an extra mild coffee and to MAX for an extra strong coffee
Please note :
selecting the quantity of coffee in the cup The appliance is set by default to automatically make the following quantities of coffee:
To change the quantity of coffee the appliance delivers automatically into the cup, proceed as described below:
The quantity of coffee in the cup has now been programmed Adjusting the coffee mill The coffee mill is preset in the factory to make coffee correctly and should not require adjusting initially However, if after making the first few coffees you find that the coffee is too thin and not creamy enough or that delivery is too slow (a drop at a time), this can be corrected by adjusting the grinding adjustment dial (fig 13)
• set a hotter coffee temperature (see section “Setting the temperature”).
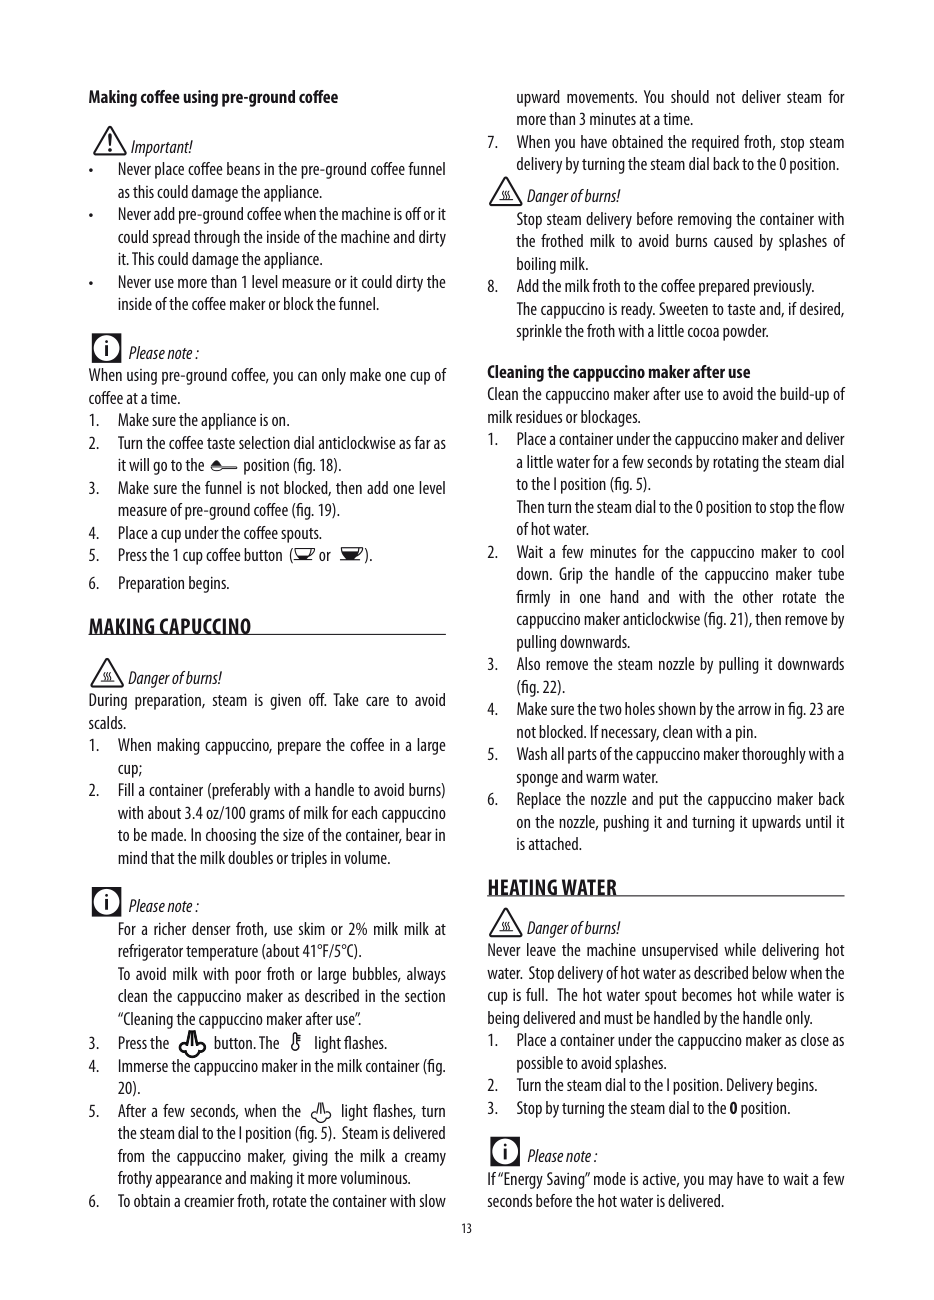
#### Making coffee using coffee beans
Important! Do not use caramelized or candied coffee beans as they could stick to the coffee mill and damage it
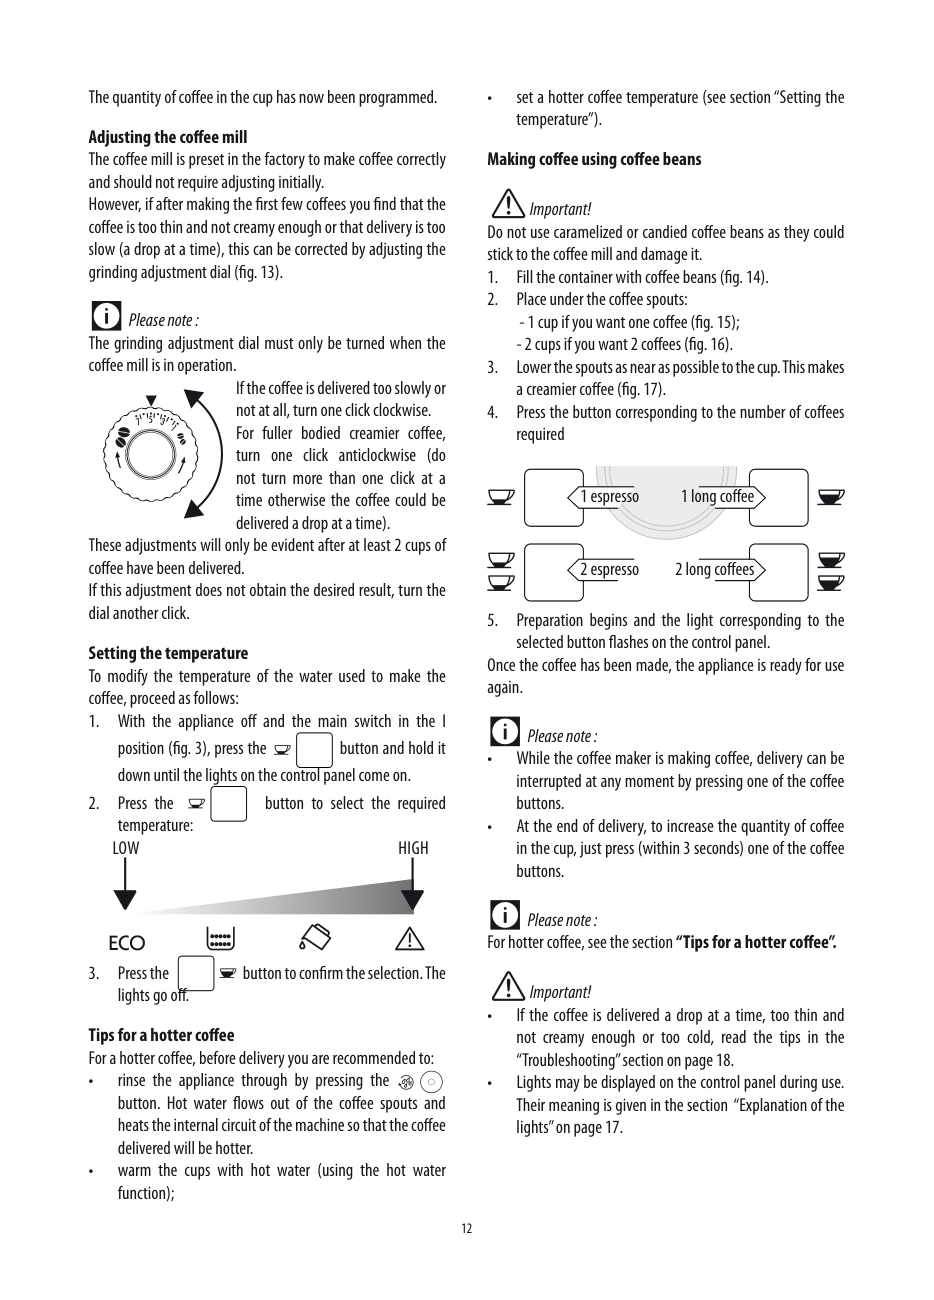
Please note : The grinding adjustment dial must only be turned when the coffee mill is in operation
If the coffee is delivered too slowly or not at all, turn one click clockwise For fuller bodied creamier coffee, turn one click anticlockwise (do not turn more than one click at a time otherwise the coffee could be delivered a drop at a time)
These adjustments will only be evident after at least 2 cups of coffee have been delivered If this adjustment does not obtain the desired result, turn the dial another click
setting the temperature To modify the temperature of the water used to make the coffee, proceed as follows:
Once the coffee has been made, the appliance is ready for use again
LOW HIGH
Please note :
Please note : For hotter coffee, see the section“tips for a hotter coffee”
Important!
tips for a hotter coffee For a hotter coffee, before delivery you are recommended to:
#### Making coffee using pre-ground coffee
Danger of burns!
Stop steam delivery before removing the container with the frothed milk to avoid burns caused by splashes of boiling milk
Important!
Please note : When using pre-ground coffee, you can only make one cup of coffee at a time
Cleaning the cappuccino maker after use Clean the cappuccino maker after use to avoid the build-up of milk residues or blockages
Danger of burns! During preparation, steam is given off Take care to avoid scalds
Please note : For a richer denser froth, use skim or 2% milk milk at refrigerator temperature (about 41°F/5°C) To avoid milk with poor froth or large bubbles, always clean the cappuccino maker as described in the section “Cleaning the cappuccino maker after use”.
20)
heAtInG WAteR Danger of burns!
Never leave the machine unsupervised while delivering hot water Stop delivery of hot water as described below when the cup is full The hot water spout becomes hot while water is being delivered and must be handled by the handle only
Please note : If “Energy Saving” mode is active, you may have to wait a few seconds before the hot water is delivered
CleAnInG Cleaning the coffee maker The following parts of the machine must be cleaned regularly:
overflow from the edge and seep inside or around the coffee maker This could damage the machine, the surface it rests on or the surrounding area
The drip tray is fitted with a level indicator (red) showing the level of water it contains (fig 25) Before the indicator protrudes from the cup tray, the drip tray must be emptied and cleaned To remove the drip tray:
Important!
Danger of electric shock!
Before cleaning internal parts, the machine must be turned off (see “Turning off”) and unplugged from the mains power supply Never immerse the coffee maker in water
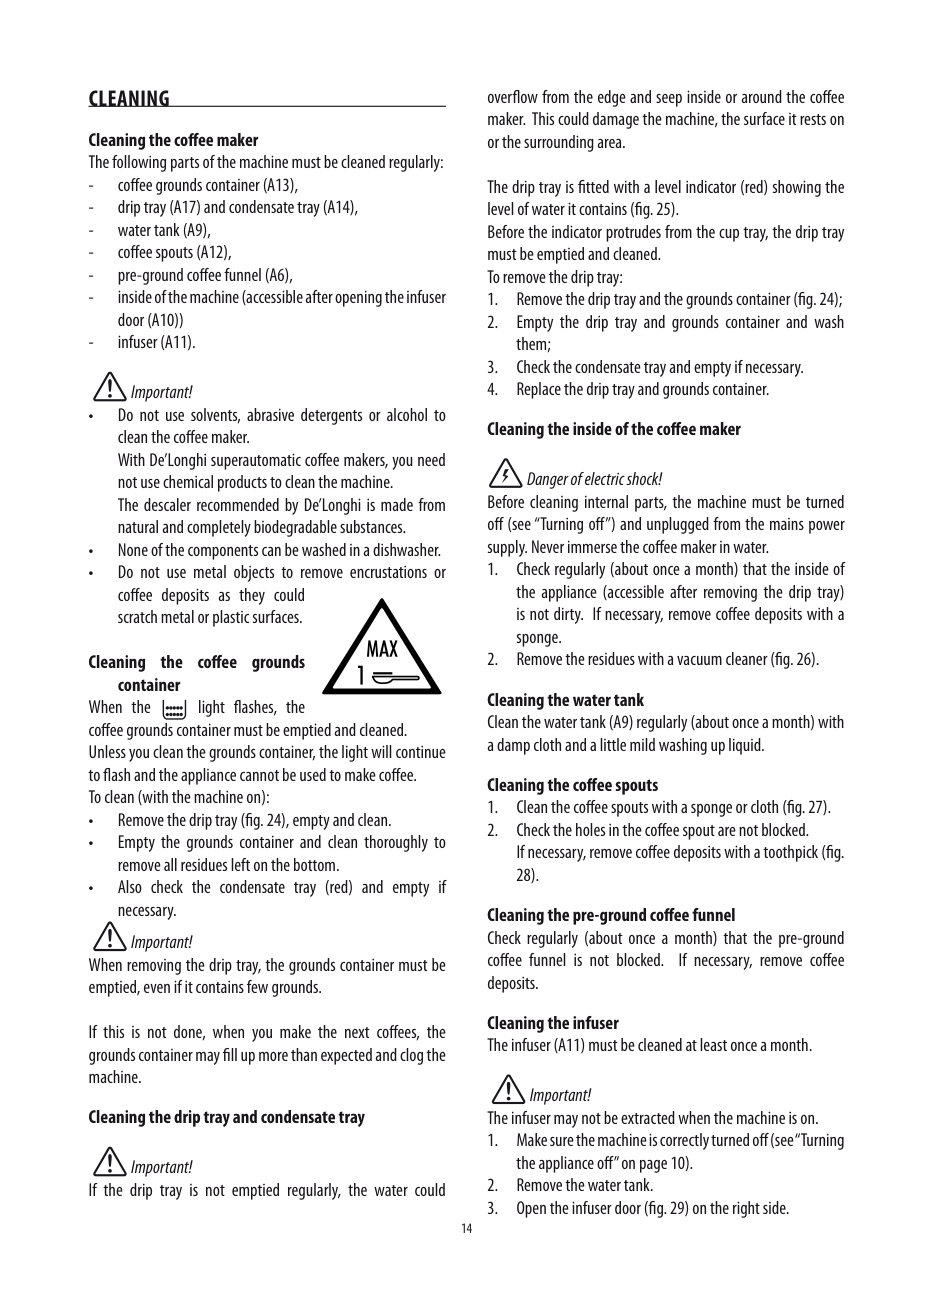
#### Cleaning the coffee grounds
container When the light flashes, the coffee grounds container must be emptied and cleaned Unless you clean the grounds container, the light will continue to flash and the appliance cannot be used to make coffee To clean (with the machine on):
Cleaning the water tank Clean the water tank (A9) regularly (about once a month) with a damp cloth and a little mild washing up liquid
#### Cleaning the coffee spouts
28)
#### Cleaning the pre-ground coffee funnel
Check regularly (about once a month) that the pre-ground coffee funnel is not blocked If necessary, remove coffee deposits
Important! When removing the drip tray, the grounds container must be emptied, even if it contains few grounds
Cleaning the infuser The infuser (A11) must be cleaned at least once a month
If this is not done, when you make the next coffees, the grounds container may fill up more than expected and clog the machine
Important! The infuser may not be extracted when the machine is on
#### Cleaning the drip tray and condensate tray
Important! If the drip tray is not emptied regularly, the water could
Important! Clean the infuser without using dish soap as it could be damaged
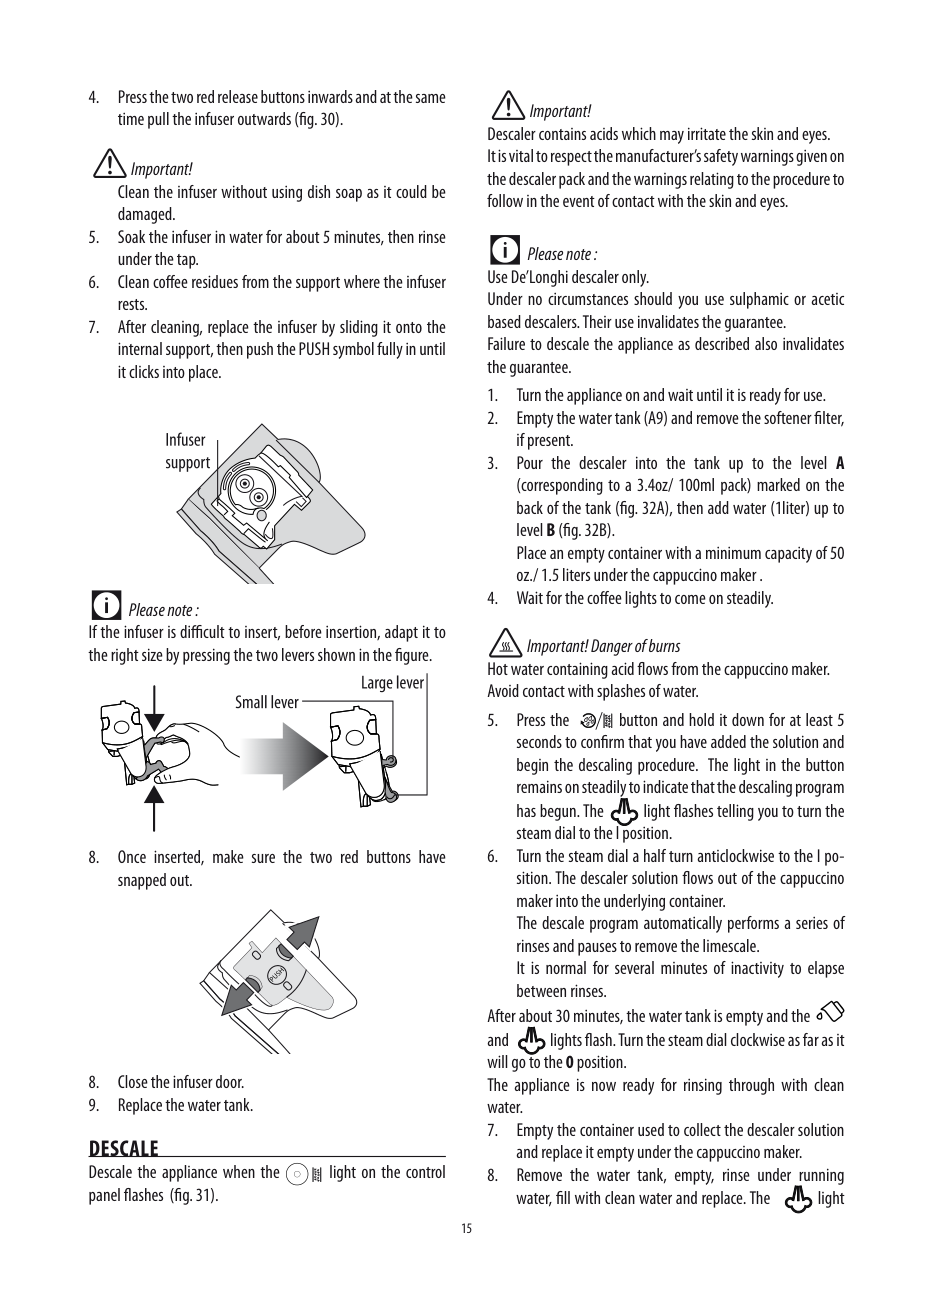
Please note : If the infuser is difficult to insert, before insertion, adapt it to the right size by pressing the two levers shown in the figure
Important! Descaler contains acids which may irritate the skin and eyes It is vital to respect the manufacturer’s safety warnings given on the descaler pack and the warnings relating to the procedure to follow in the event of contact with the skin and eyes
Please note : Use De’Longhi descaler only Under no circumstances should you use sulphamic or acetic based descalers Their use invalidates the guarantee Failure to descale the appliance as described also invalidates the guarantee
Important! Danger of burns Hot water containing acid flows from the cappuccino maker Avoid contact with splashes of water
After about 30 minutes, the water tank is empty and the and lights flash Turn the steam dial clockwise as far as it will go to the0position The appliance is now ready for rinsing through with clean water
PUSH
DesCAle Descale the appliance when the light on the control panel flashes (fig 31)
flashes
Level Level Level Level
#### 1 234
4 Press the button (on the right of the dial) to
Fill the water tank again and the machine is ready for use settInG WAteR hARDness Descaling is necessary after a period of operation established according to the water hardness set The machine is factory set for a hardness value of 4 The machine can also be programmed according to the hardness of the water supply in the various regions so that the machine needs to be descaled less often Measuring water hardness
confirm the selection The machine is now reprogrammed with the new water hardness setting
#### teChnICAl sPeCIFICAtIon
Voltage: 220-240 V~ 50/60 Hz max 10A Absorbed power: 1450W Pressure: 15 bars Water tank capacity: 1 8 liters max Size LxHxD: 238x340x430 mm Cable length: 1 15 m Weight: 9 1 kg Coffee beans container capacity: 250 g max
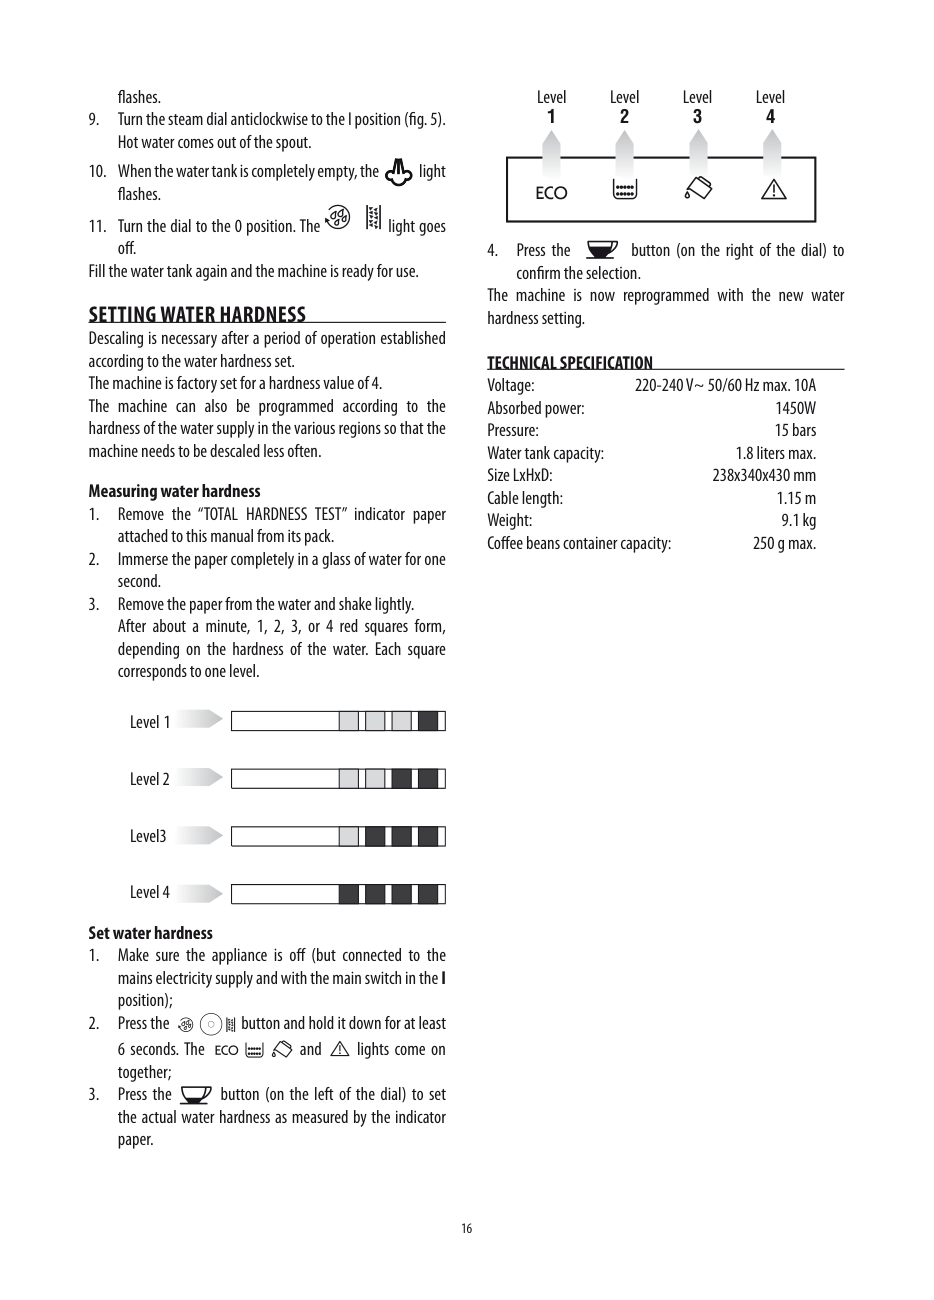
Level 4 set water hardness
| | | | | | | | | | |---|---|---|---|---|---|---|---|---|
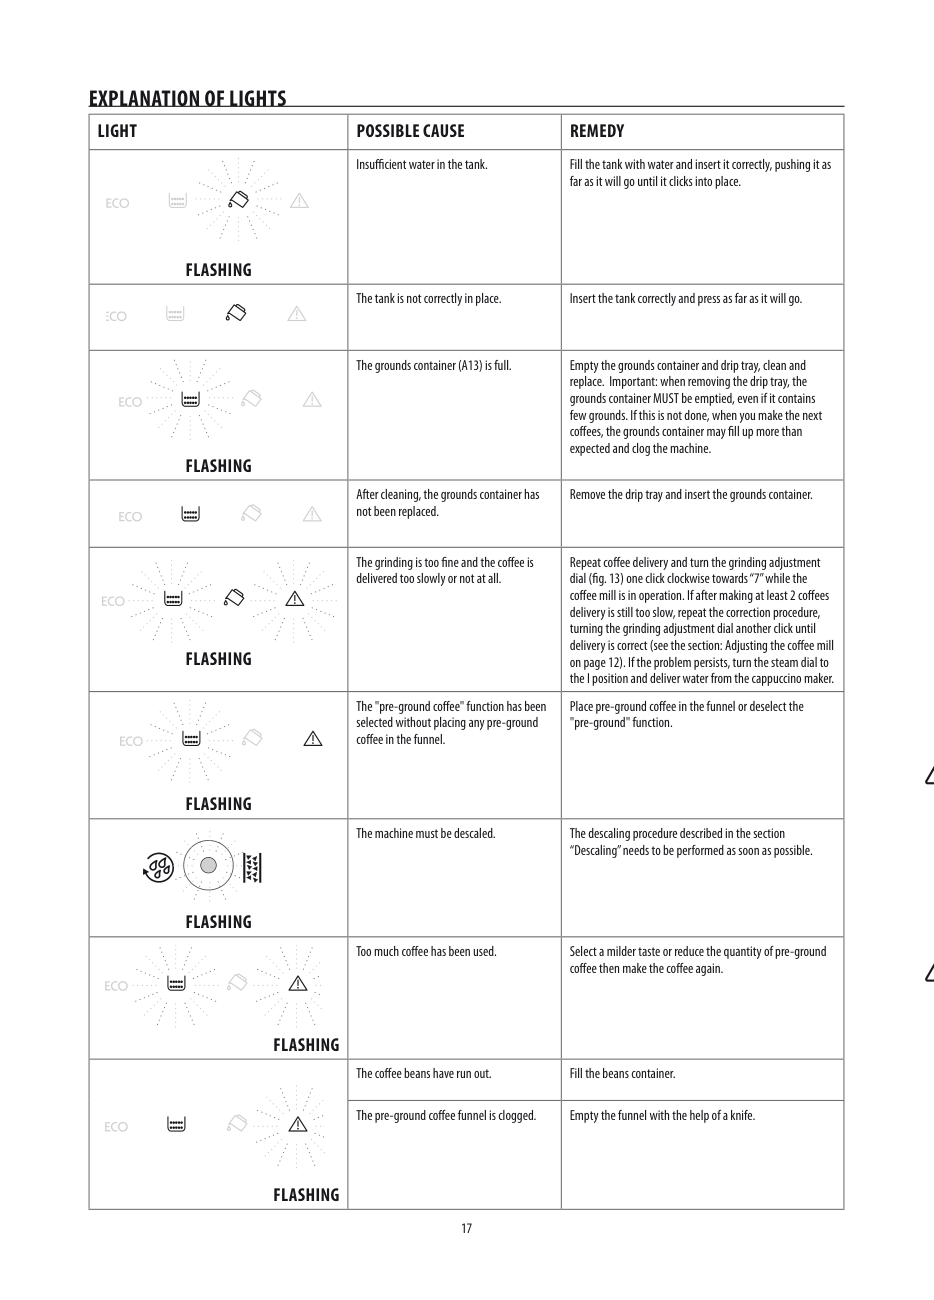
eXPlAnAtIon oF lIGhts
lIGht PossIBle CAUse ReMeDy
Insufficient water in the tank Fill the tank with water and insert it correctly, pushing it as far as it will go until it clicks into place
FlAshInG
FlAshInG
FlAshInG
FlAshInG
The tank is not correctly in place Insert the tank correctly and press as far as it will go
The grounds container (A13) is full Empty the grounds container and drip tray, clean and replace Important: when removing the drip tray, the grounds container MUST be emptied, even if it contains few grounds If this is not done, when you make the next coffees, the grounds container may fill up more than expected and clog the machine
After cleaning, the grounds container has not been replaced
Remove the drip tray and insert the grounds container
The grinding is too fine and the coffee is delivered too slowly or not at all
The "pre-ground coffee" function has been selected without placing any pre-ground coffee in the funnel
Repeat coffee delivery and turn the grinding adjustment dial (fig. 13) one click clockwise towards “7” while the coffee mill is in operation If after making at least 2 coffees delivery is still too slow, repeat the correction procedure, turning the grinding adjustment dial another click until delivery is correct (see the section: Adjusting the coffee mill on page 12) If the problem persists, turn the steam dial to the I position and deliver water from the cappuccino maker
Place pre-ground coffee in the funnel or deselect the "pre-ground" function
The machine must be descaled The descaling procedure described in the section “Descaling” needs to be performed as soon as possible.
FlAshInG
Too much coffee has been used Select a milder taste or reduce the quantity of pre-ground coffee then make the coffee again
FlAshInG
The coffee beans have run out Fill the beans container
The pre-ground coffee funnel is clogged Empty the funnel with the help of a knife
FlAshInG
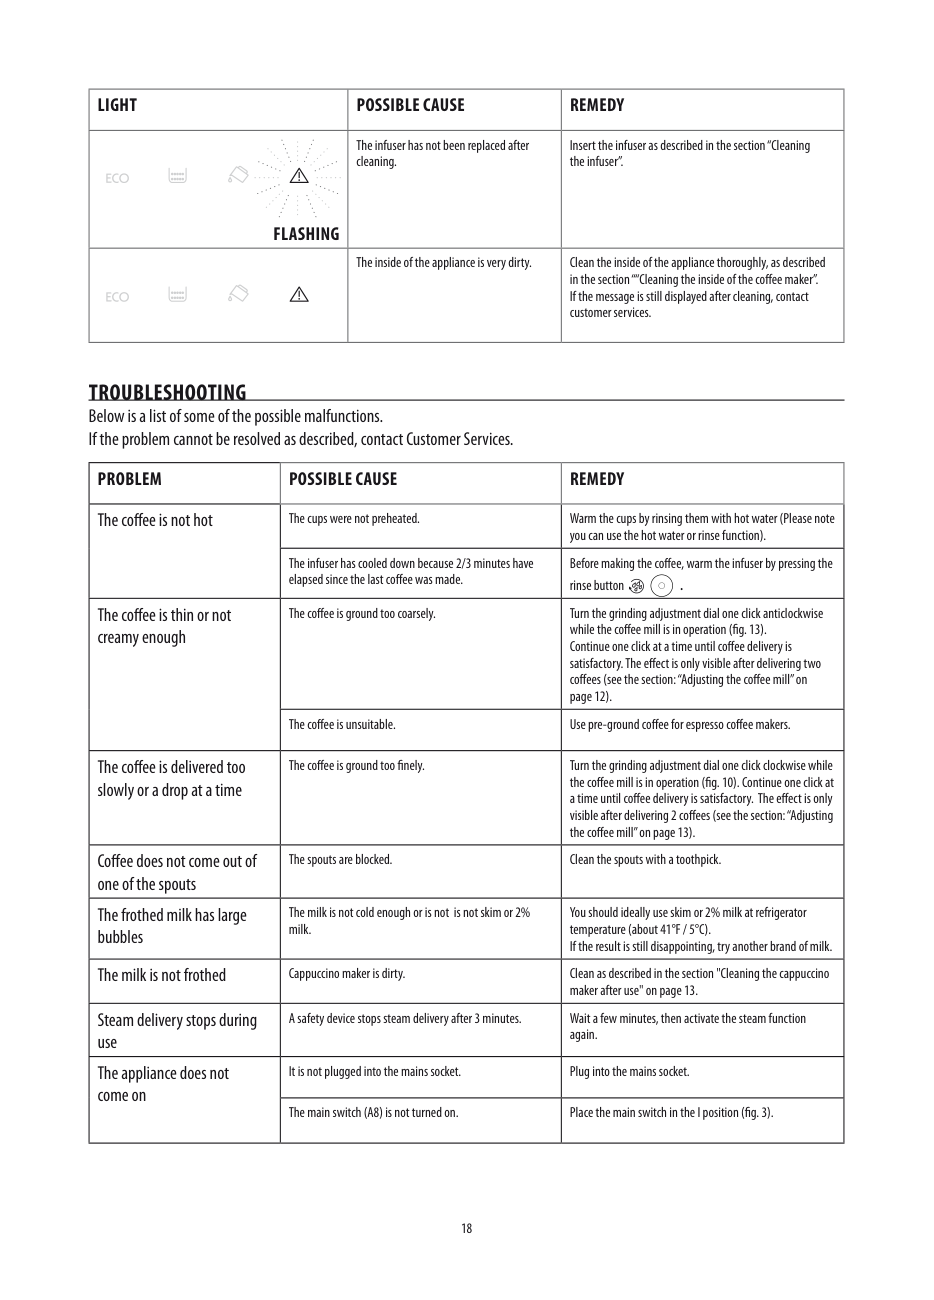
lIGht PossIBle CAUse ReMeDy
The infuser has not been replaced after cleaning
Insert the infuser as described in the section “Cleaning the infuser”.
FlAshInG
The inside of the appliance is very dirty Clean the inside of the appliance thoroughly, as described in the section ““Cleaning the inside of the coffee maker”. If the message is still displayed after cleaning, contact customer services
tRoUBleshootInG Below is a list of some of the possible malfunctions If the problem cannot be resolved as described, contact Customer Services
|PRoBleM|PossIBle CAUse|ReMeDy| |---|---|---| |The coffee is not hot|The cups were not preheated |Warm the cups by rinsing them with hot water (Please note you can use the hot water or rinse function) | |The coffee is not hot|The infuser has cooled down because 2/3 minutes have elapsed since the last coffee was made |Before making the coffee, warm the infuser by pressing the rinse button
| |The coffee is thin or not creamy enough|The coffee is ground too coarsely |Turn the grinding adjustment dial one click anticlockwise while the coffee mill is in operation (fig 13) Continue one click at a time until coffee delivery is satisfactory The effect is only visible after delivering two coffees (see the section: “Adjusting the coffee mill” on page 12) | |The coffee is thin or not creamy enough|The coffee is unsuitable |Use pre-ground coffee for espresso coffee makers | |The coffee is delivered too slowly or a drop at a time|The coffee is ground too finely |Turn the grinding adjustment dial one click clockwise while the coffee mill is in operation (fig 10) Continue one click at a time until coffee delivery is satisfactory The effect is only visible after delivering 2 coffees (see the section: “Adjusting the coffee mill” on page 13).| |Coffee does not come out of one of the spouts|The spouts are blocked |Clean the spouts with a toothpick | |The frothed milk has large bubbles|The milk is not cold enough or is not is not skim or 2% milk |You should ideally use skim or 2% milk at refrigerator temperature (about 41°F / 5°C) If the result is still disappointing, try another brand of milk | |The milk is not frothed|Cappuccino maker is dirty |Clean as described in the section "Cleaning the cappuccino maker after use" on page 13 | |Steam delivery stops during use|A safety device stops steam delivery after 3 minutes |Wait a few minutes, then activate the steam function again | |The appliance does not come on|It is not plugged into the mains socket |Plug into the mains socket | |The appliance does not come on|The main switch (A8) is not turned on |Place the main switch in the I position (fig 3) |
lIMIteD WARRAnty This warranty applies to all products with De’Longhi or Kenwood brand names. What does the warranty cover? We warrant each appliance to be free from defects in material and workmanship Our obligation under this warranty is limited to repair at our factory or authorized service center of any defective parts or part thereof, other than parts damaged in transit In the event of a products replacement or return, the unit must be returned transportation prepaid The repaired or new model will be returned at the company expense This warranty shall apply only if the appliance is used in accordance with the factory directions, which accompany it, and on an Alternating current ( AC ) circuit how long does the coverage last? This warranty runs for two years (2) from the purchase date found on your receipt and applies only to the original purchaser for use What is not covered by the warranty?
The warranty does not cover defects or damage of the appliance, which result from repairs or alterations to the appliance outside our factory or authorized service centers, nor shall it apply to any appliance, which has been subject to abuse, misuse, negligence or accidents Also, consequential and incidental damage resulting from the use of this product or arising out of any breach of contract or breach of this warranty are not recoverable under this warranty Some states do not allow the exclusion or limitation of incidental or consequential damage, so the above limitation may not apply to you
how do you get service? If repairs become necessary, see contact information below:
U s Residents: Please contact our toll free hotline at 1-866-528-8323 (1-866-Latte-Best) or log onto our website at www delonghi com
Residents of Canada:Please contact our toll free hotline at 1-888-335-6644 or log onto our website at www delonghi com Residents of Mexico: Please contact our toll free number 01-800-711-8805 for assistance or log onto our website at www delonghi com
The above warranty is in lieu of all other express warranties and representations All implied warranties are limited to the applicable warranty period set forth above This limitation does not apply if you enter into an extended warranty with De’Longhi Some states/ countries do not allow limitations on how long an implied warranty lasts, so the above exclusions may not apply to you De’Longhi does not authorize any other person or company to assume for it any liability in connection with the sale or use of its appliance
how does country law apply? This warranty gives you specific legal rights, and you may also have other rights, which vary from state to state/country to country