Fodsports Fx6 Group Talk Helmet Intercom
Ask AI
— answers from the official manualAnswers from the official manual.
Common questions
Common Questions
10 totalHow do I turn on and off the Fodsports Fx6 helmet intercom?
To turn on, press and hold the On/Off button for 3 seconds until a “Welcome to FODSPORTS Bluetooth Communication System” sound is heard. To turn off, press and hold the On/Off button for 5 seconds; afterwards, there will be a “Power Off” sound.
How do I enter pairing mode on the Fodsports Fx6?
Press and hold either the Multi-function Button or On/Off button for 6 seconds to start pairing. This initializes the device and blue and red lights will flash alternately while a “Pairing” sound is heard.
How do I connect the Fodsports Fx6 helmet intercom with other FX6 devices?
When both units are within 1 meter, first place each headset into pairing mode. Then press and hold either Multi-function Button or On/Off button on one unit to connect them; a “intercom connected” sound will confirm the connection.
How do I factory reset the Fodsports Fx6 helmet intercom?
Press and hold the Power button for 8 seconds until all settings are cleared, and the device returns to factory defaults. (Page 9)
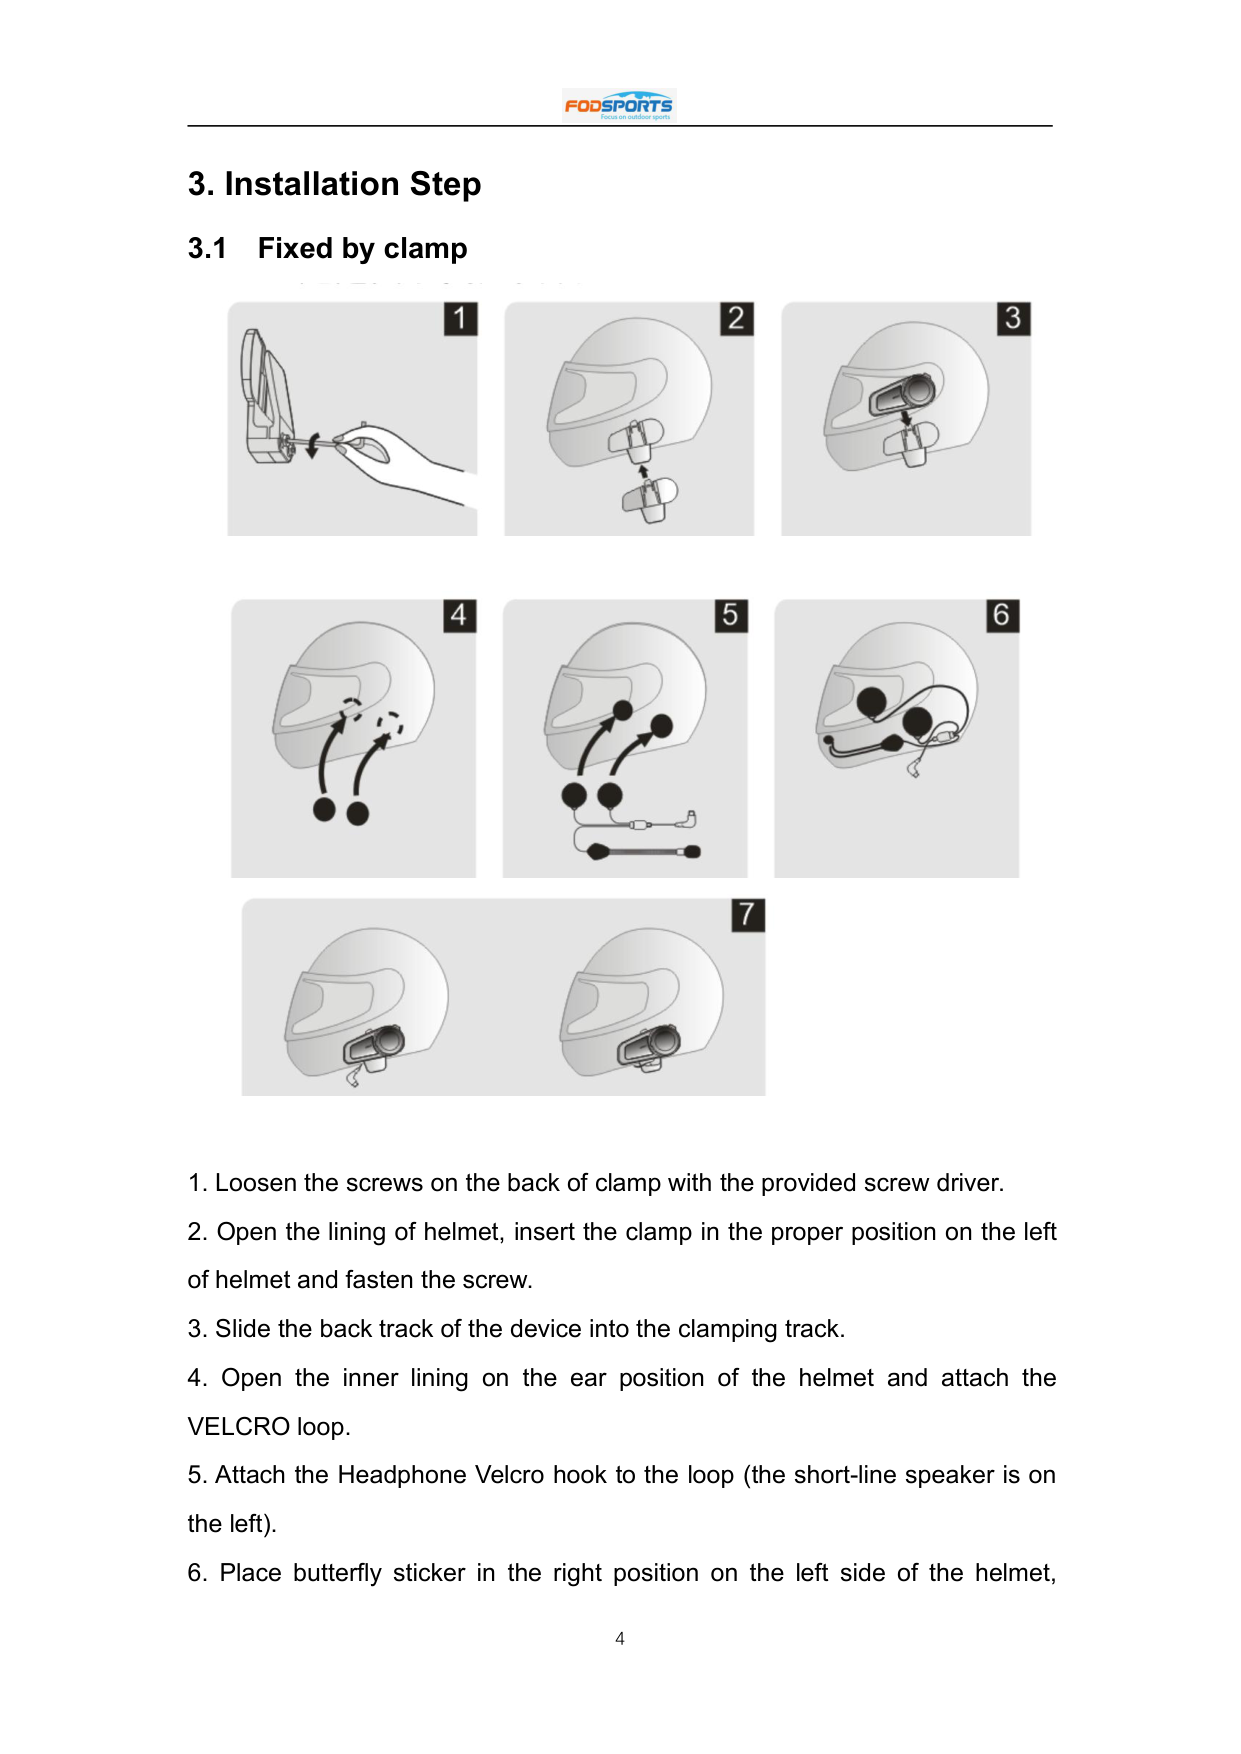
How do I install the Fodsports Fx6 helmet intercom with a clamp?
Loosen screws on the back of the clamp using the provided screw driver, insert the clamp into proper position in the left side and tighten. Attach headphone velcro loops as directed to complete installation.
How do I change between Bluetooth and FM modes?
Triple-click the Multi-function button while device is on; a “Bluetooth mode” or “FM mode” sound prompt will indicate the new selection.
Full Manual
16 pages
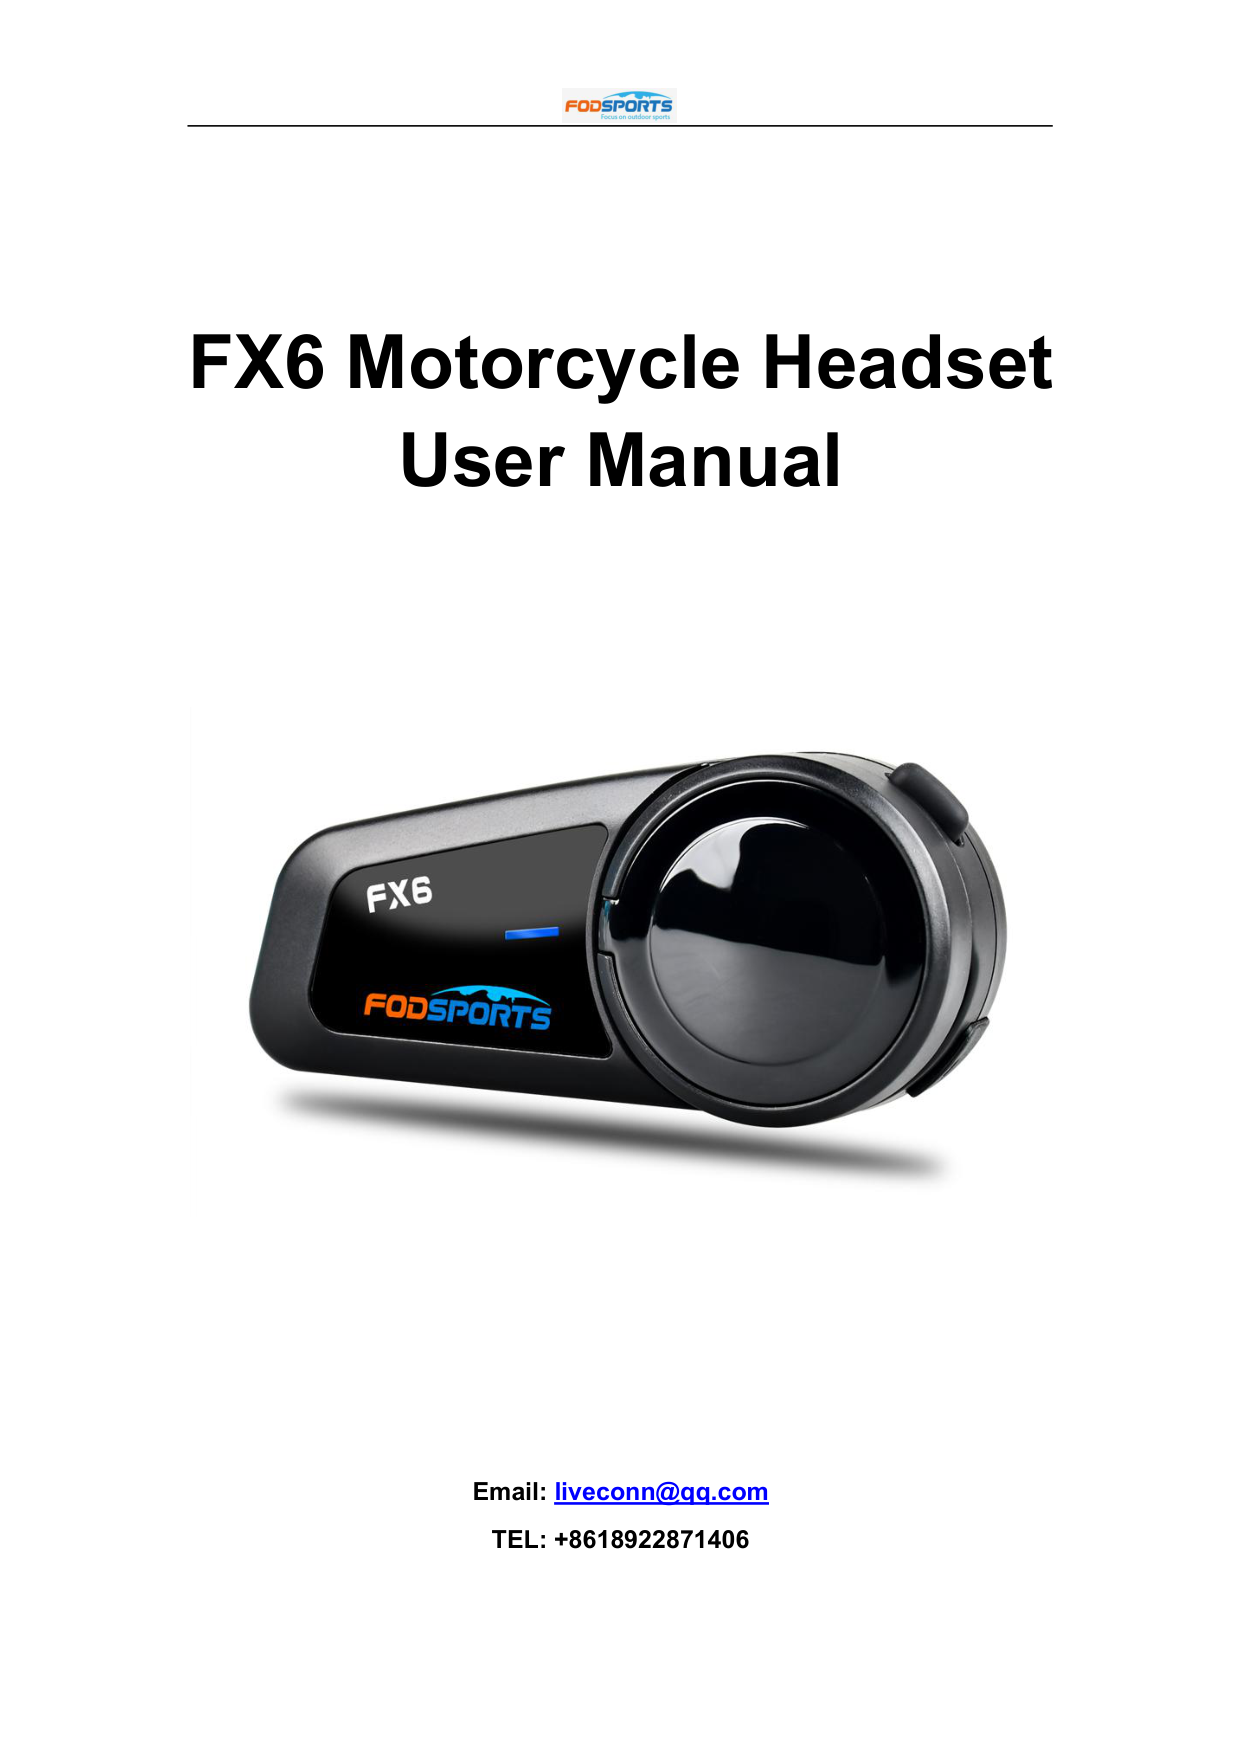
FX6 Motorcycle Headset User Manual

Email: [email protected] TEL: +8618922871406
##### CATALOGUE
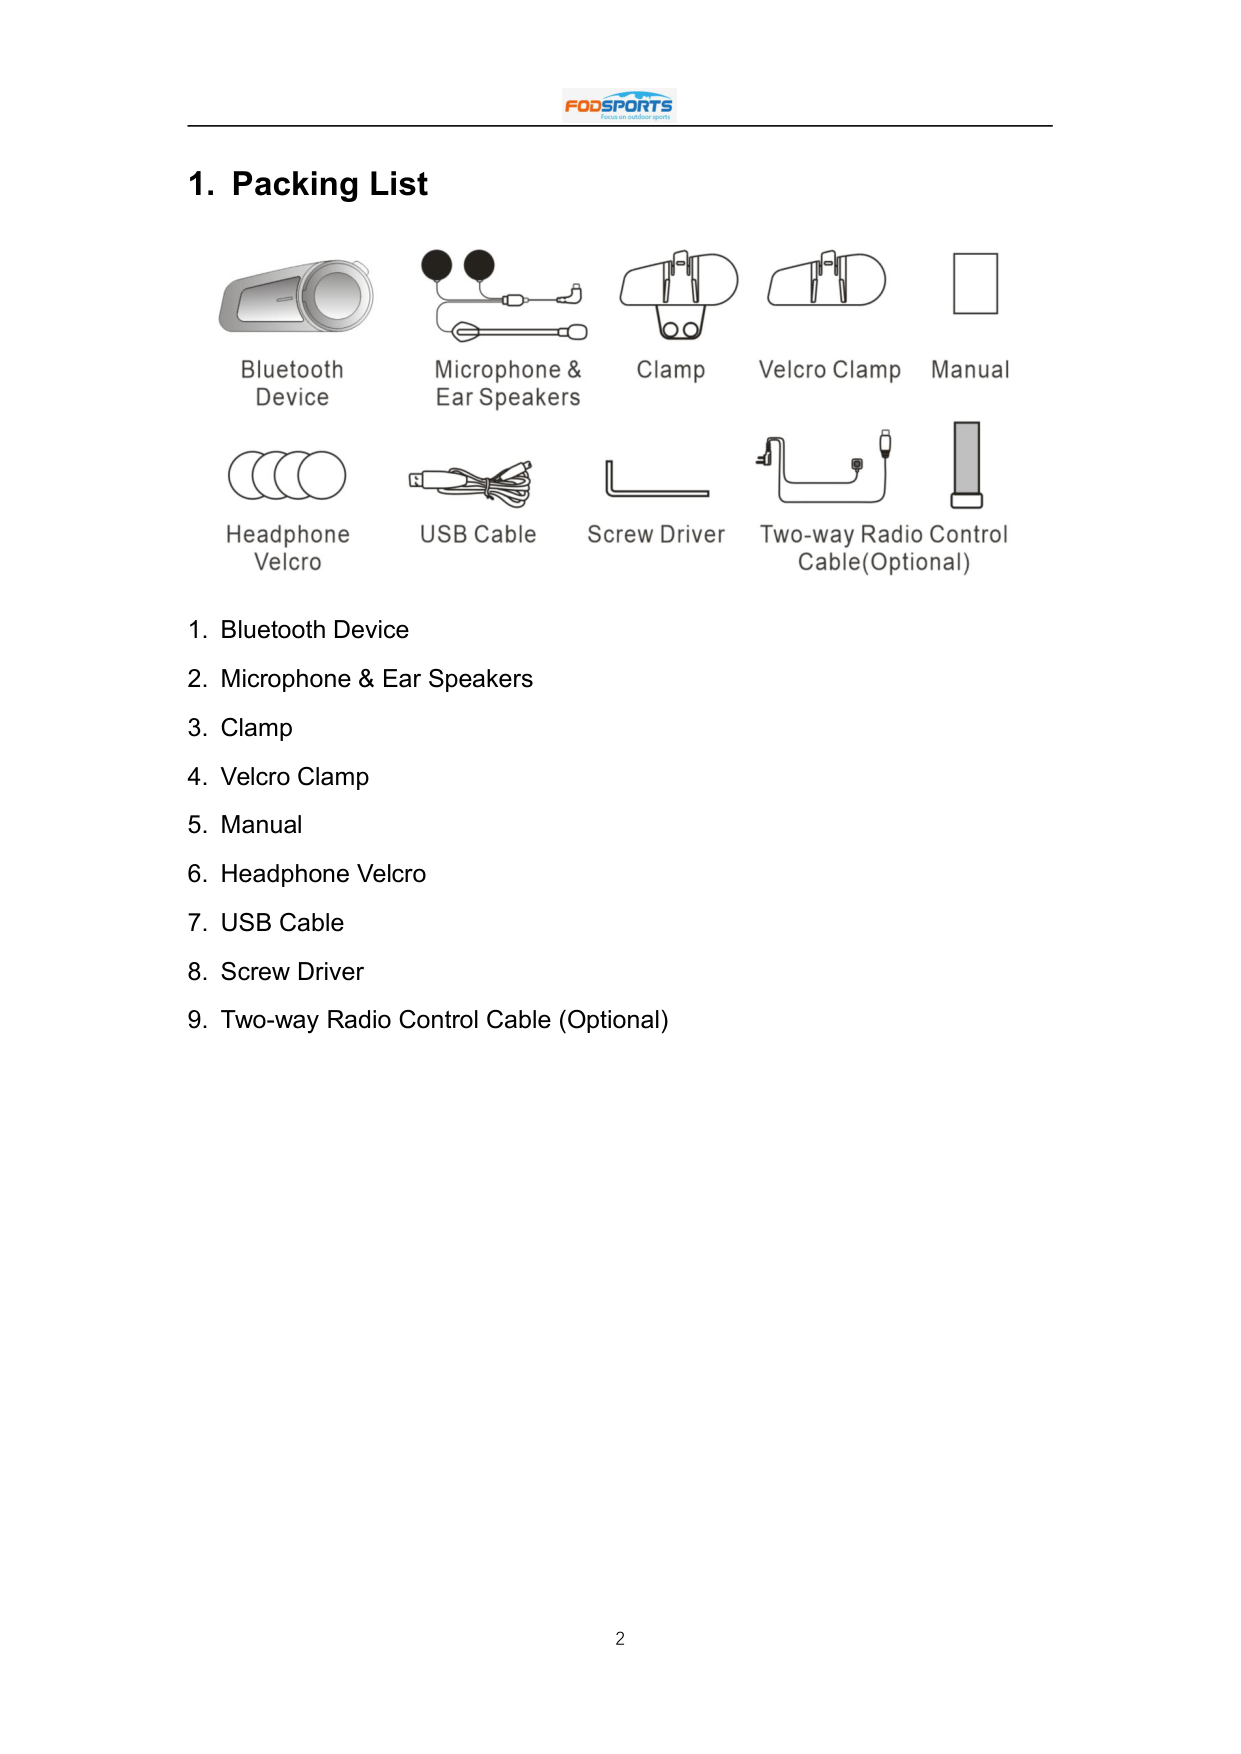
1. Packing List

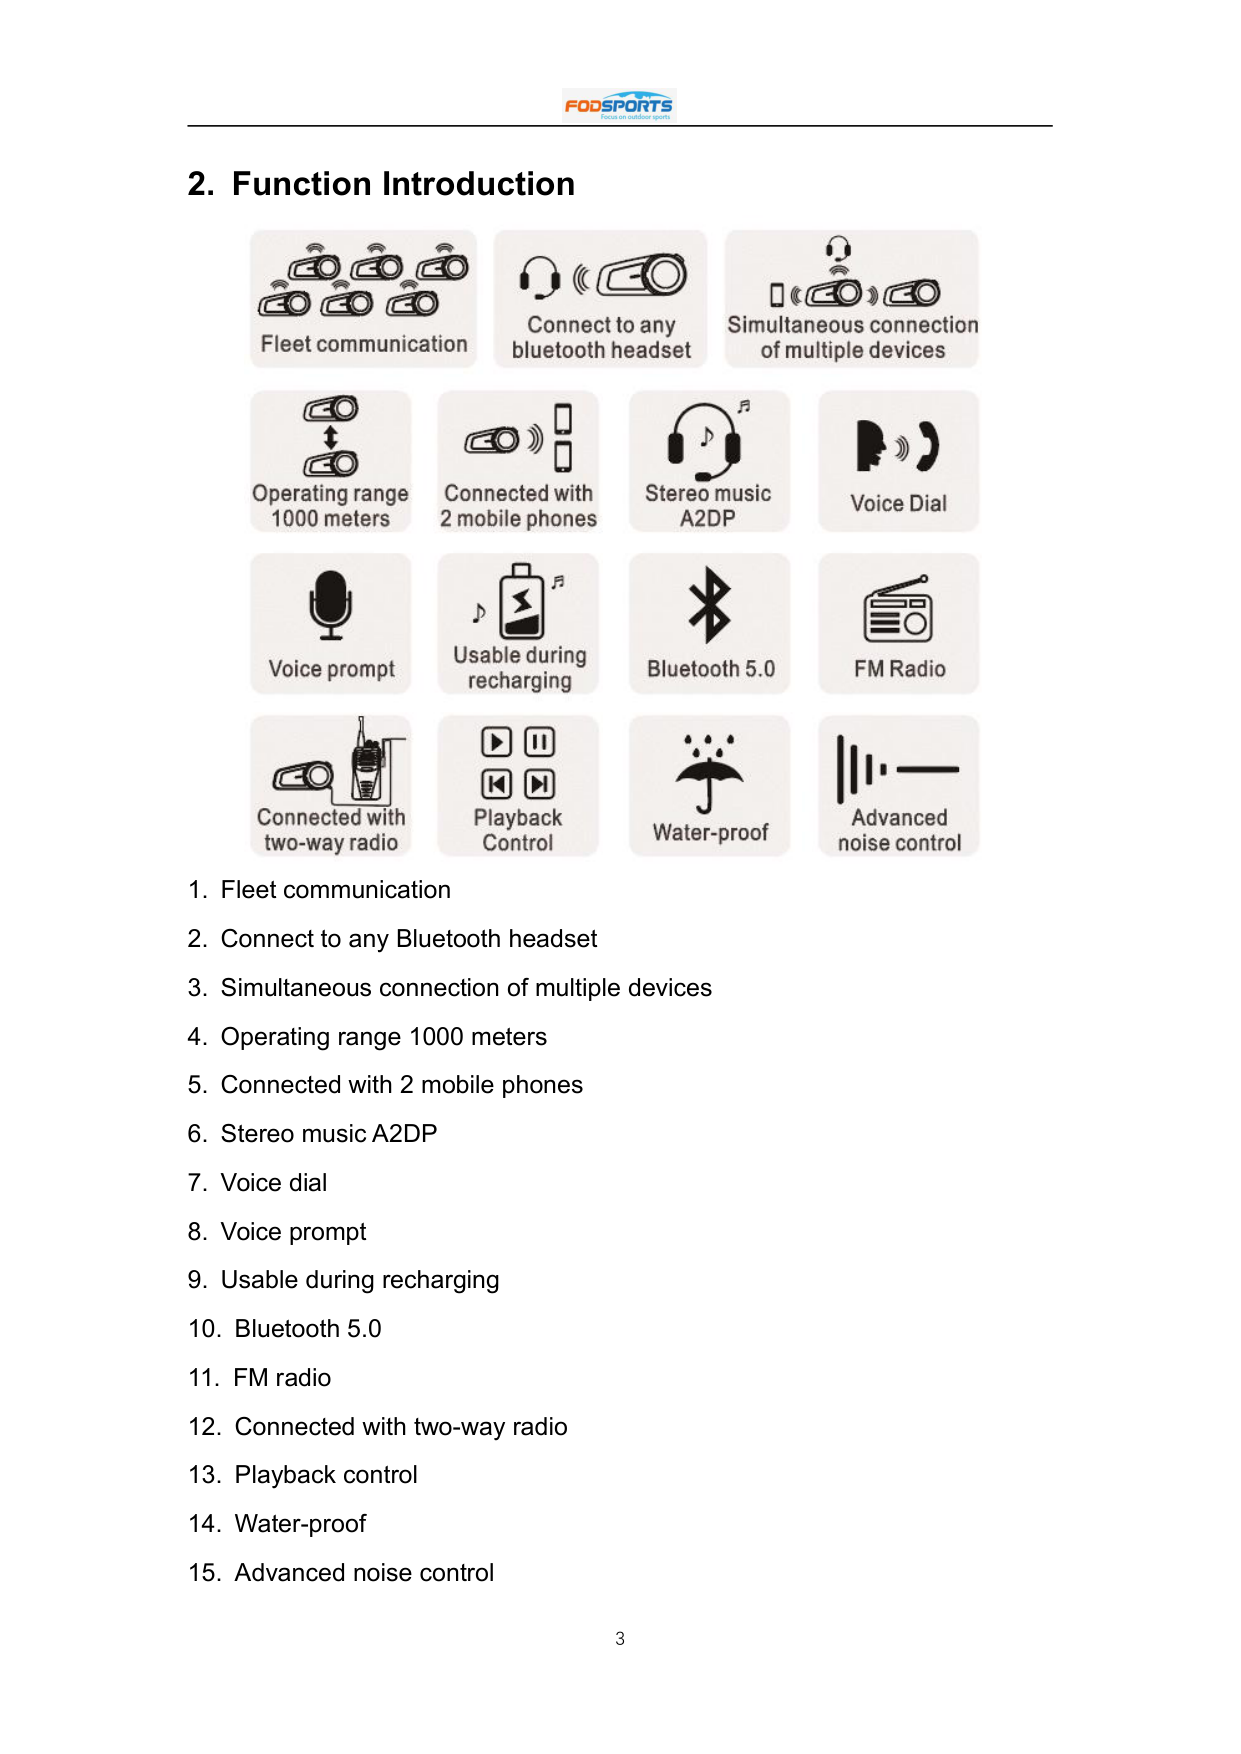
2. Function Introduction

3. Installation Step

##### 3.1 Fixed by clamp


##### 3.2 Fixed by VELCRO sticker


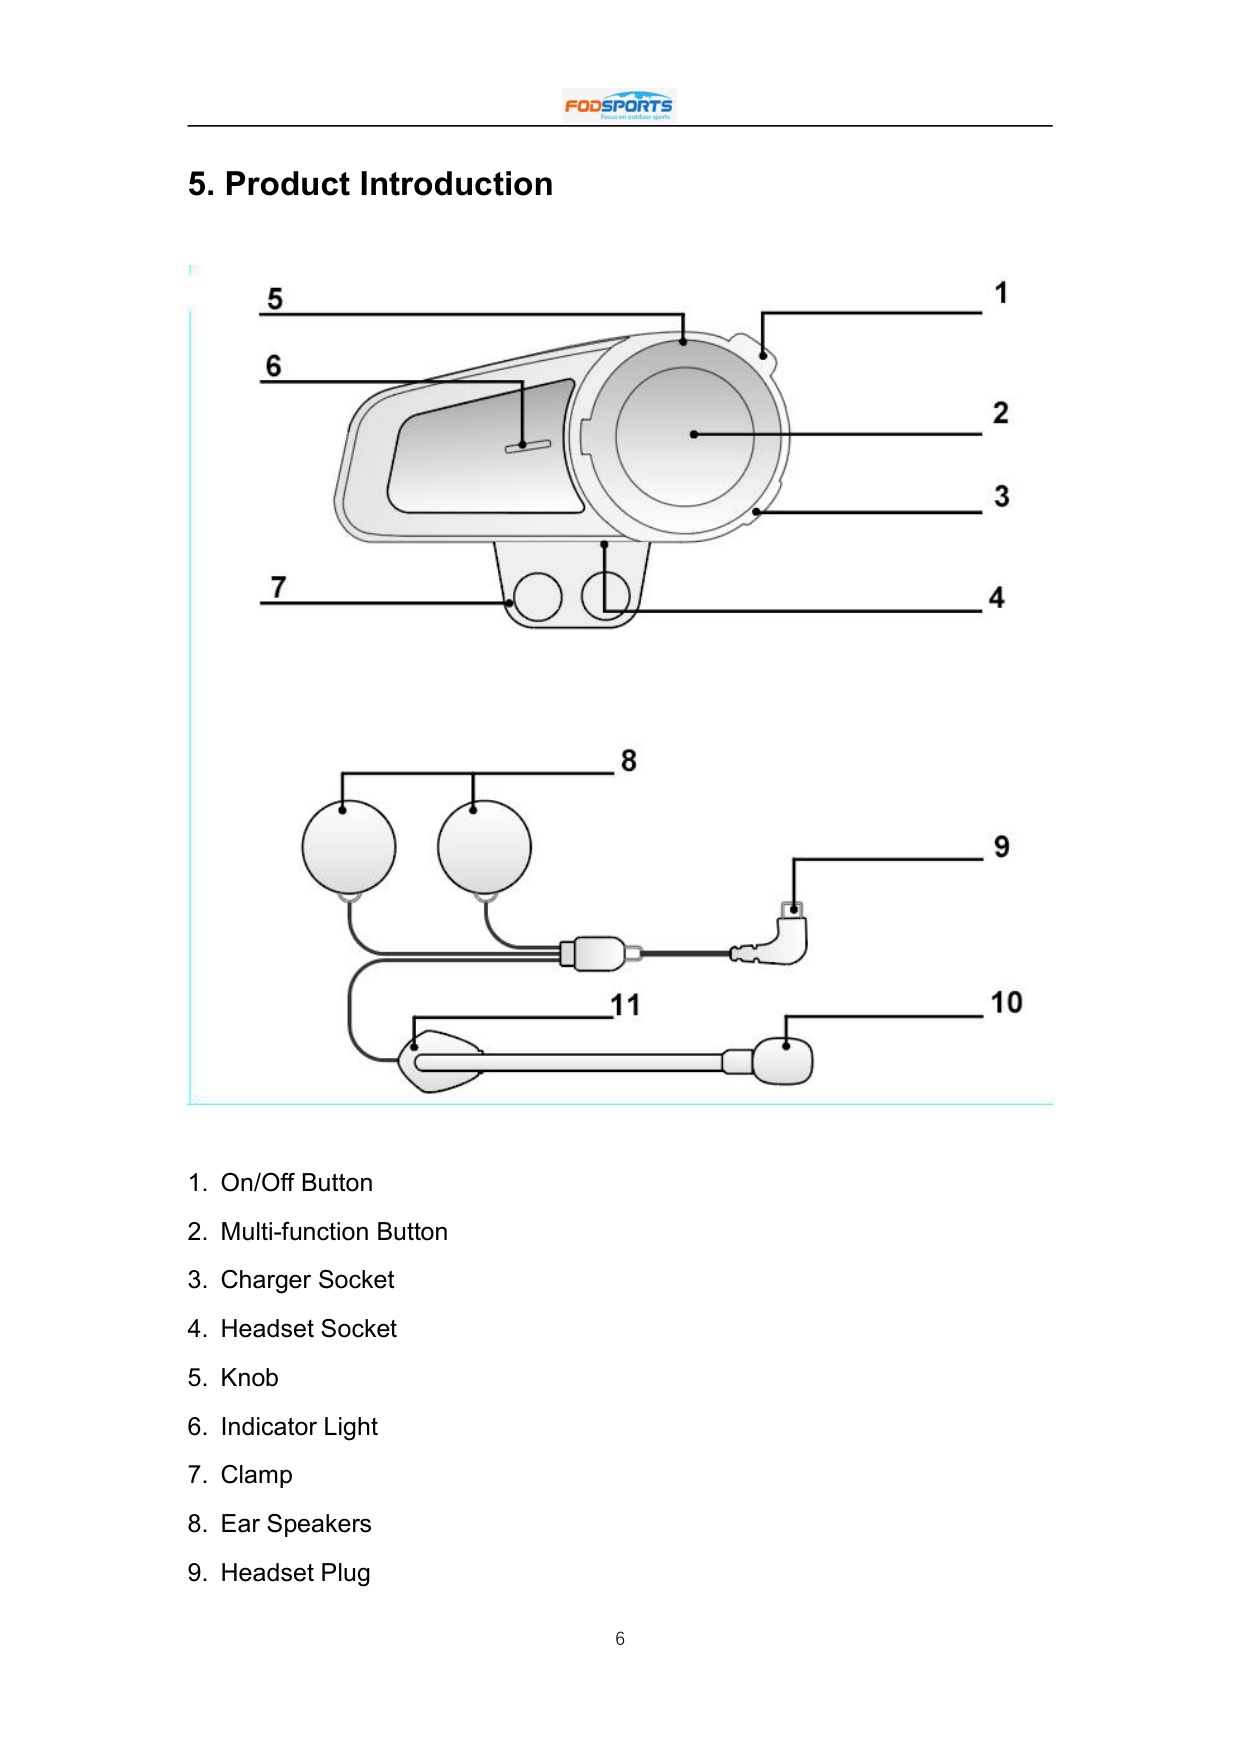
5. Product Introduction

6. Button Operation Introduction
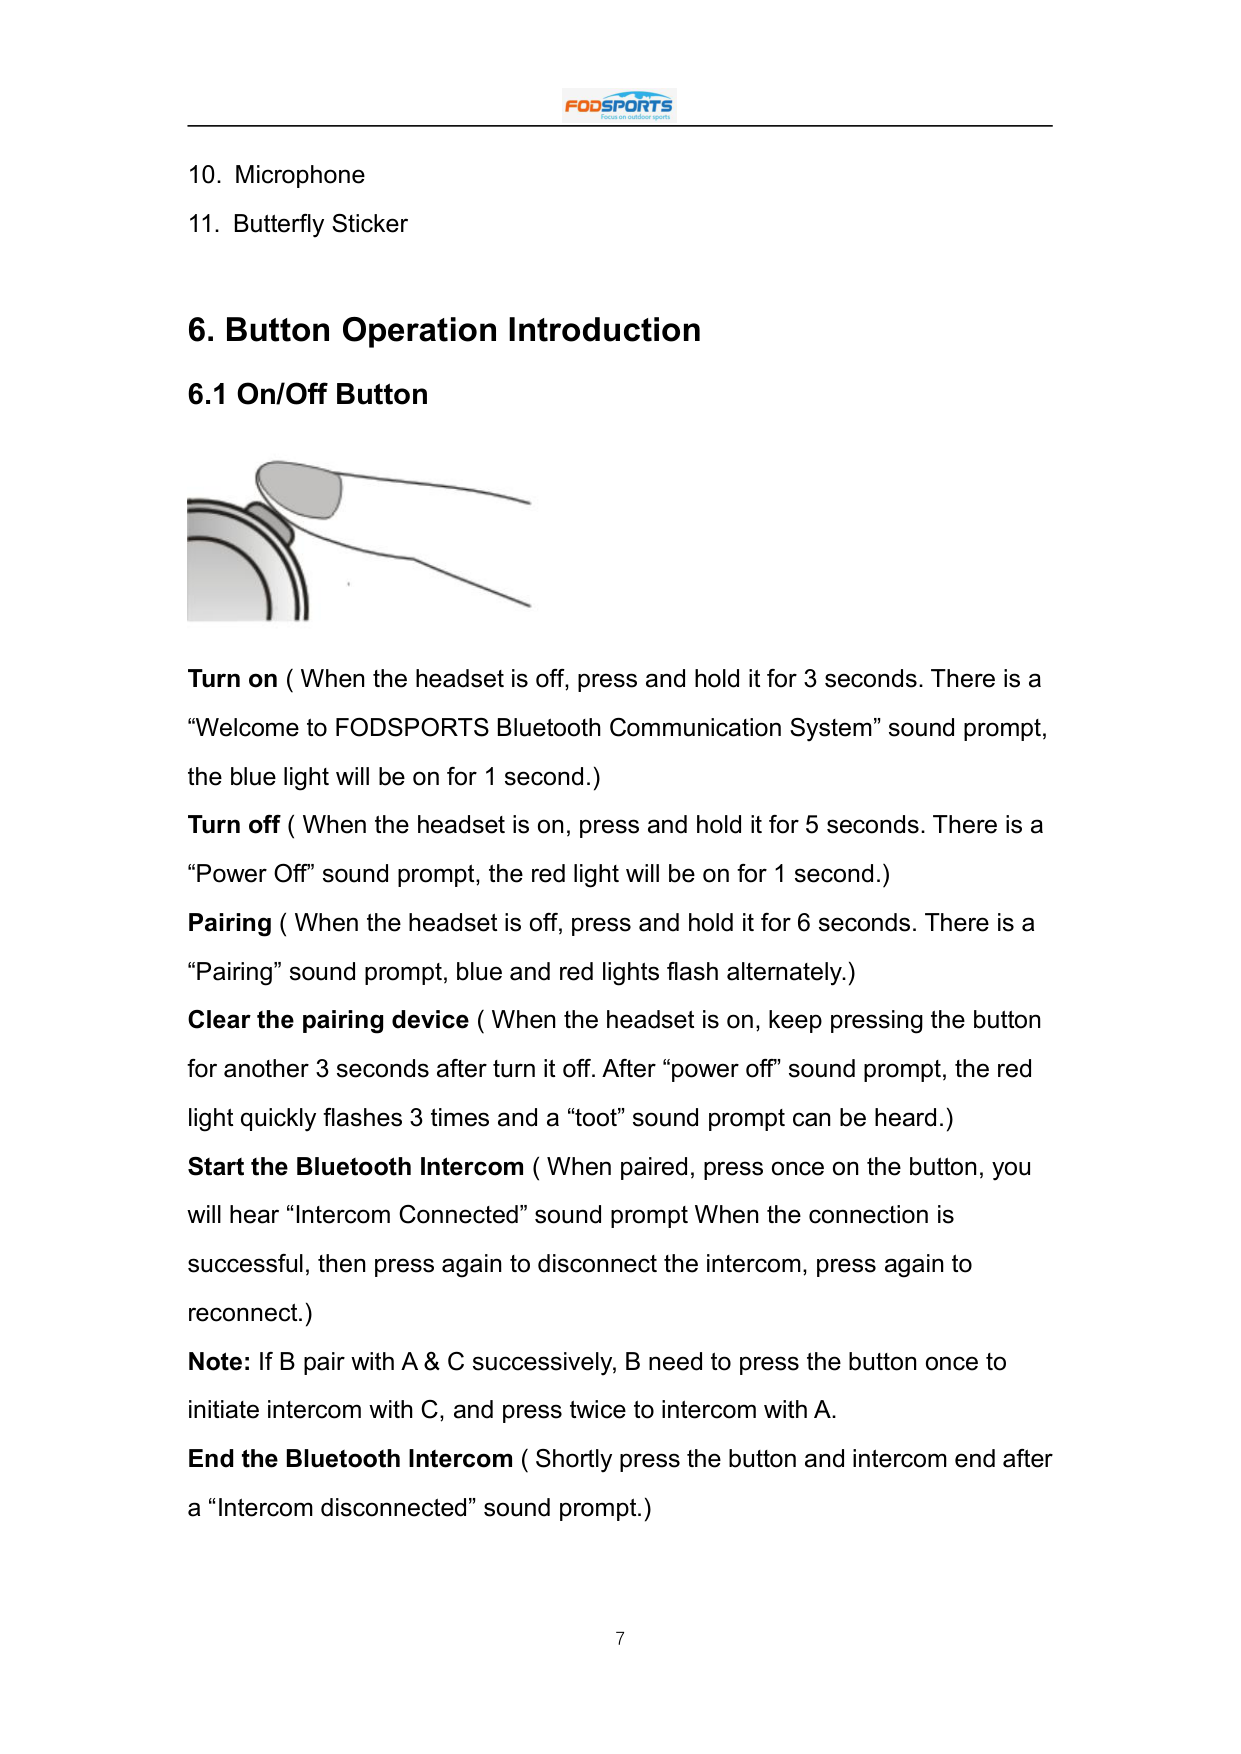
##### 6.1 On/Off Button

Turn on ( When the headset is off, press and hold it for 3 seconds. There is a “Welcome to FODSPORTS Bluetooth Communication System” sound prompt, the blue light will be on for 1 second.) Turn off ( When the headset is on, press and hold it for 5 seconds. There is a “Power Off” sound prompt, the red light will be on for 1 second.) Pairing ( When the headset is off, press and hold it for 6 seconds. There is a “Pairing” sound prompt, blue and red lights flash alternately.) Clear the pairing device ( When the headset is on, keep pressing the button for another 3 seconds after turn it off. After “power off” sound prompt, the red light quickly flashes 3 times and a “toot” sound prompt can be heard.) Start the Bluetooth Intercom ( When paired, press once on the button, you will hear “Intercom Connected” sound prompt When the connection is successful, then press again to disconnect the intercom, press again to reconnect.) Note: If B pair with A & C successively, B need to press the button once to initiate intercom with C, and press twice to intercom with A. End the Bluetooth Intercom ( Shortly press the button and intercom end after a “Intercom disconnected” sound prompt.)
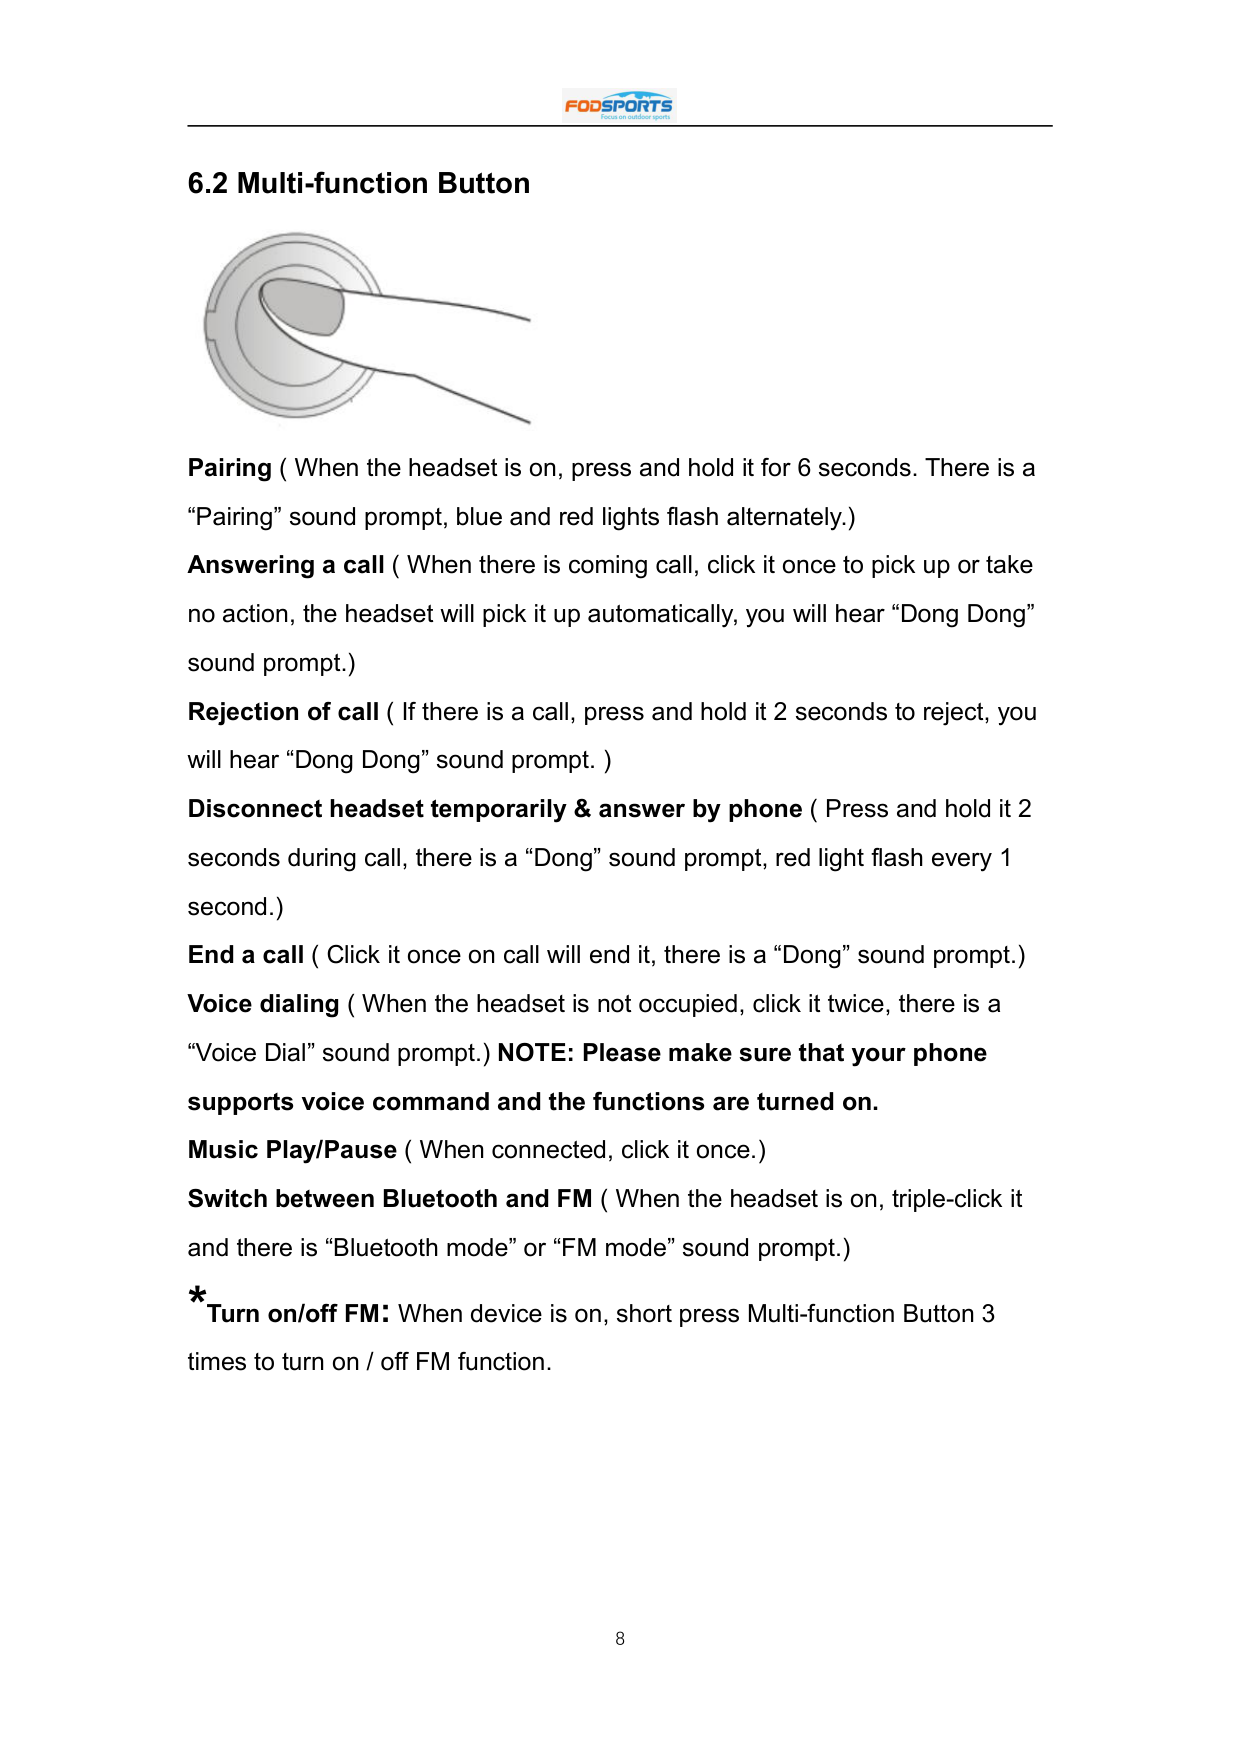
##### 6.2 Multi-function Button

Pairing ( When the headset is on, press and hold it for 6 seconds. There is a “Pairing” sound prompt, blue and red lights flash alternately.)
Answering a call ( When there is coming call, click it once to pick up or take no action, the headset will pick it up automatically, you will hear “Dong Dong” sound prompt.)
Rejection of call ( If there is a call, press and hold it 2 seconds to reject, you will hear “Dong Dong” sound prompt. ) Disconnect headset temporarily & answer by phone ( Press and hold it 2 seconds during call, there is a “Dong” sound prompt, red light flash every 1 second.) End a call ( Click it once on call will end it, there is a “Dong” sound prompt.) Voice dialing ( When the headset is not occupied, click it twice, there is a “Voice Dial” sound prompt.) NOTE: Please make sure that your phone supports voice command and the functions are turned on. Music Play/Pause ( When connected, click it once.) Switch between Bluetooth and FM ( When the headset is on, triple-click it and there is “Bluetooth mode” or “FM mode” sound prompt.)
*Turnon/offFM:Whendeviceison,shortpressMulti-functionButton3
times to turn on / off FM function.
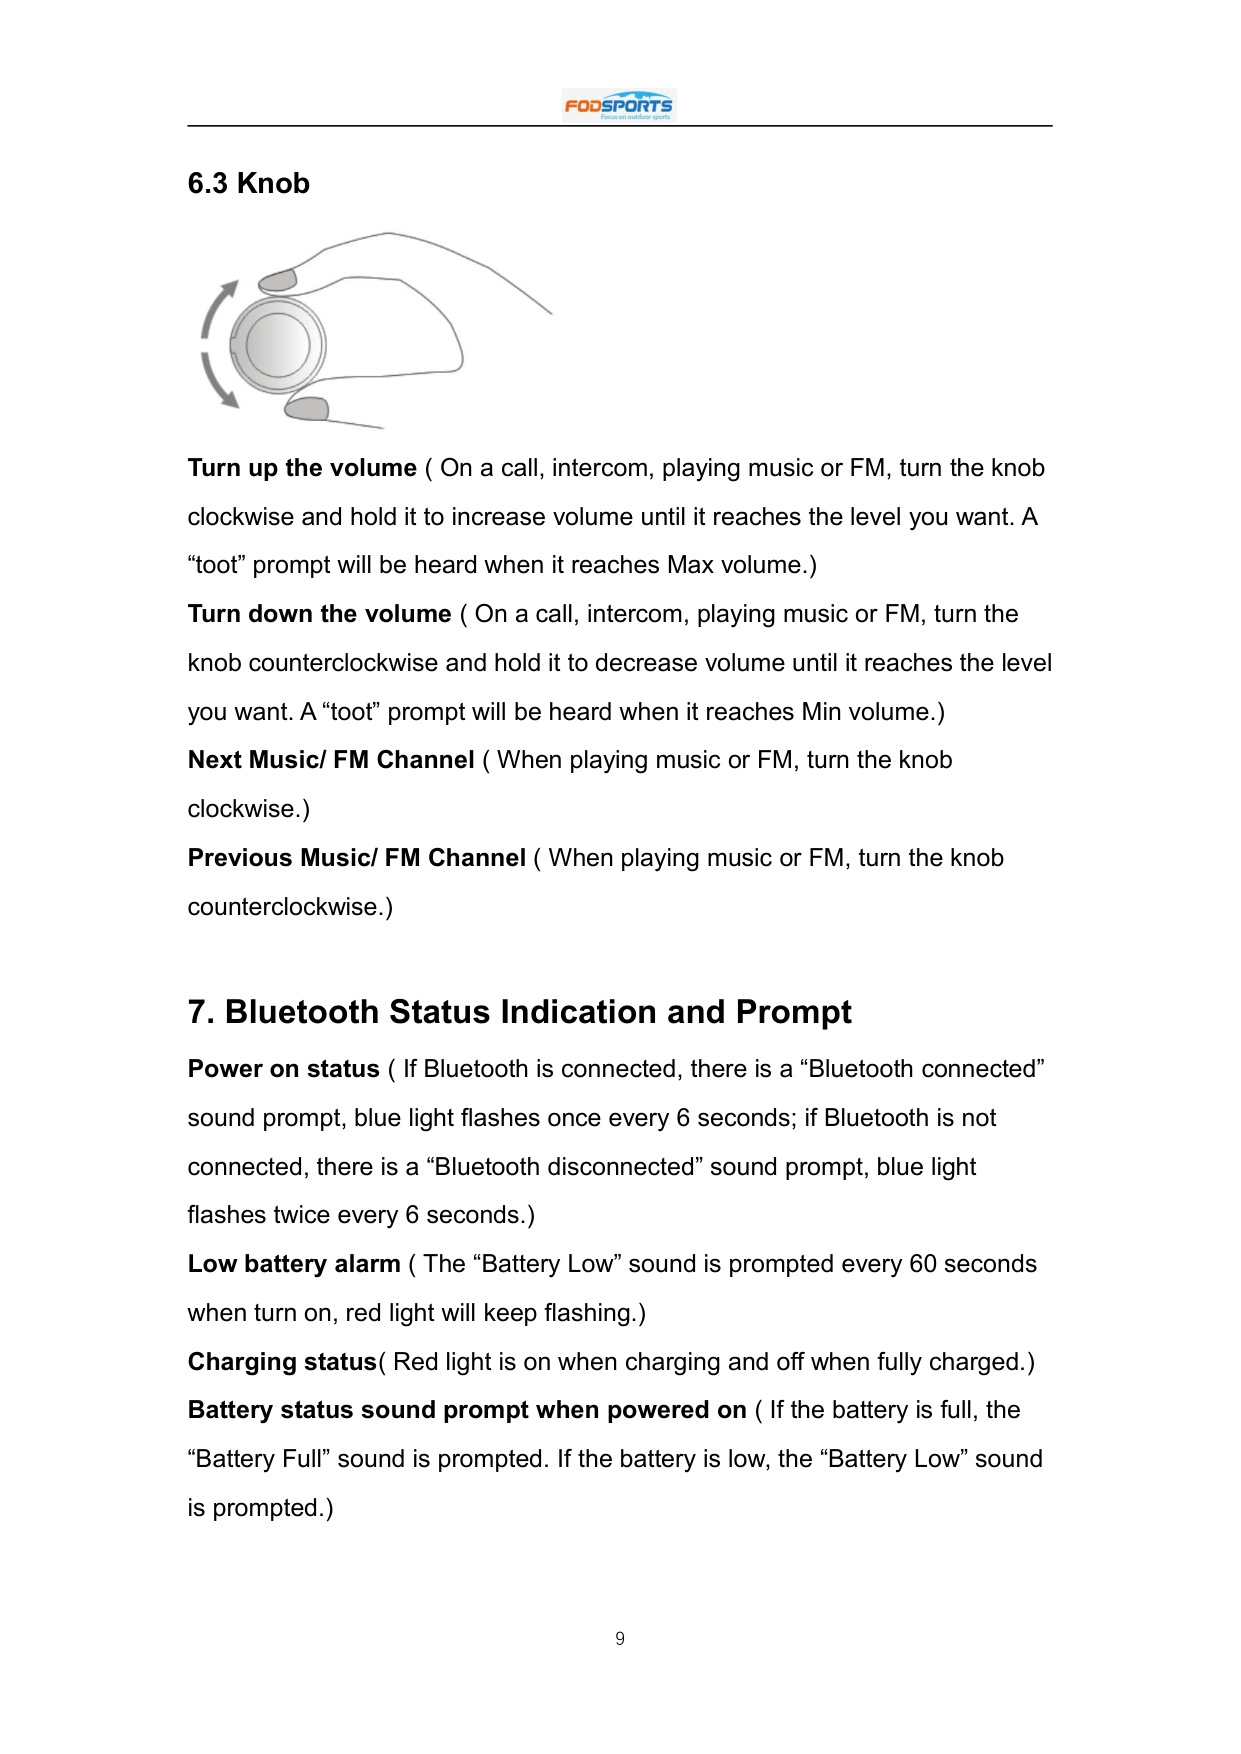
##### 6.3 Knob


Turn up the volume ( On a call, intercom, playing music or FM, turn the knob clockwise and hold it to increase volume until it reaches the level you want. A “toot” prompt will be heard when it reaches Max volume.) Turn down the volume ( On a call, intercom, playing music or FM, turn the knob counterclockwise and hold it to decrease volume until it reaches the level you want. A “toot” prompt will be heard when it reaches Min volume.) Next Music/ FM Channel ( When playing music or FM, turn the knob clockwise.) Previous Music/ FM Channel ( When playing music or FM, turn the knob counterclockwise.)
8. Pairing Methods
##### 8.1 Two ways for FX6 to enter pairing status
##### 8.2 Pairing with the Non-Fodsports FX6 Bluetooth device
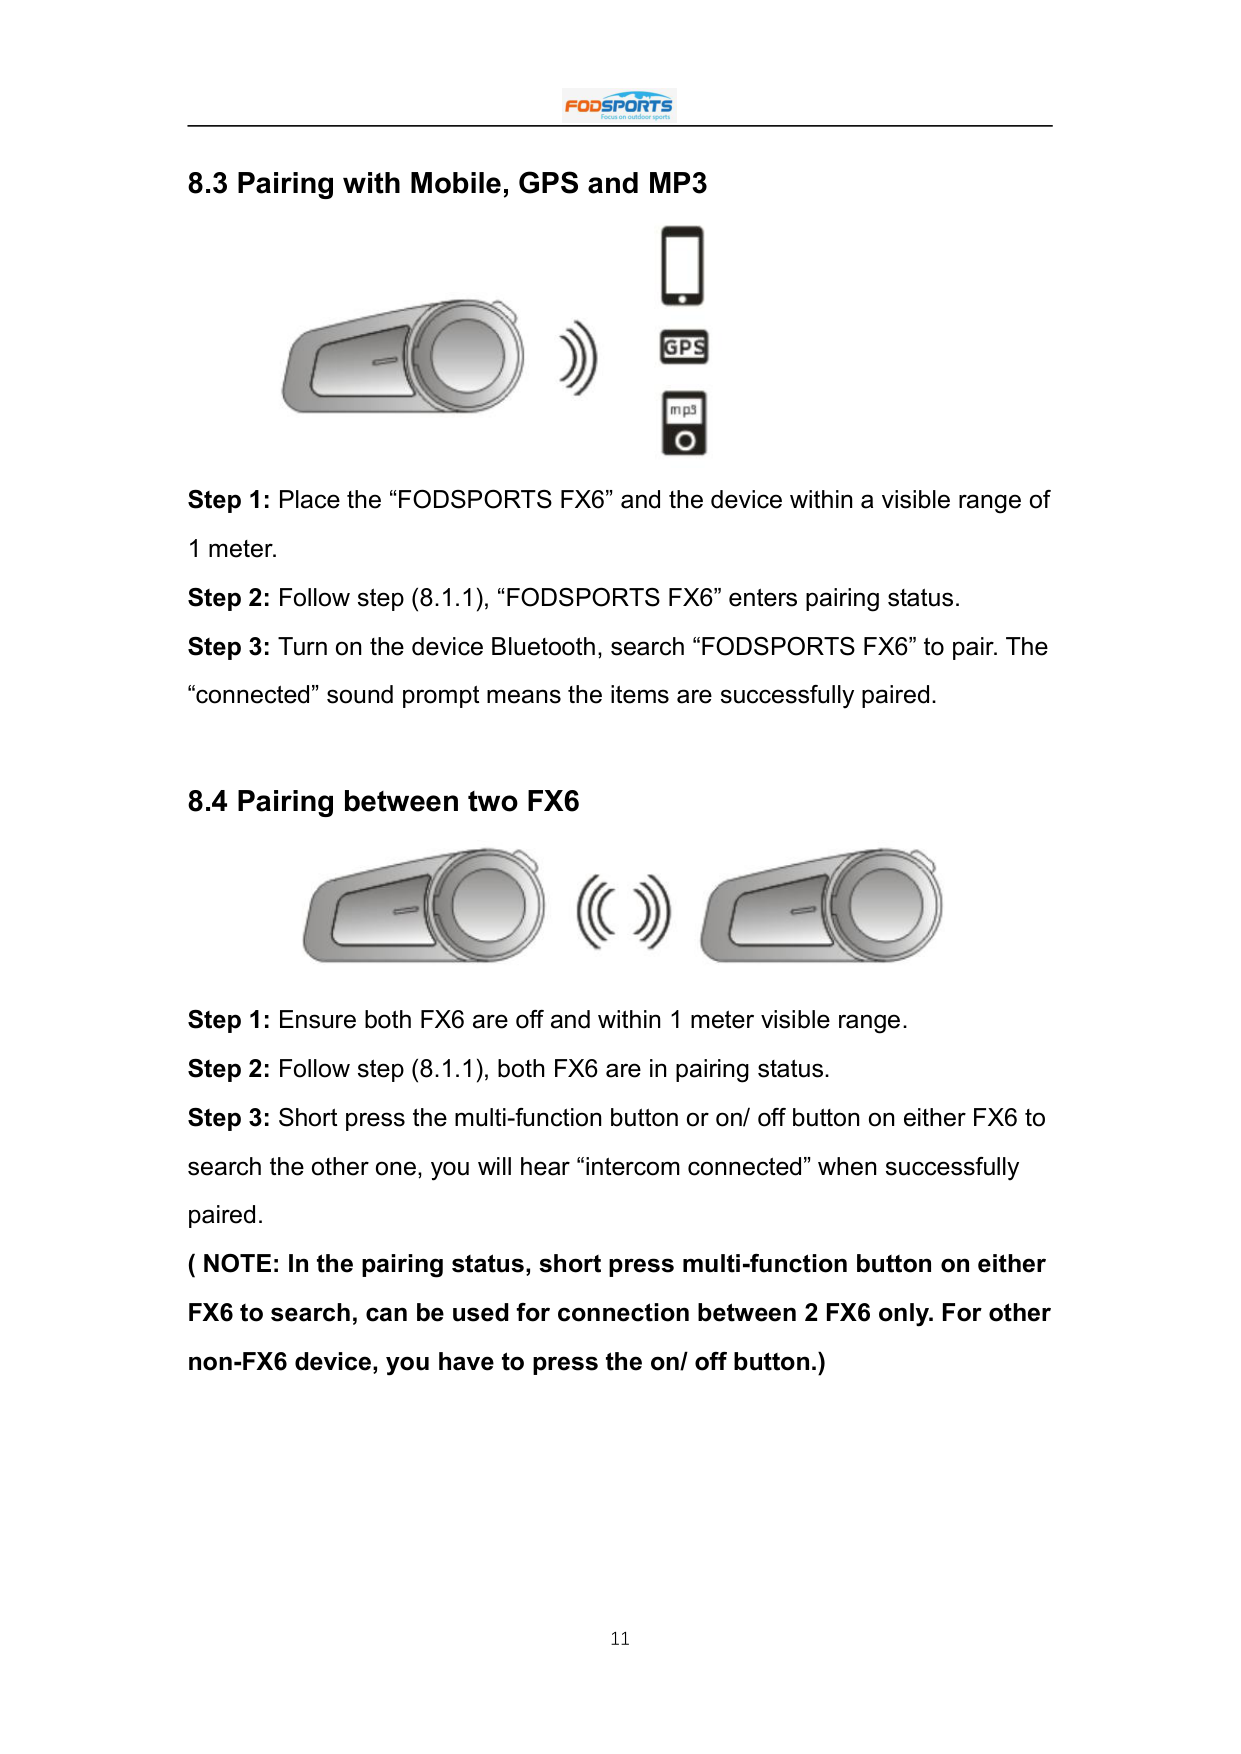

##### 8.3 Pairing with Mobile, GPS and MP3

##### 8.4 Pairing between two FX6

Step 1: Ensure both FX6 are off and within 1 meter visible range. Step 2: Follow step (8.1.1), both FX6 are in pairing status. Step 3: Short press the multi-function button or on/ off button on either FX6 to search the other one, you will hear “intercom connected” when successfully paired. ( NOTE: In the pairing status, short press multi-function button on either FX6 to search, can be used for connection between 2 FX6 only. For other non-FX6 device, you have to press the on/ off button.)
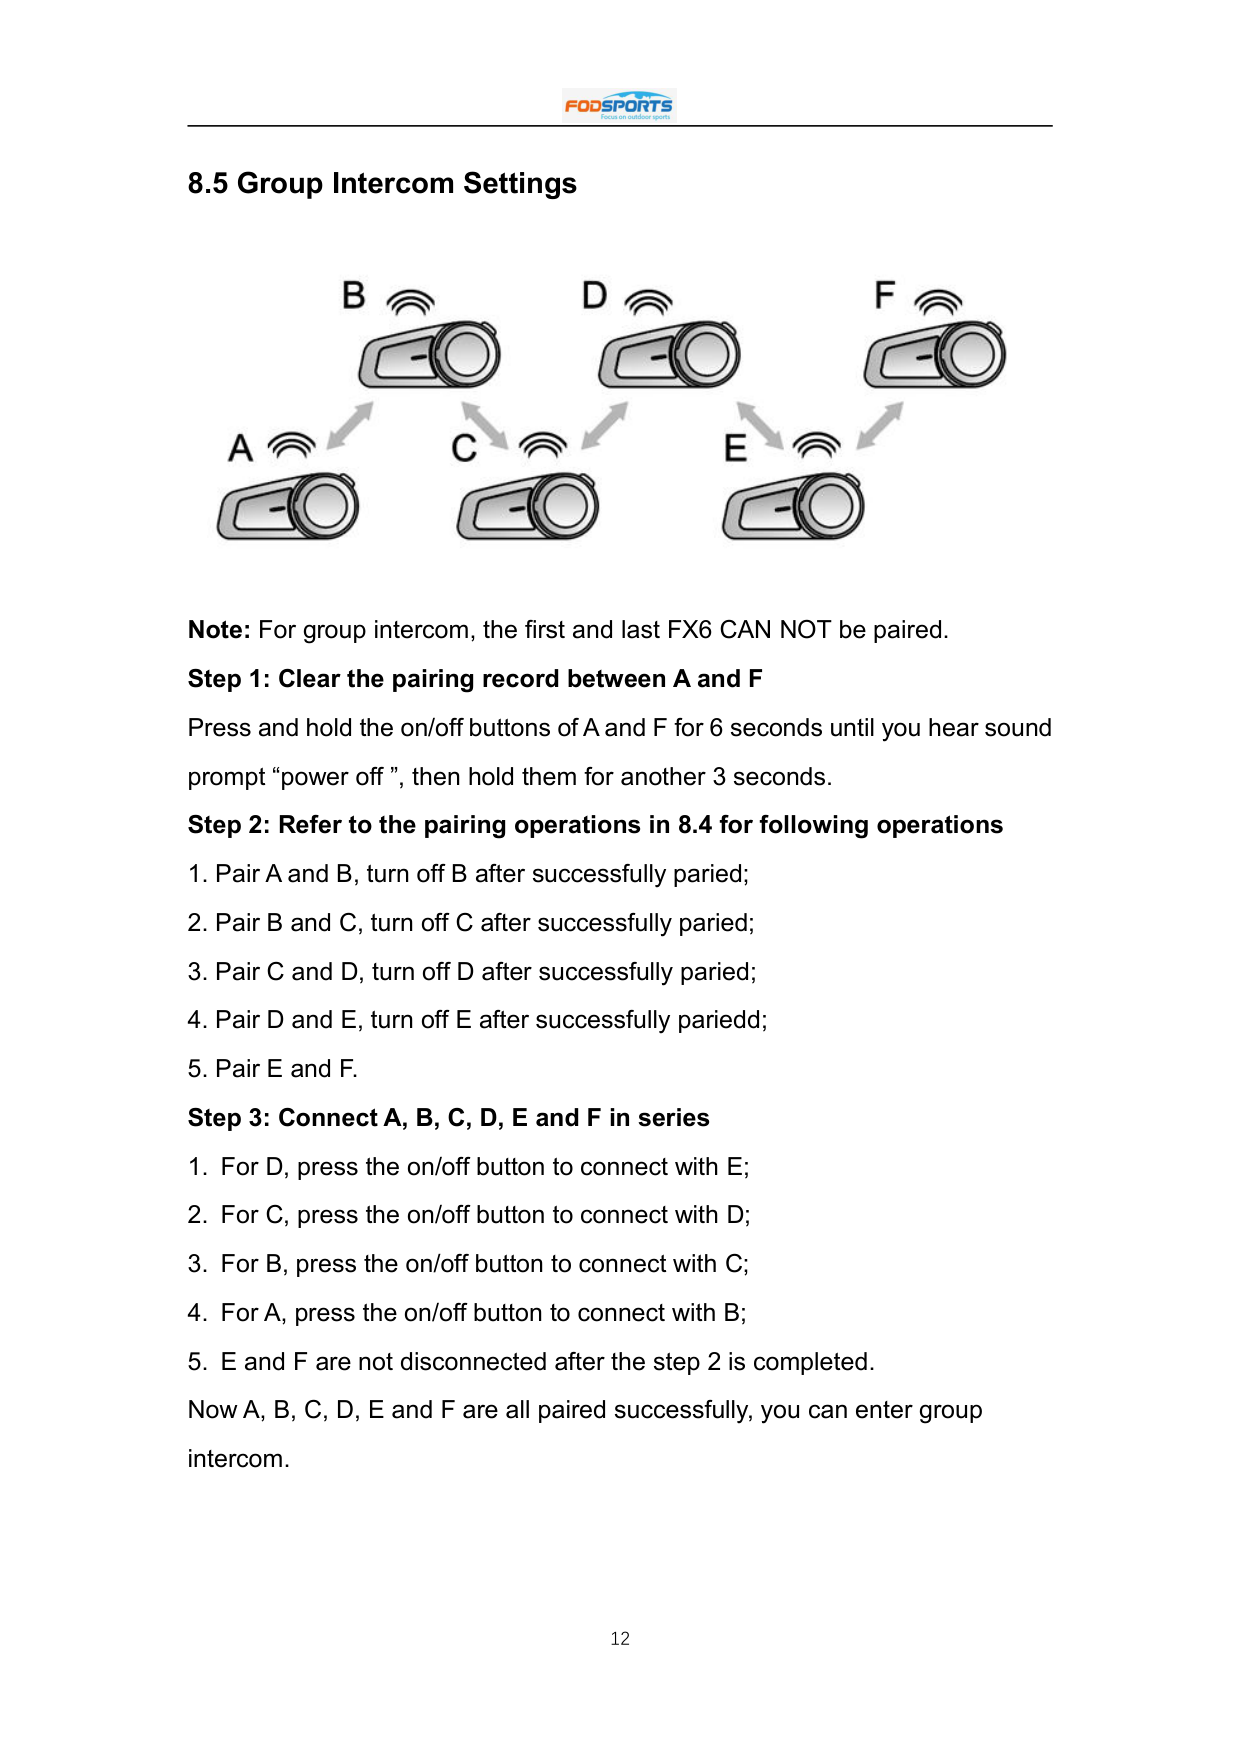
##### 8.5 Group Intercom Settings

Note: For group intercom, the first and last FX6 CAN NOT be paired.

Note: During the 6 people group intercom, if D receives a call, D will be disconnected temporarily from the group. A, B and C form a group, E and F form a group. After D finished call, D will be reconnected into the group intercom automatically and the 6 people group intercom resumes.
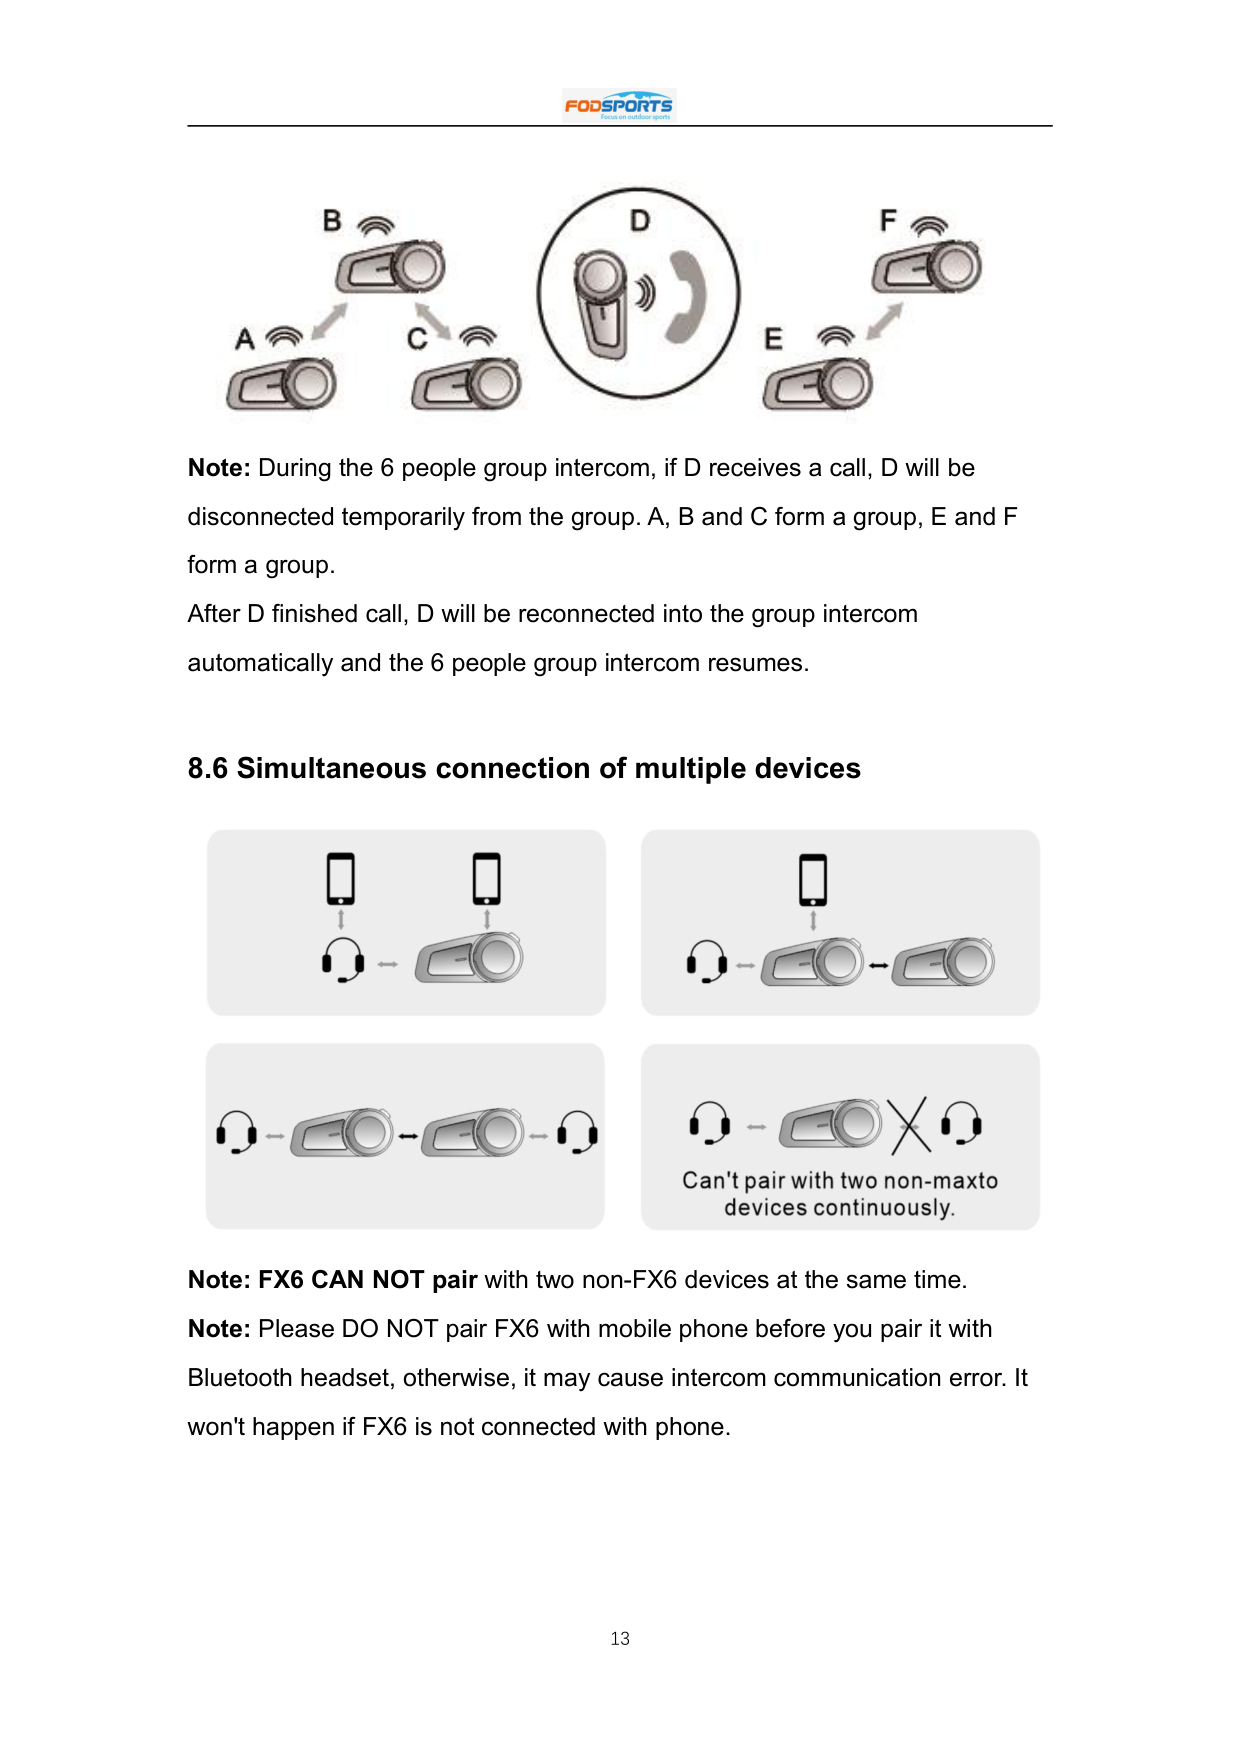
##### 8.6 Simultaneous connection of multiple devices

Note: FX6 CAN NOT pair with two non-FX6 devices at the same time. Note: Please DO NOT pair FX6 with mobile phone before you pair it with Bluetooth headset, otherwise, it may cause intercom communication error. It won't happen if FX6 is not connected with phone.
#### 9. Priority of Functions