
Ask AI
— answers from the official manualAnswers from the official manual.
Common questions
Common Questions
52 totalHow often should I recharge the unit when it is not in use?
The manufacturer recommends recharging the battery at least every 30 days when the unit is not in frequent use, and also after each use. All batteries lose energy from self-discharge over time, and more rapidly at higher temperatures. Failure to keep the battery charged will cause permanent damage and result in poor jump starting performance.
How do I charge the Everstart JUS750CE for the first time?
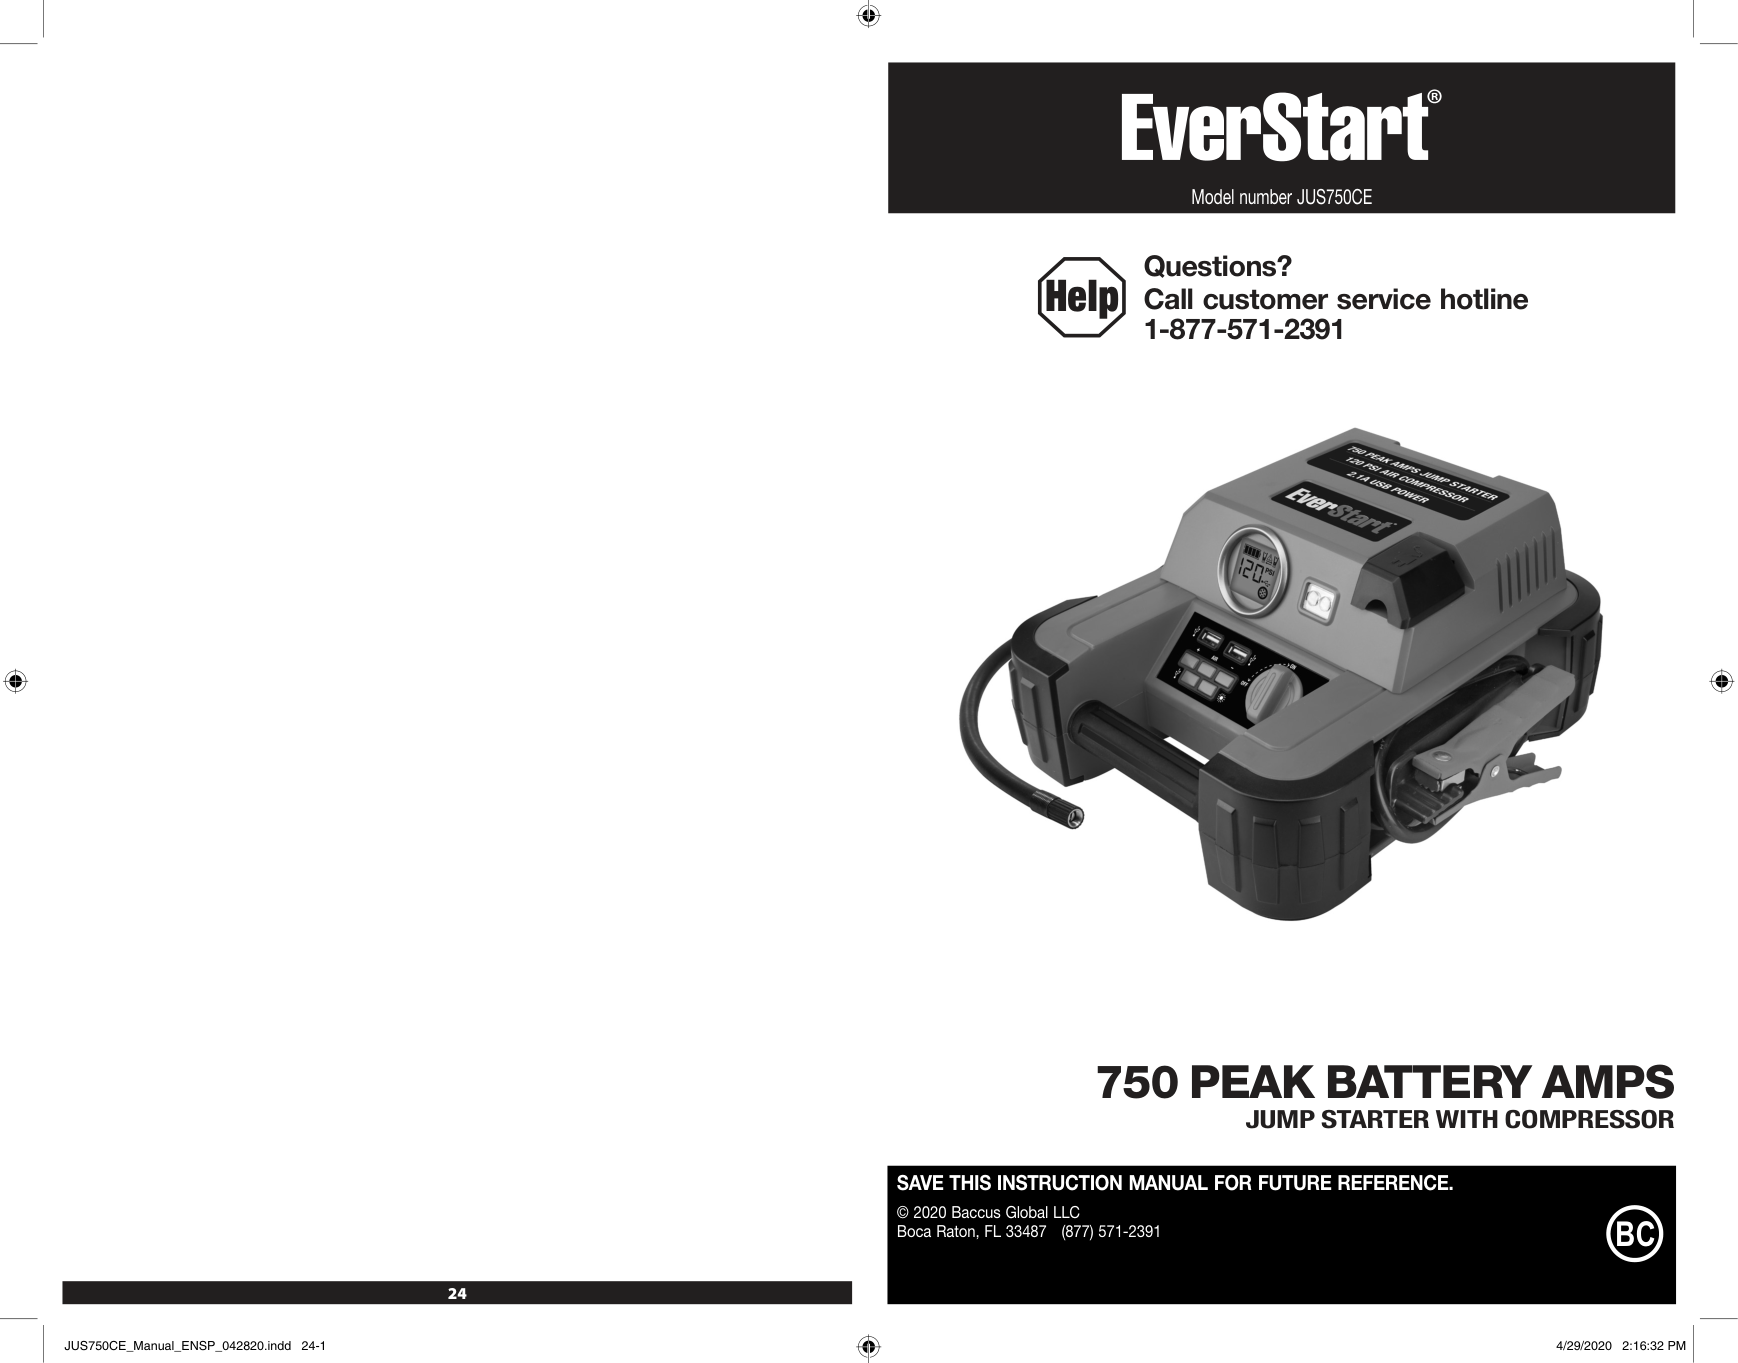
Fully charge the unit using a household extension cord connected to the built-in 120 Volt AC charger for a full 24 hours, or until the Battery Status Icon shows 4 solid bars. The unit is delivered in a partially charged state and must be fully charged before first use. You cannot overcharge the unit using the AC charging method.
What do I do if the clamps are connected with reversed polarity?
Immediately disconnect the clamps — the unit will sound a continuous alarm and the LCD screen will flash the Alarm Icon, the '+' and '–' signs, and the Reverse Polarity Icons until the clamps are removed. Do not turn on the Jump Starter Power Switch while clamps are connected with reverse polarity, as this will cause permanent damage to the unit. Reconnect the clamps with the correct polarity before proceeding.
What is the maximum pressure the compressor can deliver, and how many tires can it inflate per charge?
The compressor is capable of inflating up to 120 pounds per square inch (PSI). The compressor can operate long enough to fill up to 3 average-sized tires before the battery must be recharged.
What should I do if the compressor overheats?
Press the Compressor Power Button to turn the compressor off and allow it to cool down for approximately 30 minutes before restarting. Do not operate the compressor continuously for longer than approximately 10 minutes, as this could damage the unit. If the compressor must run for longer periods, turn it off every 10 minutes and wait the 30-minute cooling period.
How often should I recharge the unit when it's not in use?
The manufacturer recommends recharging the battery at least every 30 days when the unit is not in frequent use, and after each use. All batteries lose energy from self-discharge over time, and more rapidly at higher temperatures. Failure to keep the battery charged will cause permanent damage and result in poor jump starting performance.
Show 46 more questions
What happens if I connect the jumper clamps with reversed polarity?
What are the key specifications of the JUS750CE?
How long can I run the compressor continuously?
What is the maximum pressure the built-in compressor can reach?
What should I do if the USB port shows a fault and shuts down?
What voltage battery system is the JUS750CE compatible with?
What icons indicate battery status on the Everstart JUS750CE?
How long does it take to charge an Everstart jump starter JUS750CE fully?
What voltage does each USB port on the Everstart JUS750CE provide?
What is the peak battery output for this Everstart JUS750CE jump starter?
How should I disconnect the cables after jump-starting my vehicle?
What is the correct order to connect and disconnect the jumper clamps?
How do I use the built-in compressor to inflate a tire?
What does it mean when the Fault Icon flashes on the LCD screen while using the USB ports?
What does the warranty cover and for how long?
What should I do if the unit displays a reverse polarity alarm?
How long can I continuously run the portable compressor?
What are the steps for jump-starting a vehicle with a negative-grounded system?
What should I do if the USB ports display a fault condition?
What is the maximum pressure the portable compressor can reach?
What does it mean if the battery status icon shows 4 blank bars?
What should I check before using the compressor?
What is the total power output available from both USB ports?
How should I charge the JUS750CE for the first time?
How often should I recharge the battery during storage?
What steps should I follow to troubleshoot a malfunctioning compressor in my Everstart JUS750CE?
What safety precautions should I follow when using a jump starter on my vehicle's battery?
How often should I charge the Everstart JUS750CE if it is not used frequently?
What should I do if my jump starter sounds a continuous alarm?
How long should I charge the Everstart Jus750Ce before using it for the first time?
Can I use an extension cord with this jump starter, and what size should it be?
Where should the jump starter be stored when not in use?
What is the minimum clearance required if using this unit in a garage or enclosed area?
What should I do if a part of the jump starter is damaged?
What is the peak battery amp rating for this model?
Can I use the Everstart JUS750CE in wet or rainy conditions?
Can I insert objects into the USB ports?
What is the peak battery amp rating for the Everstart JUS750CE?
How should I store the Everstart JUS750CE when not in use?
Can I insert objects into the USB ports of the Everstart JUS750CE?
When charging or not in use, what position should all switches be in?
What is the minimum height requirement if I use the JUS750CE in a garage?
What type of charger should I use to recharge the Everstart JUS750CE?
Is this jump starter safe to use in wet or damp conditions?
What should I do before charging or when the unit is not in use?
How do I reduce the risk of electric shock when maintaining this unit?
Full Manual
2 pages


Everstart jump starter user manual
How long to charge a everstart jump starter. Everstart jump starter. How do i use everstart jump starter. How do i know when my everstart jump starter is fully charged. How does everstart jump starter work. Everstart maxx 1200a jump starter user manual. Everstart 750 jump starter manual pdf. Everstart jump starter manual pdf. How to use everstart jump starter. Everstart 750 jump starter manual. Everstart
jump starter 750 amp user manual.
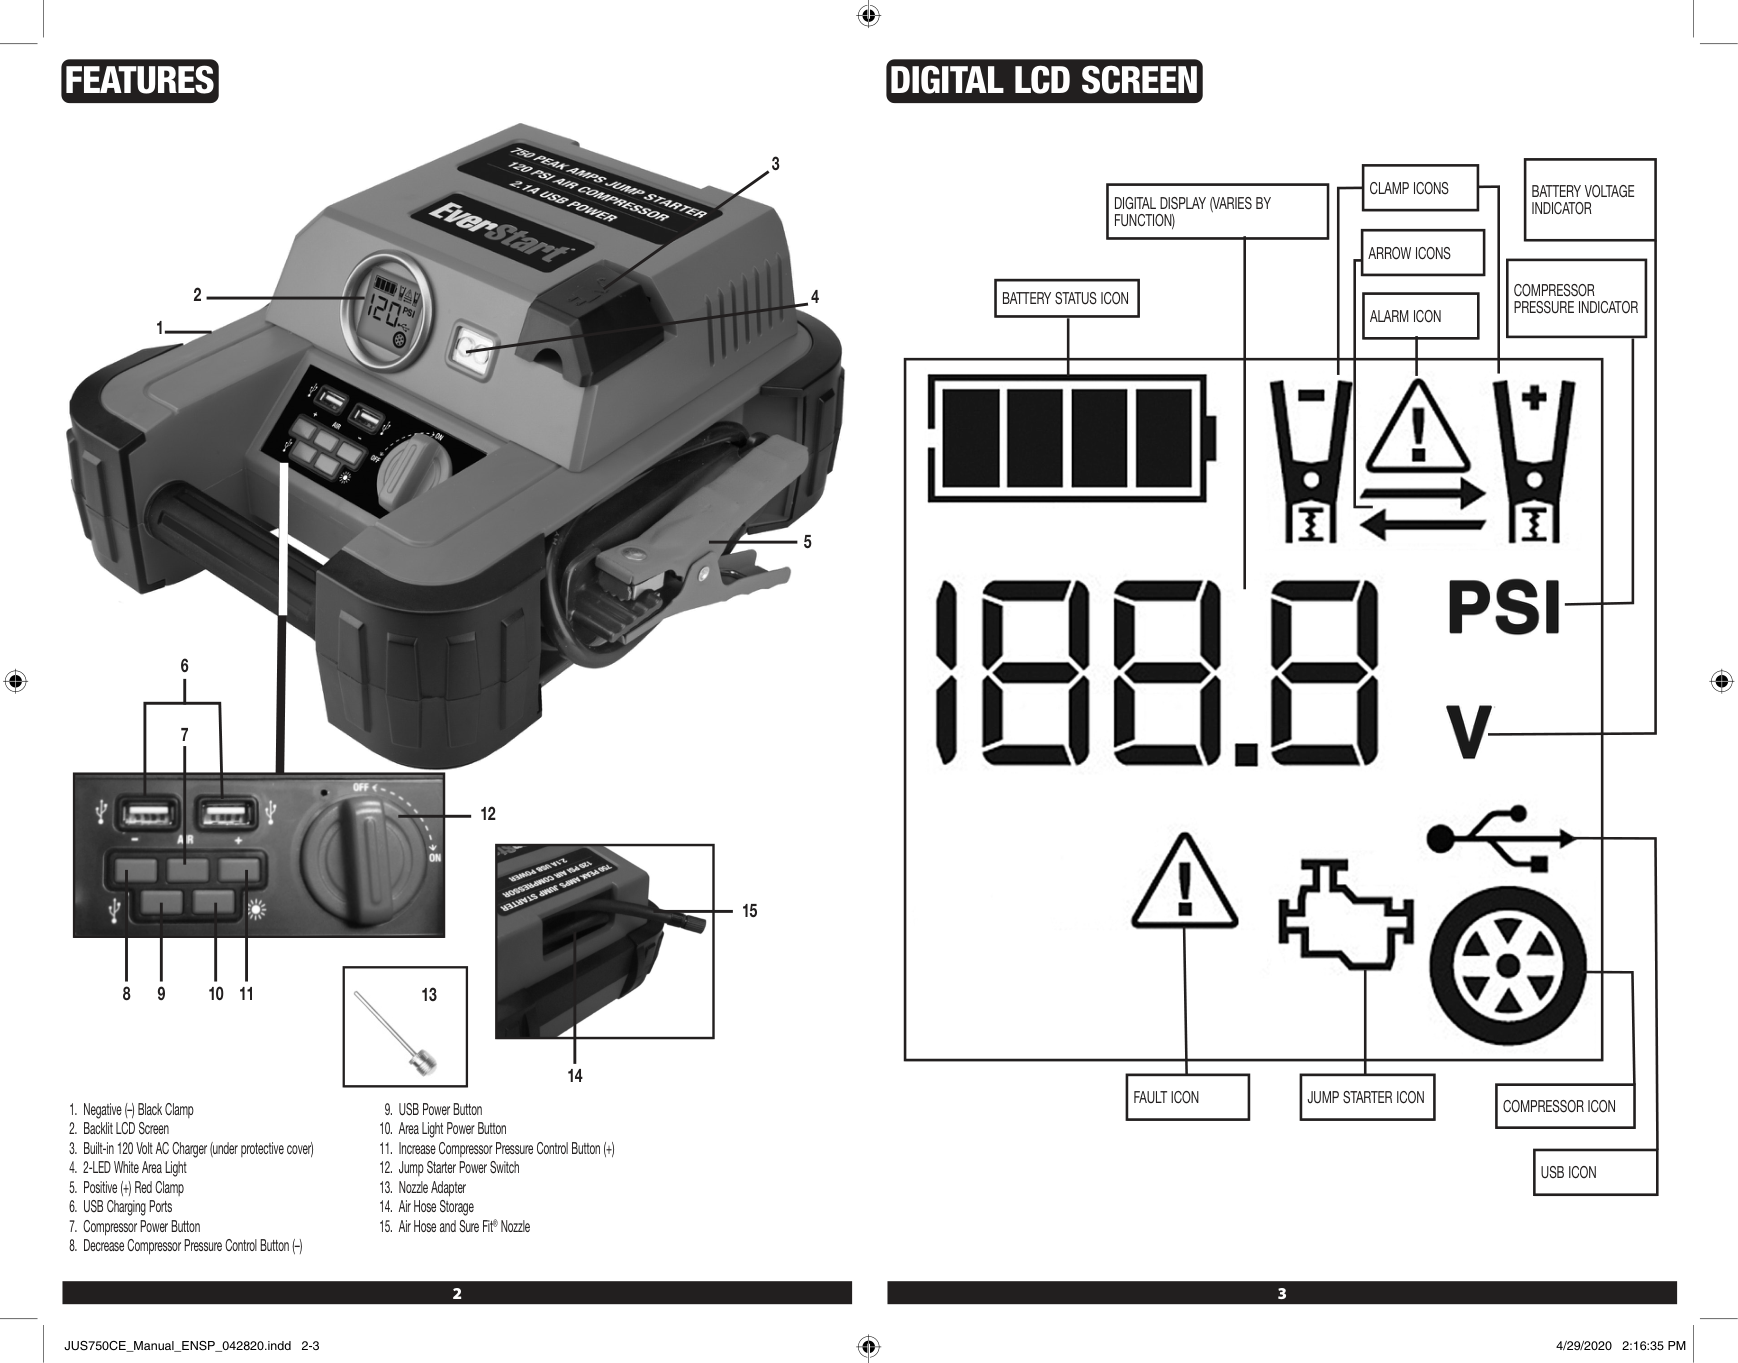
This manual outlines essential safety guidelines for using the EverStart JUS750CE, a 750A jump starter with compressor. The device features a backlit LCD screen, built-in AC charger, and multiple charging ports. To ensure safe operation, follow these precautions: - Understand Safety Definitions: Be aware of hazardous situations that could lead to death or injury. - Use Correctly: Tools and equipment should be used as intended; modifying them can result in serious harm. - Read All Instructions: Failure to do so may cause electric shock, fire, and injury. Do not use this unit near liquids or flammable materials as sparks may ignite them. Also avoid using it in wet conditions or submerging it in water. To prevent electrical shock, unplug the device before maintenance or cleaning. This equipment creates sparks and arcs, so keep it at least 18 inches above the floor when used in enclosed areas like garages. Avoid inserting objects into USB ports and make sure to use only the built-in charger for this unit. Allow it to charge fully for a full 24 hours before using it for the first time. Never overcharge the unit with AC power, as this can cause overheating and loss of performance. Using the jump-starter requires careful adherence to instructions and precautions. To minimize risks, follow these guidelines and manufacturer recommendations for equipment used near the battery. Before proceeding, review cautionary markings on products and engines. Never attempt to jump-start or charge a frozen battery, as this can cause damage to vehicles with onboard computer systems. Always read the vehicle's owner manual to confirm suitability for external assistance. To ensure safety: - Avoid smoking or sparks near batteries, engines, or power stations. - Remove personal metal items like jewelry and keep hands clear of fan blades and other hazardous parts. - Wear non-conductive clothing and avoid dropping tools onto the battery. - Jump-start procedures should be performed in a well-ventilated area with stored clamps when not in use. For safe connection: Positive (red) clamp: Connect to positive ungrounded battery post, away from the vehicle's body. - Negative (black) clamp: Connect to vehicle chassis or engine block, away from the battery. - Never connect clamps to carburetor, fuel lines, or sheet-metal parts. Proper polarity is crucial. If incorrectly connected, the unit will display warning icons and sound an alarm until corrected. Always disconnect negative clamps first, followed by positive clamps. Never expose batteries to fire or intense heat, as this may cause explosion. 1. Place this unit as far away from a 12-volt battery as possible to avoid contact between acid and metal. 2. Do not place the unit near other objects that may cause it to touch another object or the wall, and make sure good ventilation is present in your area. 3. Check the following information before using this product: - Vehicle with a DC battery system only - Not connectable to other types of batteries such as 6 volts or 24 volts 4. Use only on vehicles that have batteries installed and use caution when handling vehicles without batteries for extended periods. 5. Be cautious about overusing the unit as excessive engine cranking can damage a vehicle's starter motor, so don't keep starting the engine repeatedly. 6. Don't place the unit in direct sunlight, heat or moisture to avoid damaging it and shorten its working life. 7. Use this unit only on devices that are compatible with it for safe operation and avoid inserting foreign objects into ports or overloading them. 8. Make sure not to leave the compressor alone while using it as prolonged use can lead to overheating, which could damage it. 9. Carefully follow instructions for inflatables you're going to use this product on, monitor pressure closely and only inflate to recommended levels to avoid injury. 10. Keep protective eyewear on hand and know first aid procedures in case of accidents or injuries while using the unit and working with batteries. Pressing the LED Area Light Power Button activates the LCD screen with the Battery Status Icon and Battery Voltage Indicator remaining visible while the backlight turns on for 10 seconds. Pressing the USB Power Button enables the two active USB Ports, displaying the Battery Status Icon and Battery Voltage Indicator along with a solid USB Icon. The Compressor Power Button displays the battery status and PSI reading along with the Compressor Icon. If no further actions are taken within one minute, the unit will automatically turn off. When clamps are properly connected to a battery, a beep sounds, displaying the Battery Status Icon, Battery Voltage Indicator, Clamp Icons, and the "+" and "–" signs. The Jump Starter Power Switch must be turned on for this feature to function. Rotating the switch with unconnected clamps triggers a two-second warning every 10 seconds until the switch is turned off. If clamp connections are reversed, the unit will sound a continuous warning until they are disconnected from the battery. The Battery Status Icon and Voltage Indicator remain visible during charging or recharging using the built-in AC Charger, where the backlight turns on for 10 seconds and the bars repeatedly change their state. The unit's built-in low voltage protection will activate if it is not charged at this time, causing the Battery Status Icon to flash and automatically shutting down the unit until the battery is recharged. To ensure proper operation, fully charge the unit for the first time before using it. Charging and Recharging Routine Maintenance: - Lead-acid batteries require periodic charging due to self-discharge. - Batteries lose energy faster at higher temperatures. - Charge the battery every 30 days when not in frequent use. - Avoid heavy discharges between recharges and overcharging, as this can reduce battery life. Risk of Property Damage: - Failure to recharge the battery may cause permanent damage and poor jump starting performance. - Recharge after each use to prolong battery life. Charging Procedure Using Built-In 120 Volt AC Charger: - Connect an extension cord to the unit. - Plug the other end into a standard 120-volt AC wall outlet. - The LCD screen will display charge progress, with four solid bars indicating full charge. - Charge for approximately 24 hours or until the Battery Status Icon shows 4 solid bars. - Unplug and disconnect the AC extension cord after charging completion. Safety Precautions: - Use a heavy gauge metal part of the frame or engine block when connecting clamps for positive-grounded systems. - Do not connect to carburetor, fuel lines, or sheet-metal body parts. Never touch red and black clamps together as this can cause dangerous sparks, power arcing, and/or explosion. Always follow all safety instructions in the "Specific Safety Instructions for Jump Starters" section of the manual. The unit will sound a continuous alarm until the clamps are disconnected if they are connected incorrectly with regard to polarity. The backlit LCD Screen displays the Battery Status Icon, Battery Voltage Indicator, and Clamp Icons. The "+" and"-"" signs above the Clamp Icons, Arrow Icons, and Alarm Icon will flash. If the Jump Starter Power Switch is turned on while the clamps are connected with reverse polarity, the unit will suffer permanent damage. Disconnect the clamps and reconnect to battery with correct polarity. If the Jump Starter Power Switch is turned on and the unit detects that the clamps are not connected to a battery, a two-second warning will sound every 10 seconds. The LCD screen displays the Battery Status Icon, Battery Voltage Indicator, and Clamp Icons with the "+" and"-"" signs. The Alarm Icon and the Jump Starter Icon will flash. Always disconnect the negative (black) jumper cable first, followed by the positive (red) jumper cable, except for positive grounded systems. When you switch on the Power Switch, the Engine Icon will light solid, telling you it's time to start the vehicle. To get going, turn on the ignition and crank the engine in short bursts of 5-6 seconds until it starts. You'll see some important icons lighting up on the backlit LCD screen, including the Battery Status Icon, the Battery Voltage Indicator, the Jump Starter Icon, and the "+" and "–" signs turning solid to show the unit is jump-starting. Remember to turn off the Jump-Starter Power Switch once you're done. When shutting down, always disconnect the negative (–) engine or chassis clamp first, followed by the positive (+) battery clamp. Also, make sure to recharge this unit fully after each use and keep it turned off when not in use. It's crucial to be aware that jump-starting a vehicle with on-board computerized systems can potentially damage its electrical system. Before attempting to jump-start such a vehicle, read your car manual to confirm that external-starting assistance is recommended. If the engine fails to start after multiple attempts, stop trying and look for other issues that need correction. If your vehicle still won't start, turn off the ignition, switch off the Jump-Starter Power Switch, disconnect the jump-start system's leads, and have a qualified technician check why the engine didn't start. The built-in LED Area Light on this unit consists of two LEDs located at the front. The light is controlled by the Area Light Power Button on the control panel. Pressing the button once turns the light on; pressing it again turns the area light off. When you turn it on, you'll hear a beep and see the Battery Status Icon and the Battery Voltage Indicator on the backlit LCD screen for 10 seconds. It's essential to check the unit's battery status regularly on the backlit LCD screen. A full battery is indicated by four solid bars in the battery icon. When the battery level gets low, with only one solid bar or completely empty with 4 empty bars, the unit must be recharged at that time, or its built-in low voltage protection will activate. Make sure to turn off the Area Light when the unit is being recharged or stored. The USB Ports on this unit are located on the front and provide a total of 2.1A (5V each). When using the USB Ports, the unit monitors for fault conditions such as low battery voltage, overload, and short circuit on both ports. If any of these faults occur, the backlit LCD screen will display the Fault Icon continuously, and the USB Ports will automatically shut down. If a fault condition exists, disconnect the USB-powered device and press the USB Power Button again to turn off the USB Ports immediately. Make sure the unit does not need to be recharged before using the USB Ports again. If another fault occurs, check that the total draw of the devices plugged into the USB Ports does not exceed 2.1A (5V each). To utilize this device with USB Ports, follow these steps: Firstly, turn off compressor then let it cool for about half an hour. Afterwards, hook up Sure Fit nozzle to valve stem without tightening too much. Press power button - you'll hear a beep and LCD screen will show some numbers. You can adjust pressure by pressing "+" and "–" buttons. When done, just press power button again and compressor will start working. Monitor pressure on the screen until desired level is reached. To stop inflation, simply press power button once more. For inflating items without valve stems, you'll need nozzle adapter. Attach it to Sure Fit nozzle and then insert into item you want to inflate. Follow same steps as before, but be careful not to over-inflate small things like volleyballs or footballs. When unit is not in use, make sure to charge battery every 30 days. Also, wipe down outside with soft cloth from time to time. Never submerge appliance in water and check adapters, wires and connectors periodically for wear and tear. If something breaks, contact manufacturer for replacement. Battery should last whole life of the compressor, but its lifespan depends on how often you recharge it and take care of it. Important Safety Information To ensure safe battery disposal, recycle the sealed, lead acid battery properly. Failure to comply with local regulations may result in fines or imprisonment. When disposing of the battery: - Protect exposed terminals with heavy-duty electrical tape. - Do not expose the battery to fire or intense heat, as it may explode. Troubleshooting - Ensure all unit functions are turned off before troubleshooting. - Check connections and recharge if necessary. - Refer to Important Notes for USB Port issues. - Be aware of total USB device draw and check device compatibility. This device abides by FCC rules. Operation is subject to two conditions: no interference can be caused, and all received interference must be accepted, including that which may lead to undesired operation. Specifications * Boost Ampere: 12V DC, 750A peak battery, 375A instantaneous * Battery Type: Maintenance-free, sealed lead acid, 12V DC, 9Ah * AC Input: 120V AC, 60Hz, 9W * Area Light: 2 white LEDs * USB Ports: 2.1A (5V DC each) max. * Compressor Maximum Pressure: 120 PSI Important Information * Everstart is a registered U.S. trademark owned by Baccus Global, LLC. * Imported by Baccus Global LLC, located at 621 NW 53rd St., Suite 450, Boca Raton, FL 33487 * Visit www.Baccusglobal.com or call 1-877-571-2391 for more information. Downloadable Manual You can download the full pdf version of the manual from our website. It may contain additional safety instructions, warranty information, FCC rules, and other important details. Using an EverStart Jump Starter 1200A on a Car Stranded on the side of the road? A car with a jump starter can save you from long wait times. To use one, follow these simple steps: Plug jumper cables into both batteries, connecting positive and negative terminals for each cable. Start your car once it's turned over completely before disconnecting cables. Turning Off the EverStart Jump Starter 1200A To turn off your device, find the power switch on its side and press and hold until the light turns off. Next, locate and press the reset button. Finally, remove the battery pack to fully power down. Turning On the EverStart Jump Starter 1200A If properly connected, you can start it by connecting the red positive cable to your battery's positive terminal, then touching the black negative cable to any metal surface on your engine. Alternatively, use the jumper cables: connect the red positive cable and the black negative cable directly to the terminals. Resetting the EverStart Jump Starter 1200A If not working properly, follow these steps: disconnect the negative battery terminal, remove jump start cables, press and hold the jump start button for 5 seconds. Reconnect the negative terminal, then repeat with positive and both cables, each time holding the button for 5 seconds. Conclusion An EverStart jump starter is a useful tool when your car won't start. It provides the boost needed without relying on another car. Understanding how to set it up and use it correctly can be found in this manual.