
Ask AI
— answers from the official manualAnswers from the official manual.
Common questions
Common Questions
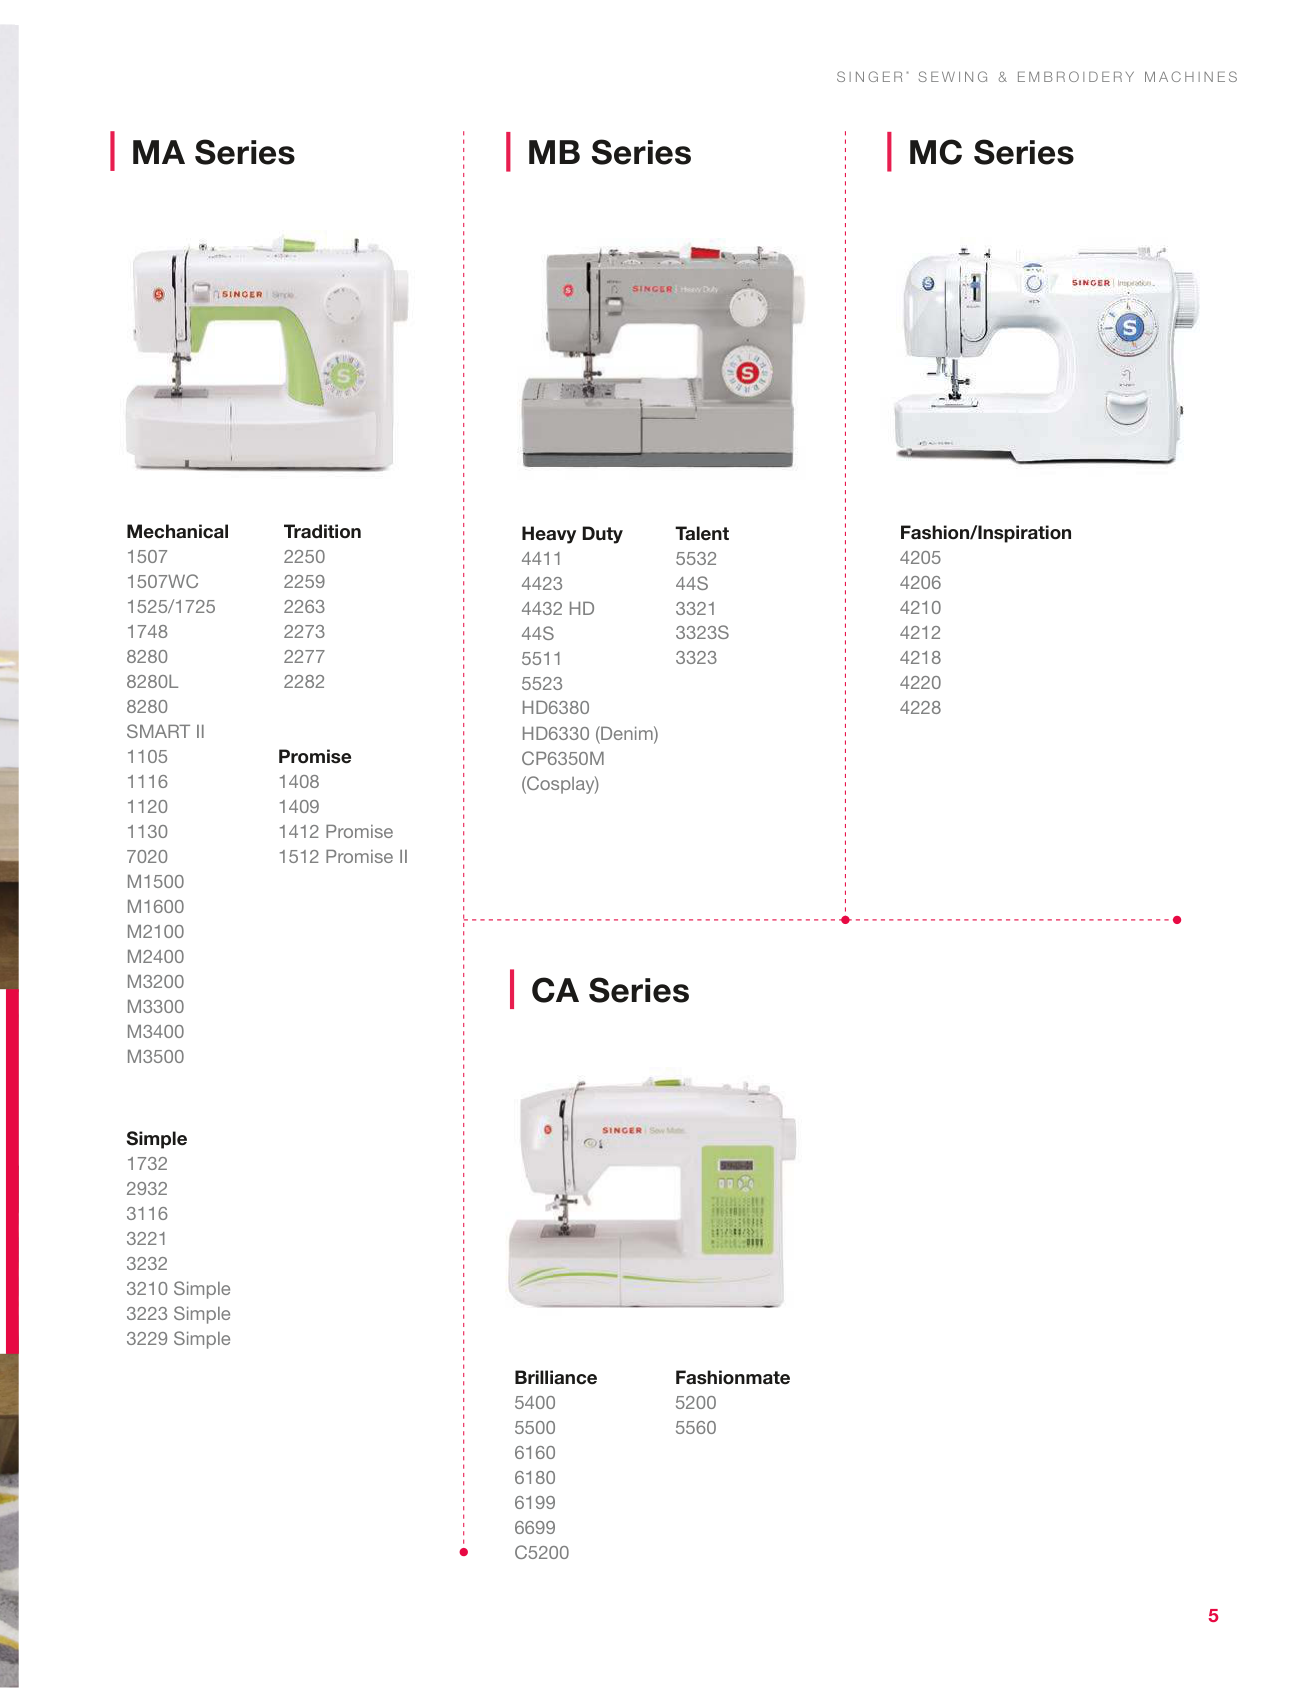
10 totalWhat Singer sewing machine models are included in the Simple series?
The Simple series includes the following models: 1732, 2932, 3116, 3221, 3232, 3210, 3223, and 3229. These machines are listed on page 5 of the manual under the Simple machine category.
What are the different types of needles available for Singer sewing machines and what are they used for?
Singer offers multiple needle types including Universal needles for general sewing, Ball Point needles for knit fabrics, Microtex needles for microfibers and topstitching, Leather needles for leather and suedes, Denim needles for denim and heavy fabrics, Embroidery needles for decorative stitching, Quilting needles for quilting, and Twin needles for creating two rows of stitches simultaneously. Each needle type is designed for specific fabric types and sewing applications. (Pages 49-53)
How do I gather fabric using the Gathering Foot?
To gather a single layer of fabric, attach the Gathering Foot securely, place the fabric under the foot, and sew. For wider seam allowances, move the needle to the left. To gather and attach a second flat fabric simultaneously, place the fabric to be gathered right side up under the foot, place the flat fabric right side down into the slot from the left side opening, and sew while keeping the two layers aligned. A longer stitch length and tighter tension will produce fuller gathers. (Page 15)
What is the Ruffler Foot and what can it create?
The Ruffler Foot is used to create perfectly spaced pleats and gathers, and can also make pleated or gathered ruffles that are simultaneously stitched to a project. It has a Ruffler Regulator (determines tuck frequency), Adjusting Screw (determines tuck depth), Ruffling Blade (forms gathers/pleats), Separator Blade (bottom plate), and Separator Guides (fabric edge slots). You can make ruffles alone or attach them to fabric in one operation by positioning fabric between the blades and stitching. (Page 26)
What accessories are included in the Singer Road Show Presser Feet Kit?
The Singer Road Show Presser Feet Kit (#u2-SU5-021) includes nine presser feet and a twin needle in a Singer display case. The included feet are: Blind Hem Foot, Cording Foot, Even Feed Foot, Free Motion/Darning Foot, Gathering Foot, Overcasting Foot, Rolled Hem Foot, Satin Stitch Foot, and Straight Stitch Foot, plus a Twin Needle Size 90/14. (Page 37)
How do I use the Sew Easy Foot on my Singer Simple sewing machine?
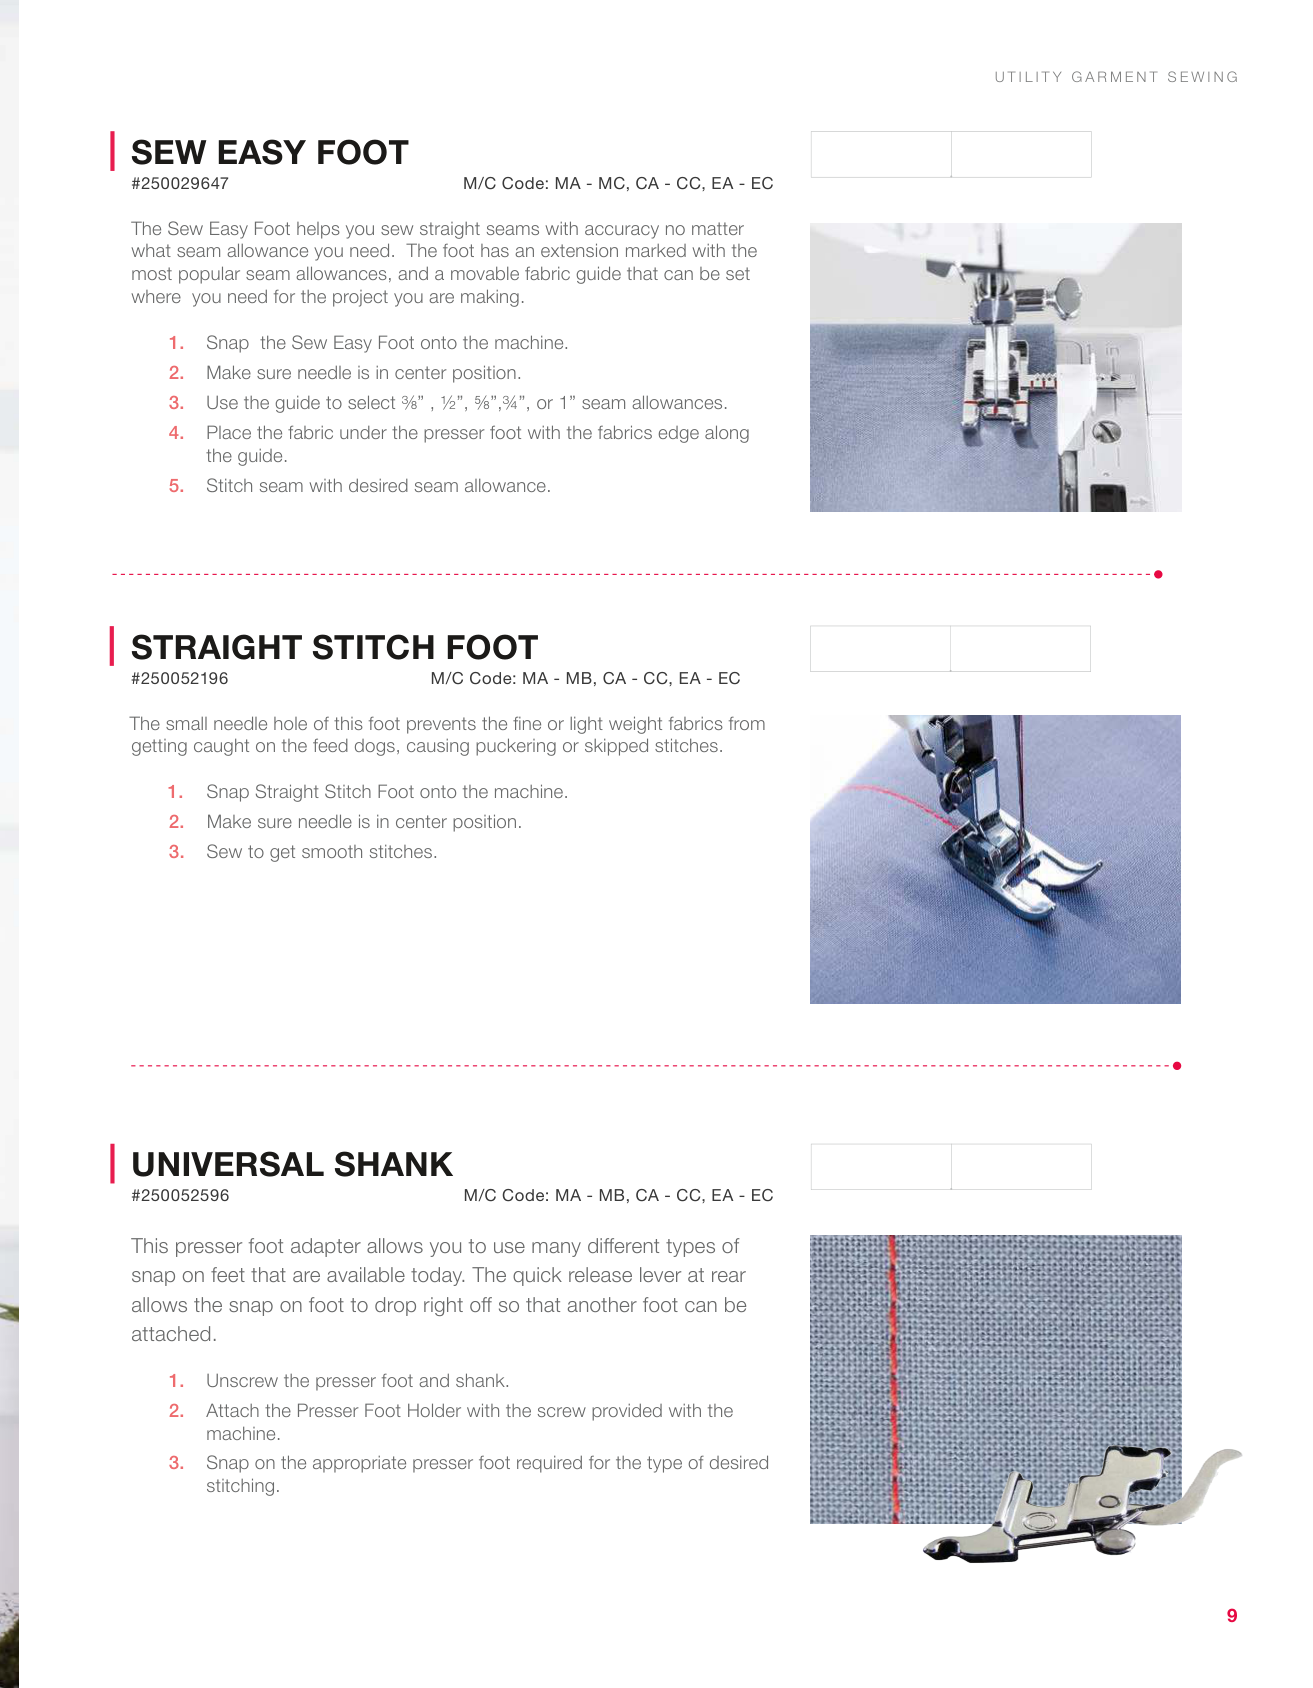
First, snap the Sew Easy Foot onto your machine and ensure the needle is in center position. Select your desired seam allowance (⅜", ½", ⅝", ¾", or 1") using the marked extension and movable fabric guide. Place the fabric under the presser foot with its edge along the guide and stitch your seam with the desired seam allowance. (Page 9)
Full Manual
66 pages
Accessory User Guide 2022
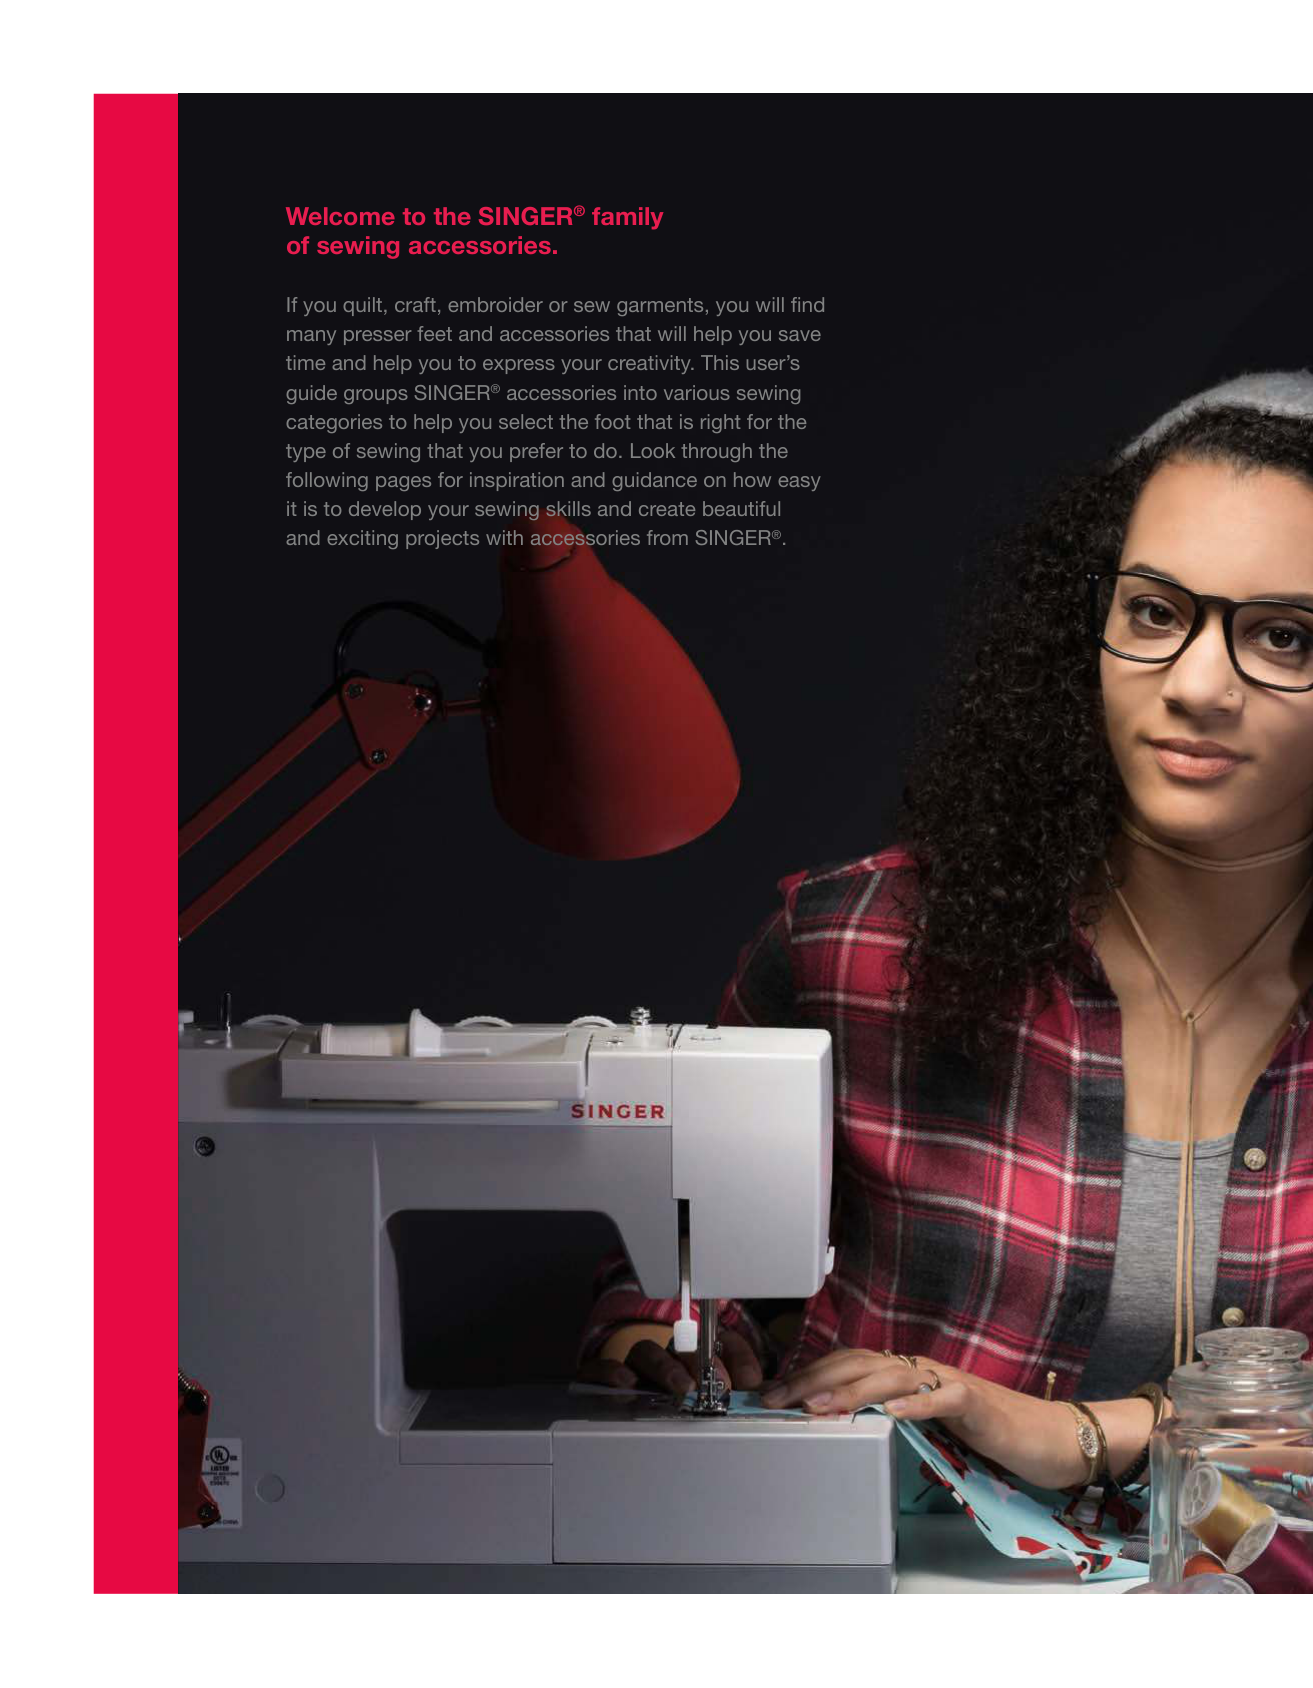
Welcome to the SINGER® family of sewing accessories. If you quilt, craft, embroider or sew garments, you will find many presser feet and accessories that will help you save time and help you to express your creativity. This user’s guide groups SINGER® accessories into various sewing categories to help you select the foot that is right for the type of sewing that you prefer to do. Look through the following pages for inspiration and guidance on how easy it is to develop your sewing skills and create beautiful and exciting projects with accessories from SINGER®.
Table of Contents SINGER® Sewing & Embroidery Machines ..................4-7 Utility Garment Sewing ............................................8-18 Decorative & Crafting Sewing .................................19-27 Quilting .................................................................28-35 Presser Feet Kits ..................................................36-37
Embroidery ...........................................................38-39 Additional Accessories...........................................40-41 Overlock Sewing and Embellishment ......................42-49 Notions (Needles,Scissors and Dress Forms) ..........50-69 Index ....................................................................70-71
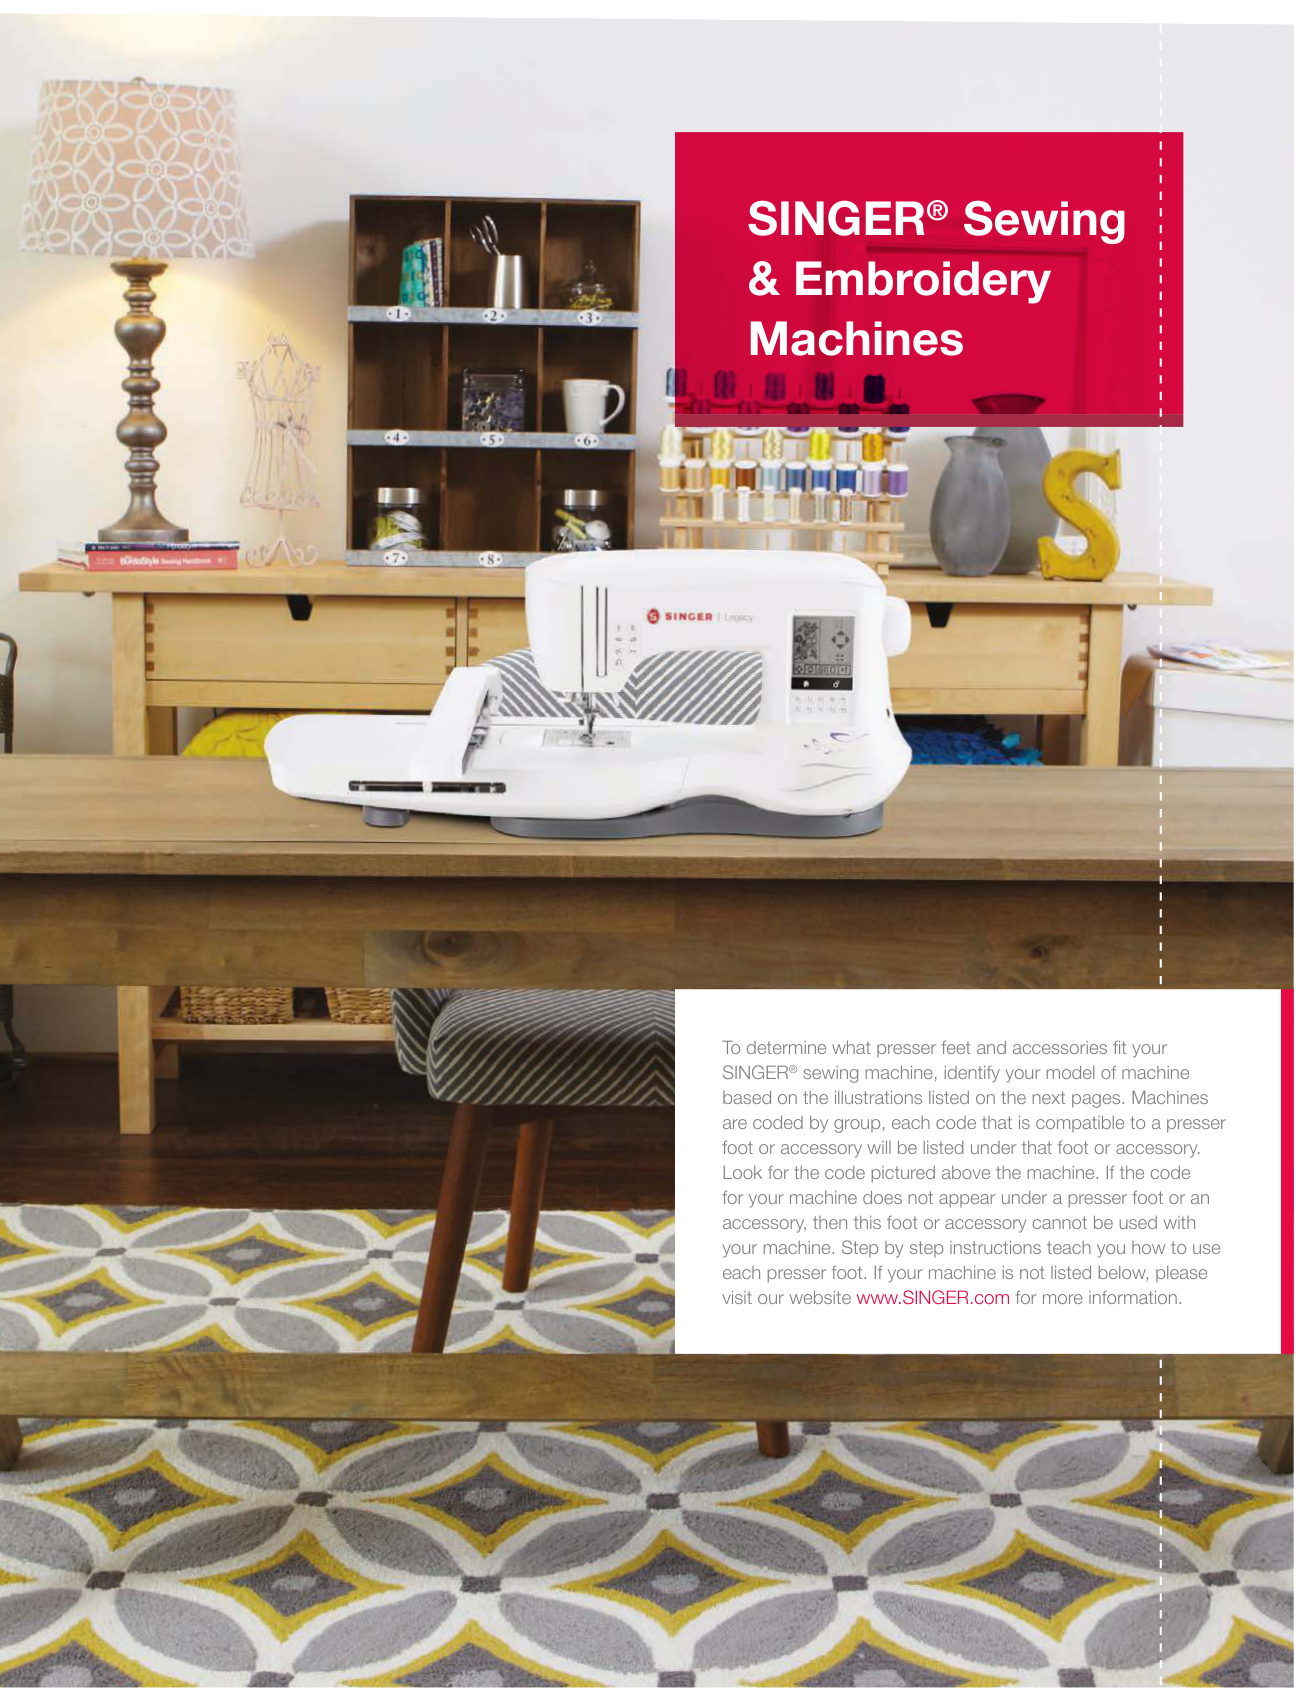
4 SINGER® Sewing & Embroidery Machines To determine what presser feet and accessories fit your SINGER® sewing machine, identify your model of machine based on the illustrations listed on the next pages. Machines are coded by group, each code that is compatible to a presser foot or accessory will be listed under that foot or accessory. Look for the code pictured above the machine. If the code for your machine does not appear under a presser foot or an accessory, then this foot or accessory cannot be used with your machine. Step by step instructions teach you how to use each presser foot. If your machine is not listed below, please visit our website www.SINGER.com for more information.
5 Heavy Duty 4411 4423
4432 Hd
44S
5511 5523Hd6380
HD6330 (Denim)Cp6350M
(Cosplay)Talent 5532
44S
33213323S
3323 Fashion/Inspiration 4205 4206 4210 4212 4218 4220 4228 MA Series MB Series MC Series Brilliance 5400 5500 6160 6180 6199 6699C5200
CA SeriesS I N G E R ® S E W I N G & E M B R O I D E R Y M A C H I N E S
Simple 1732 2932 3116 3221 3232 3210 Simple 3223 Simple 3229 Simple Mechanical 15071507Wc
1525/1725 1748 82808280L
8280Smart Ii
1105 1116 1120 1130 7020M1500
M1600
M2100
M2400
M3200
M3300
M3400
M3500
Promise 1408 1409 1412 Promise 1512 Promise II Tradition 2250 2259 2263 2273 2277 2282 Fashionmate 5200 5560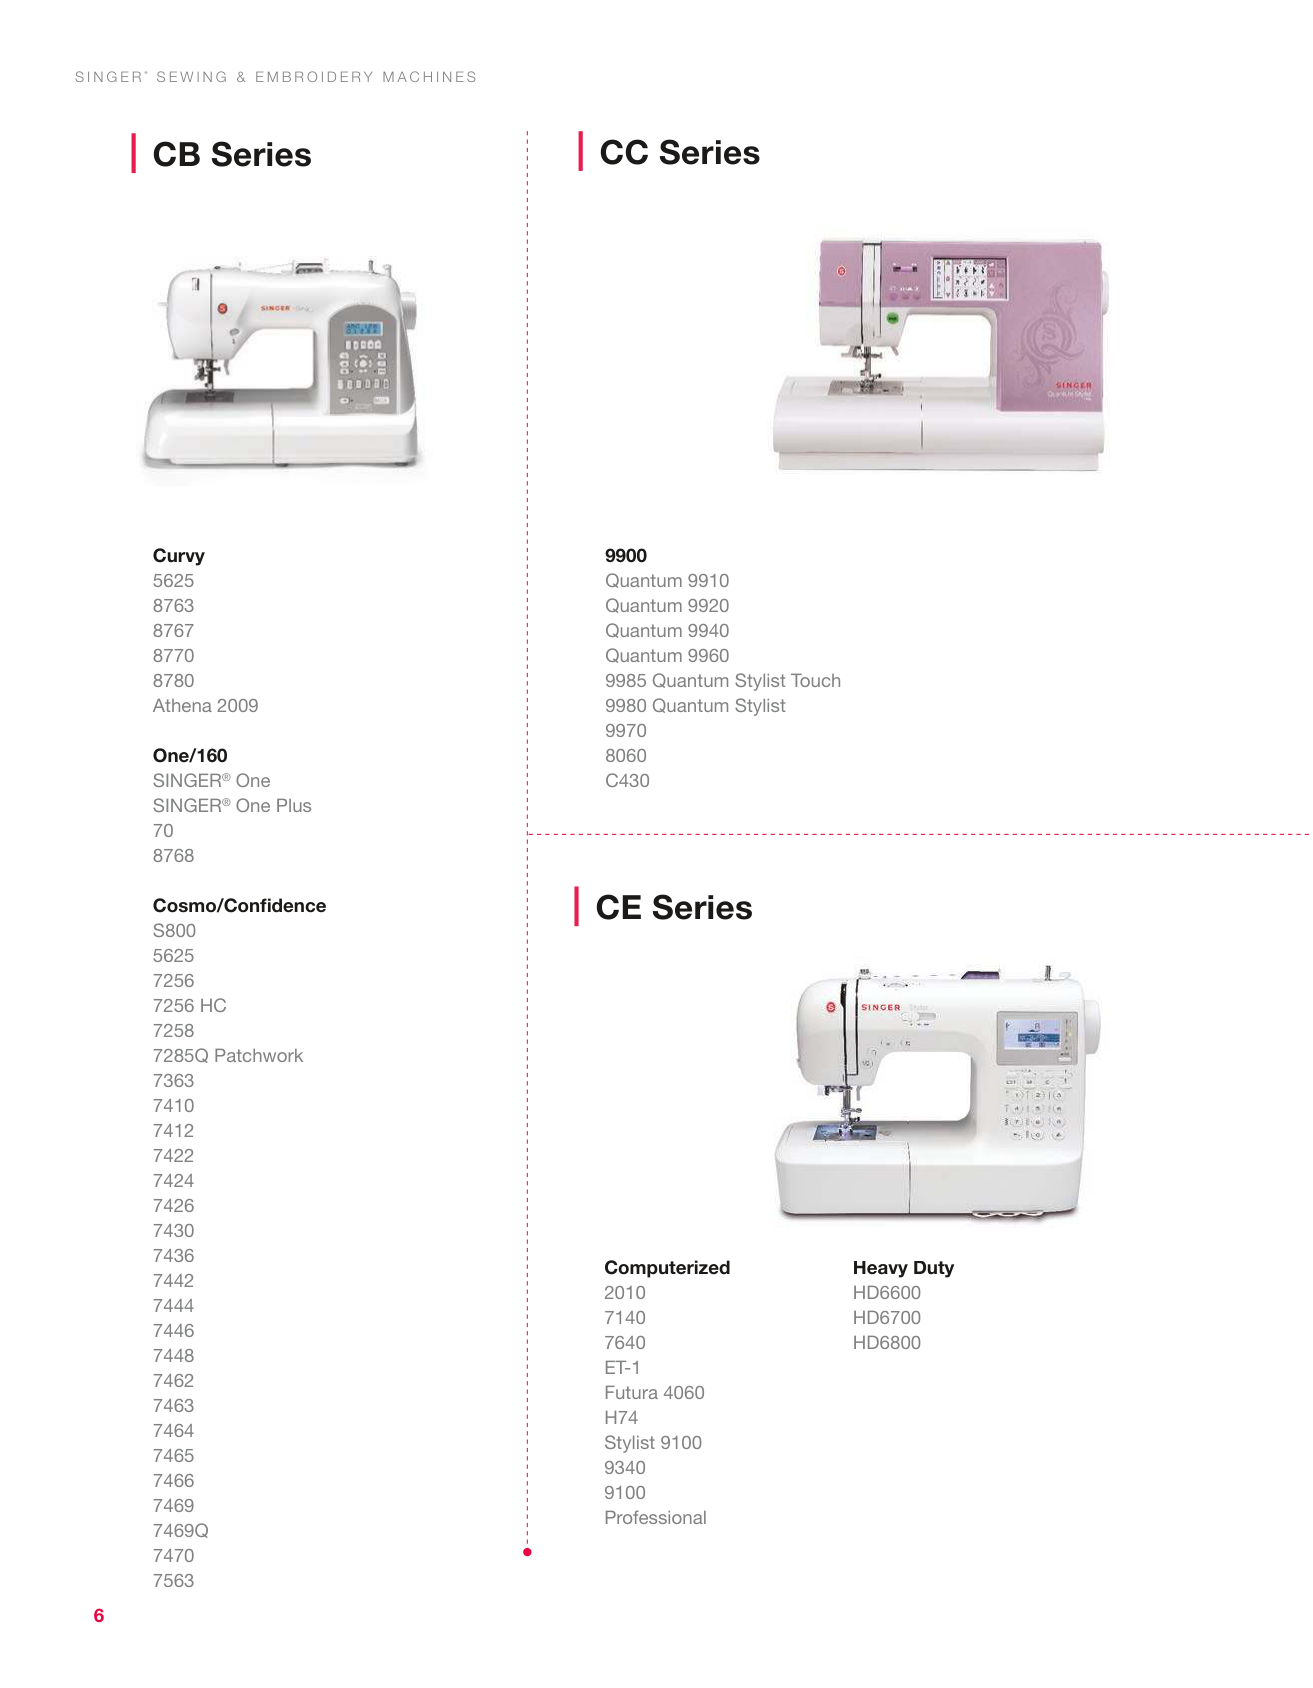
6 9900 Quantum 9910 Quantum 9920 Quantum 9940 Quantum 9960 9985 Quantum Stylist Touch 9980 Quantum Stylist 9970 8060
C430
Computerized 20107140 7640
Et-1
Futura 4060H74
Stylist 9100 9340 9100 Professional Heavy DutyHd6600
Hd6700
Hd6800
CC Series CE Series Curvy5625 8763 8767 8770 8780 Athena 2009 One/160 SINGER® One SINGER® One Plus 70 8768 Cosmo/Confidence
S800
5625 72567256 Hc
7258 7285Q Patchwork 7363 7410 7412 7422 7424 7426 7430 7436 7442 7444 7446 7448 7462 7463 7464 7465 7466 74697469Q
7470 7563 CB SeriesS I N G E R ® S E W I N G & E M B R O I D E R Y M A C H I N E S
7
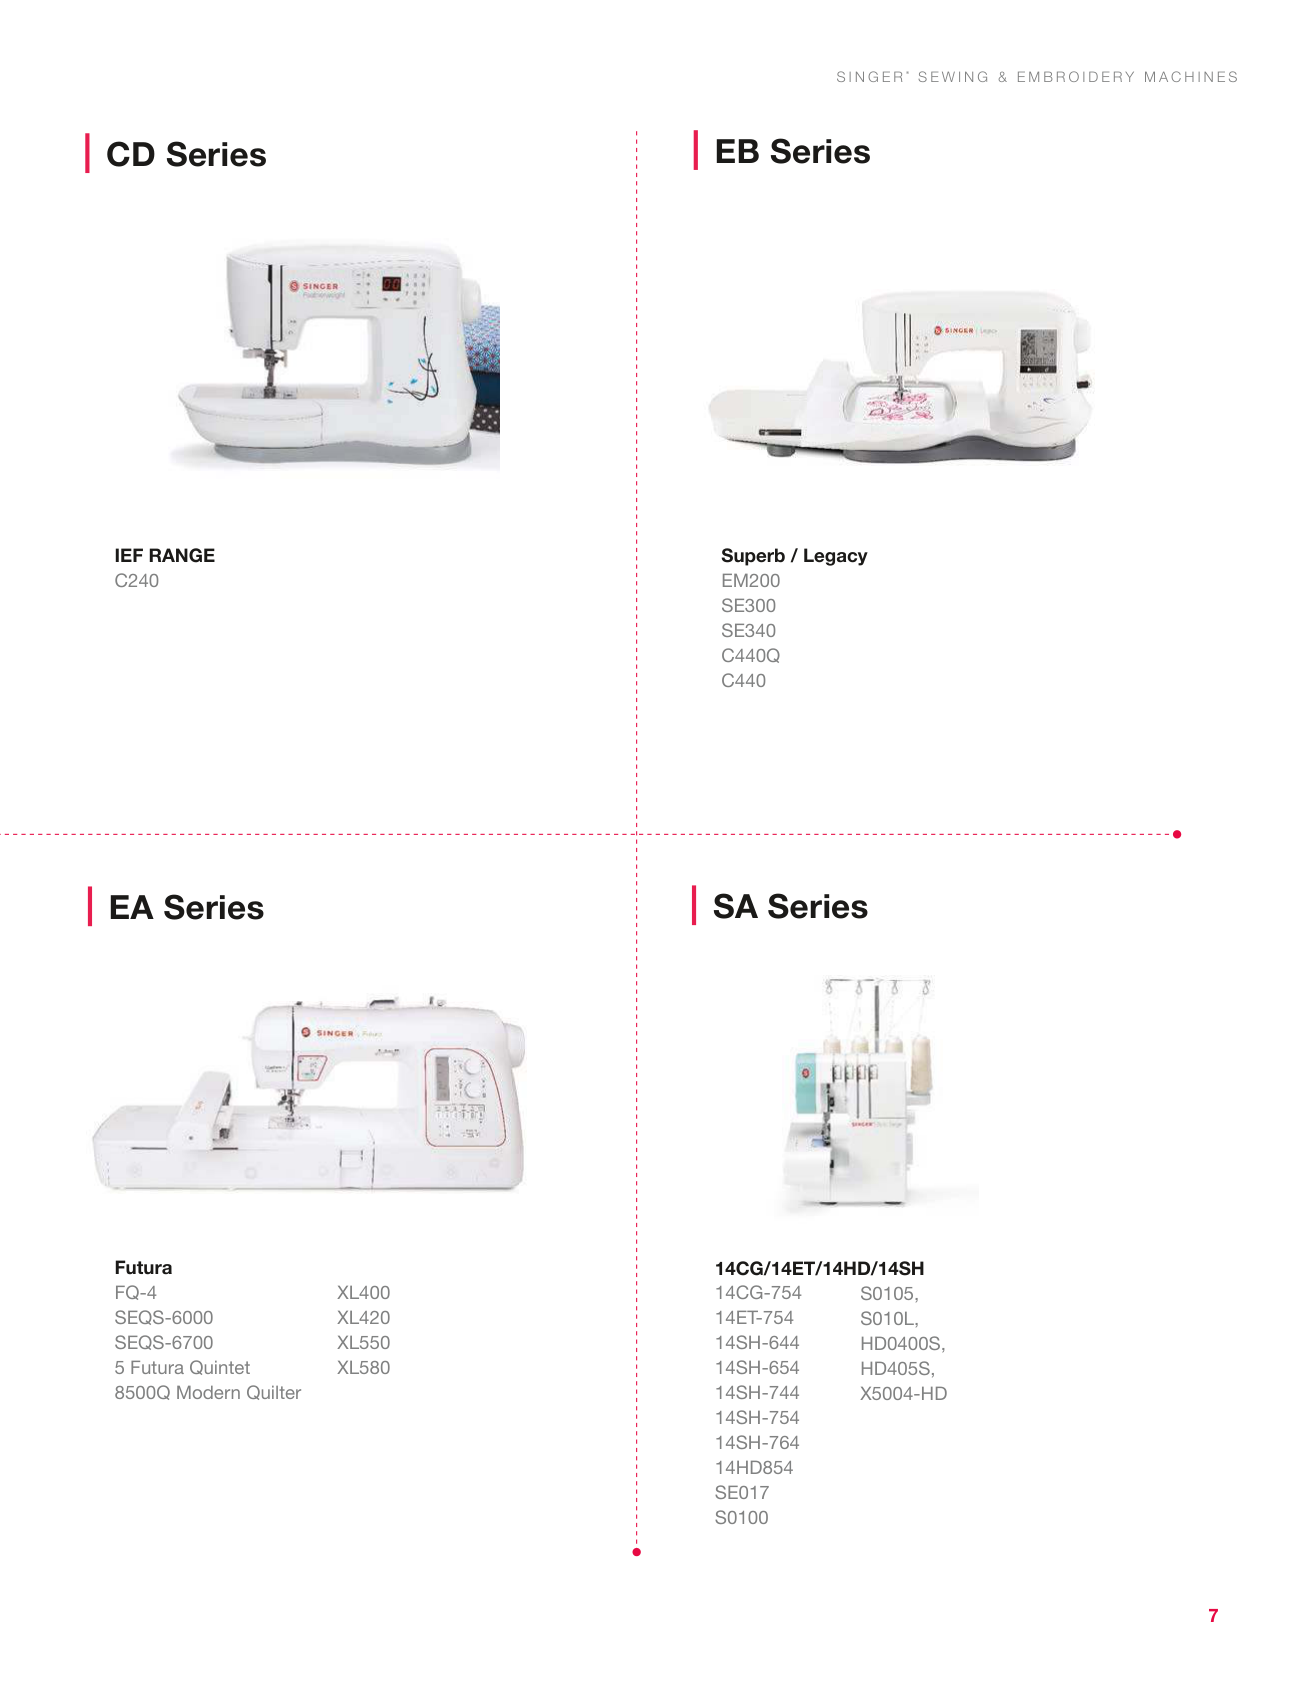
Ief Range
C240
FuturaFq-4
Seqs-6000
Seqs-6700
5 Futura Quintet 8500Q Modern QuilterXl400
Xl420
Xl550
Xl580
CD Series EA Series Superb / LegacyEm200
Se300
Se340
C440Q
C440
14Cg/14Et/14Hd/14Sh
14Cg-754
14Et-754
14Sh-644
14Sh-654
14Sh-744
14Sh-754
14Sh-764
14Hd854
Se017
S0100
EB Series SA SeriesS I N G E R ® S E W I N G & E M B R O I D E R Y M A C H I N E S
S0105,
S010L,
Hd0400S,
Hd405S,
X5004-Hd
8 Utility Garment Sewing
9
Sew Easy Foot
#250029647 M/C Code: MA - MC, CA - CC, EA - EC The Sew Easy Foot helps you sew straight seams with accuracy no matter what seam allowance you need. The foot has an extension marked with the most popular seam allowances, and a movable fabric guide that can be set where you need for the project you are making.U T I L I T Y G A R M E N T S E W I N G
Straight Stitch Foot
#250052196M/C Code: MA - MB, CA - CC, EA - EC The small needle hole of this foot prevents the fine or light weight fabrics from getting caught on the feed dogs, causing puckering or skipped stitches.
Universal Shank
#250052596 M/C Code: MA - MB, CA - CC, EA - EC This presser foot adapter allows you to use many different types of snap on feet that are available today. The quick release lever at rear allows the snap on foot to drop right off so that another foot can be attached.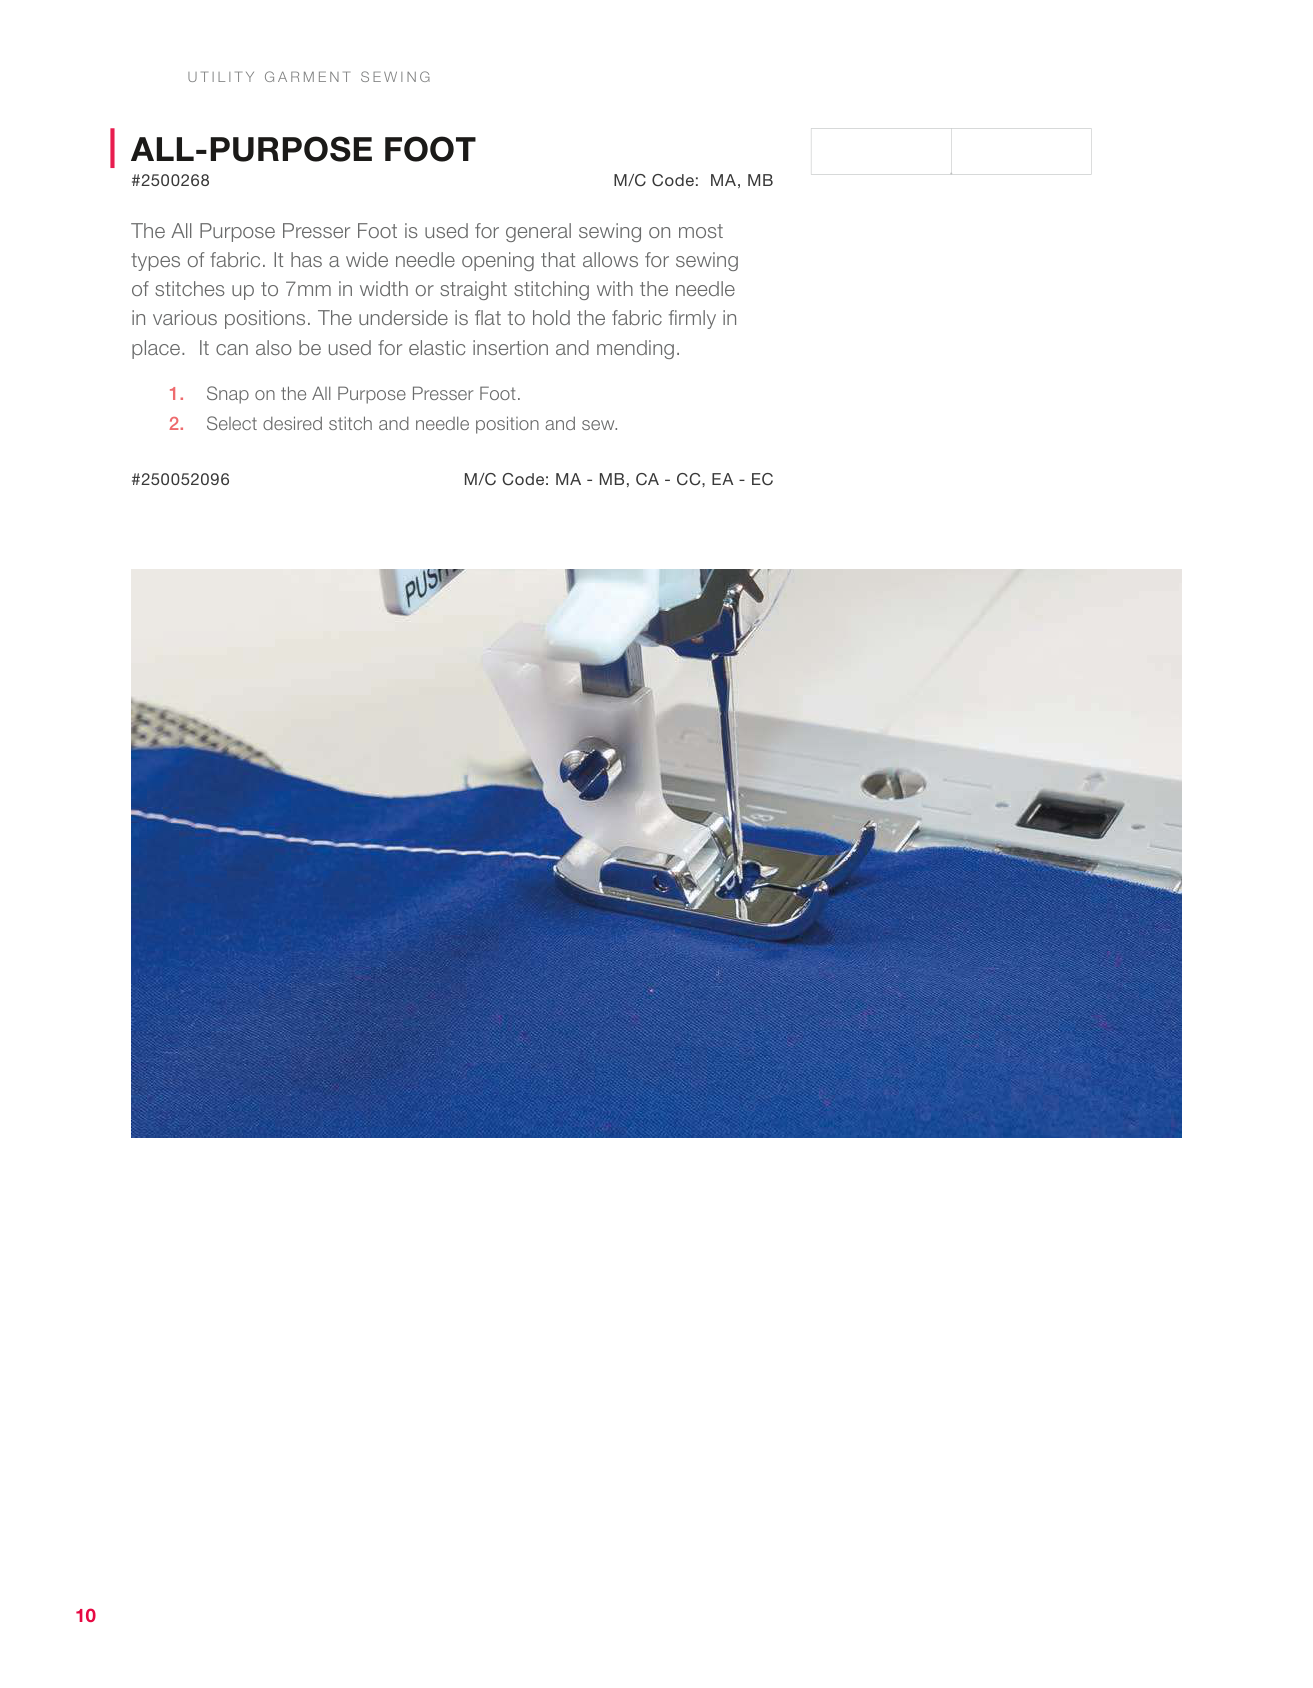
10
All-Purpose Foot
#2500268 M/C Code: MA, MB The All Purpose Presser Foot is used for general sewing on most types of fabric. It has a wide needle opening that allows for sewing of stitches up to 7mm in width or straight stitching with the needle in various positions. The underside is flat to hold the fabric firmly in place. It can also be used for elastic insertion and mending.U T I L I T Y G A R M E N T S E W I N G
11
Blind Hem Foot
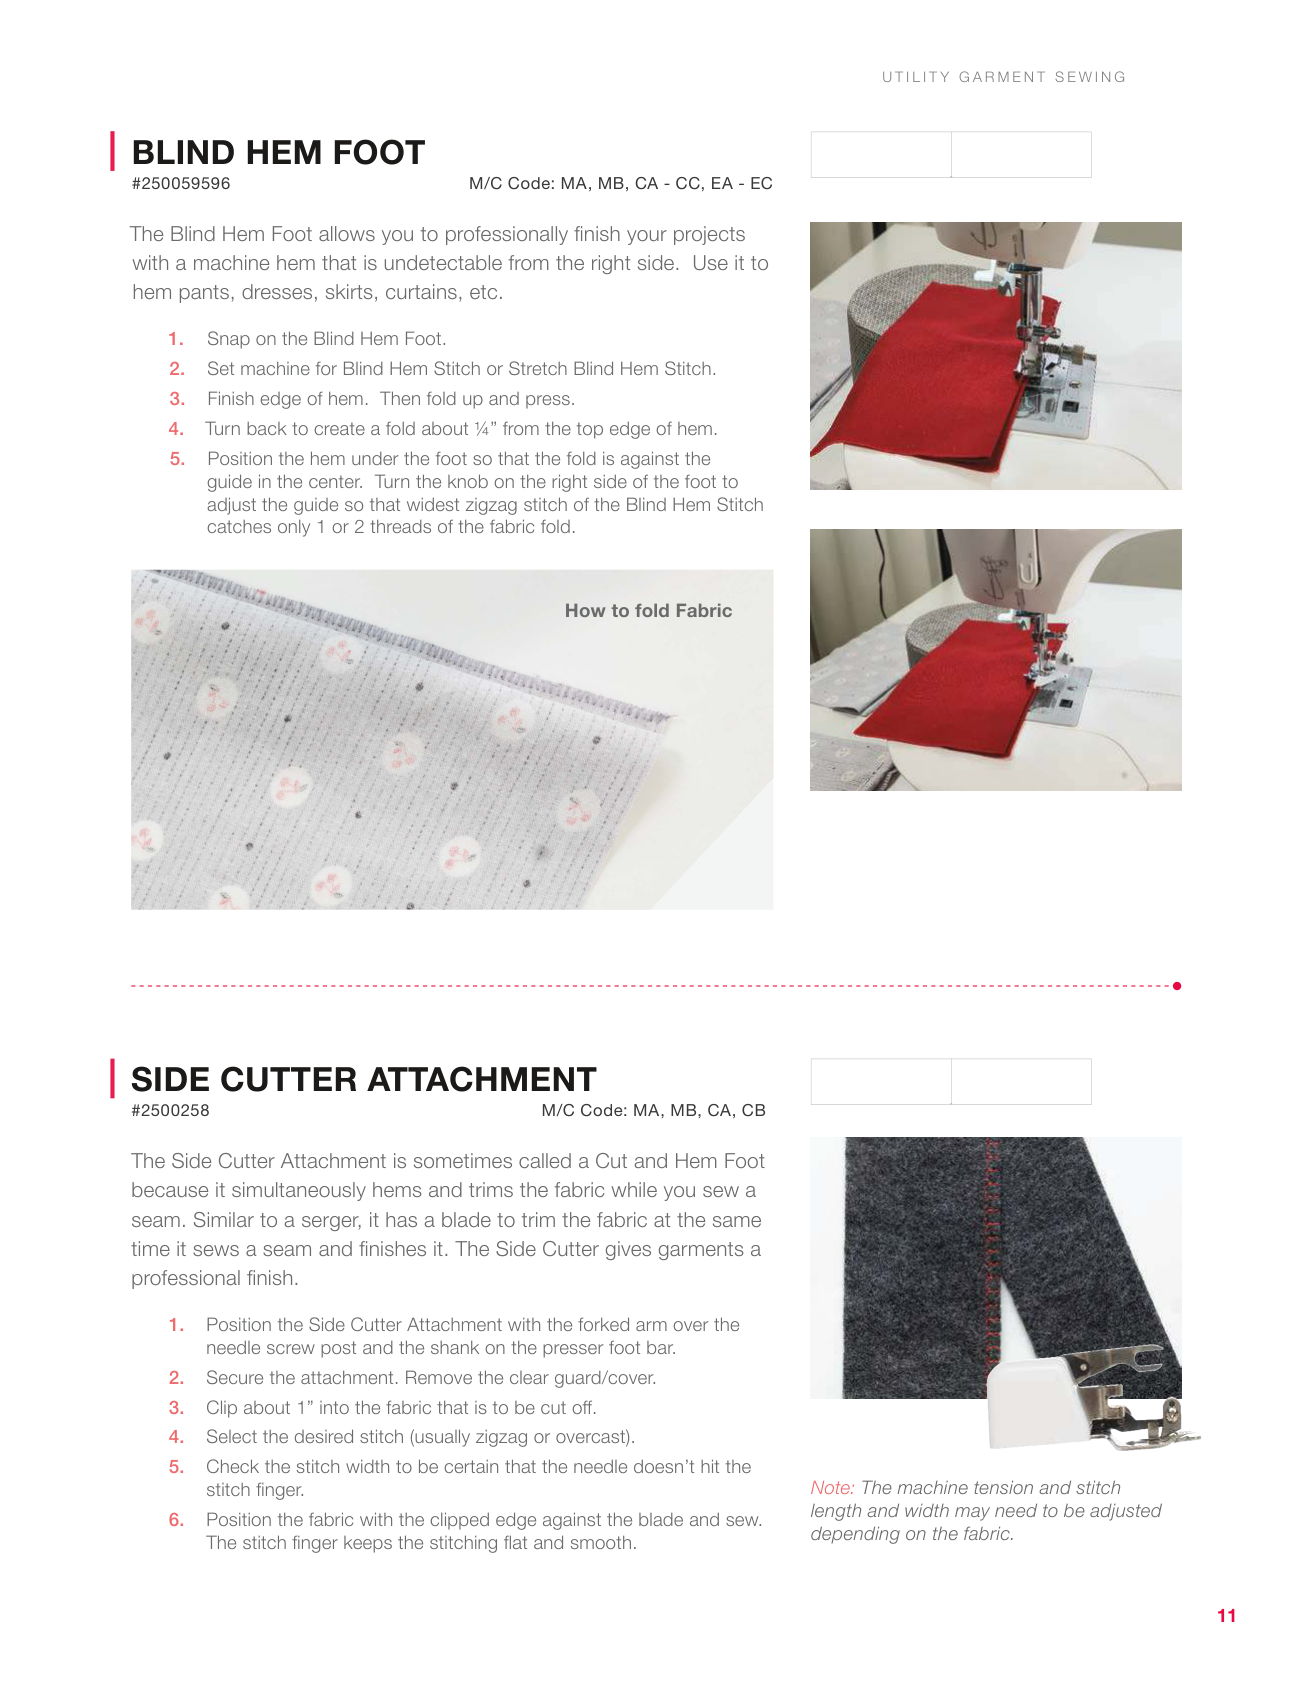
#250059596 M/C Code: MA, MB, CA - CC, EA - EC The Blind Hem Foot allows you to professionally finish your projects with a machine hem that is undetectable from the right side. Use it to hem pants, dresses, skirts, curtains, etc.Side Cutter Attachment
#2500258M/C Code: MA, MB, CA, CB The Side Cutter Attachment is sometimes called a Cut and Hem Foot because it simultaneously hems and trims the fabric while you sew a seam. Similar to a serger, it has a blade to trim the fabric at the same time it sews a seam and finishes it. The Side Cutter gives garments a professional finish.
U T I L I T Y G A R M E N T S E W I N G
12
Zipper Foot
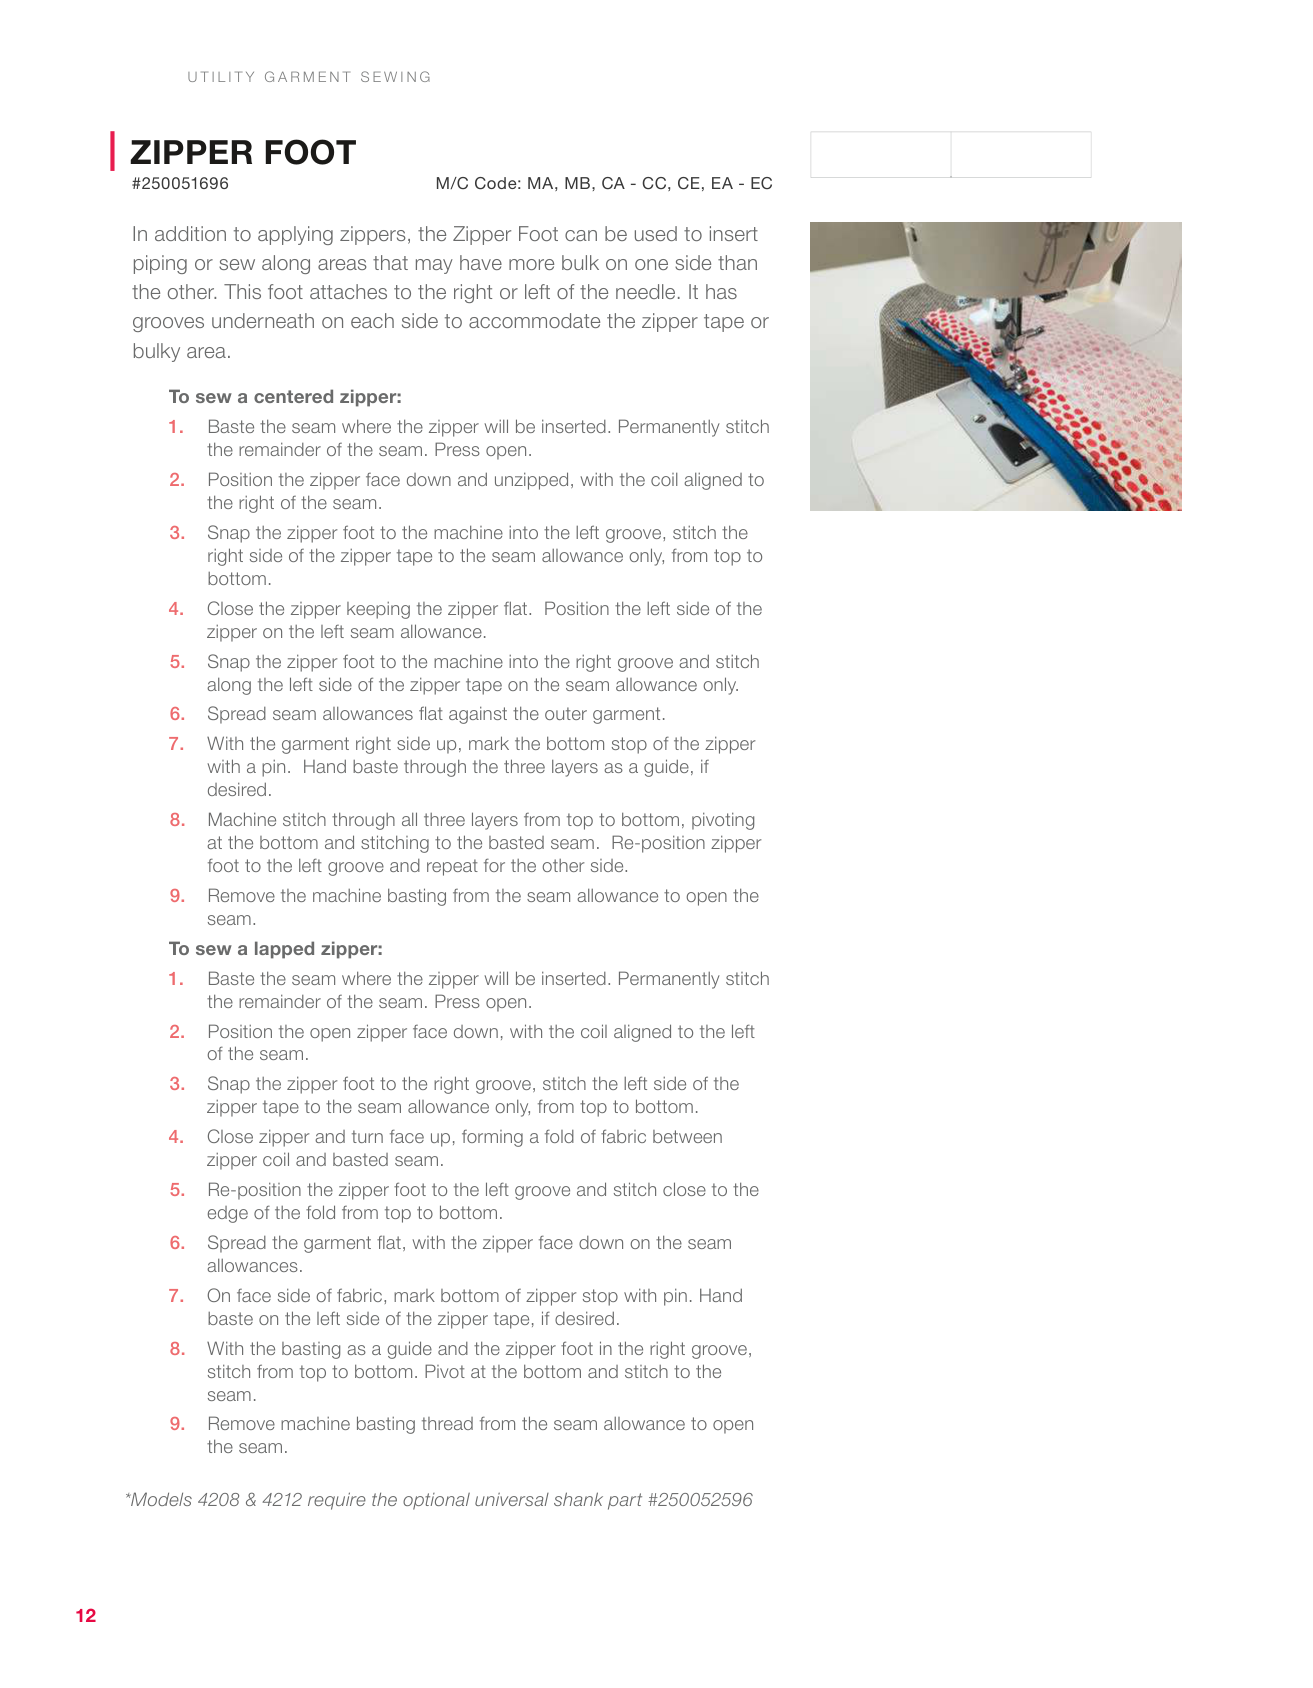
#250051696 M/C Code: MA, MB, CA - CC, CE, EA - EC In addition to applying zippers, the Zipper Foot can be used to insert piping or sew along areas that may have more bulk on one side than the other. This foot attaches to the right or left of the needle. It has grooves underneath on each side to accommodate the zipper tape or bulky area. To sew a centered zipper:U T I L I T Y G A R M E N T S E W I N G
13
Invisible Zipper Foot
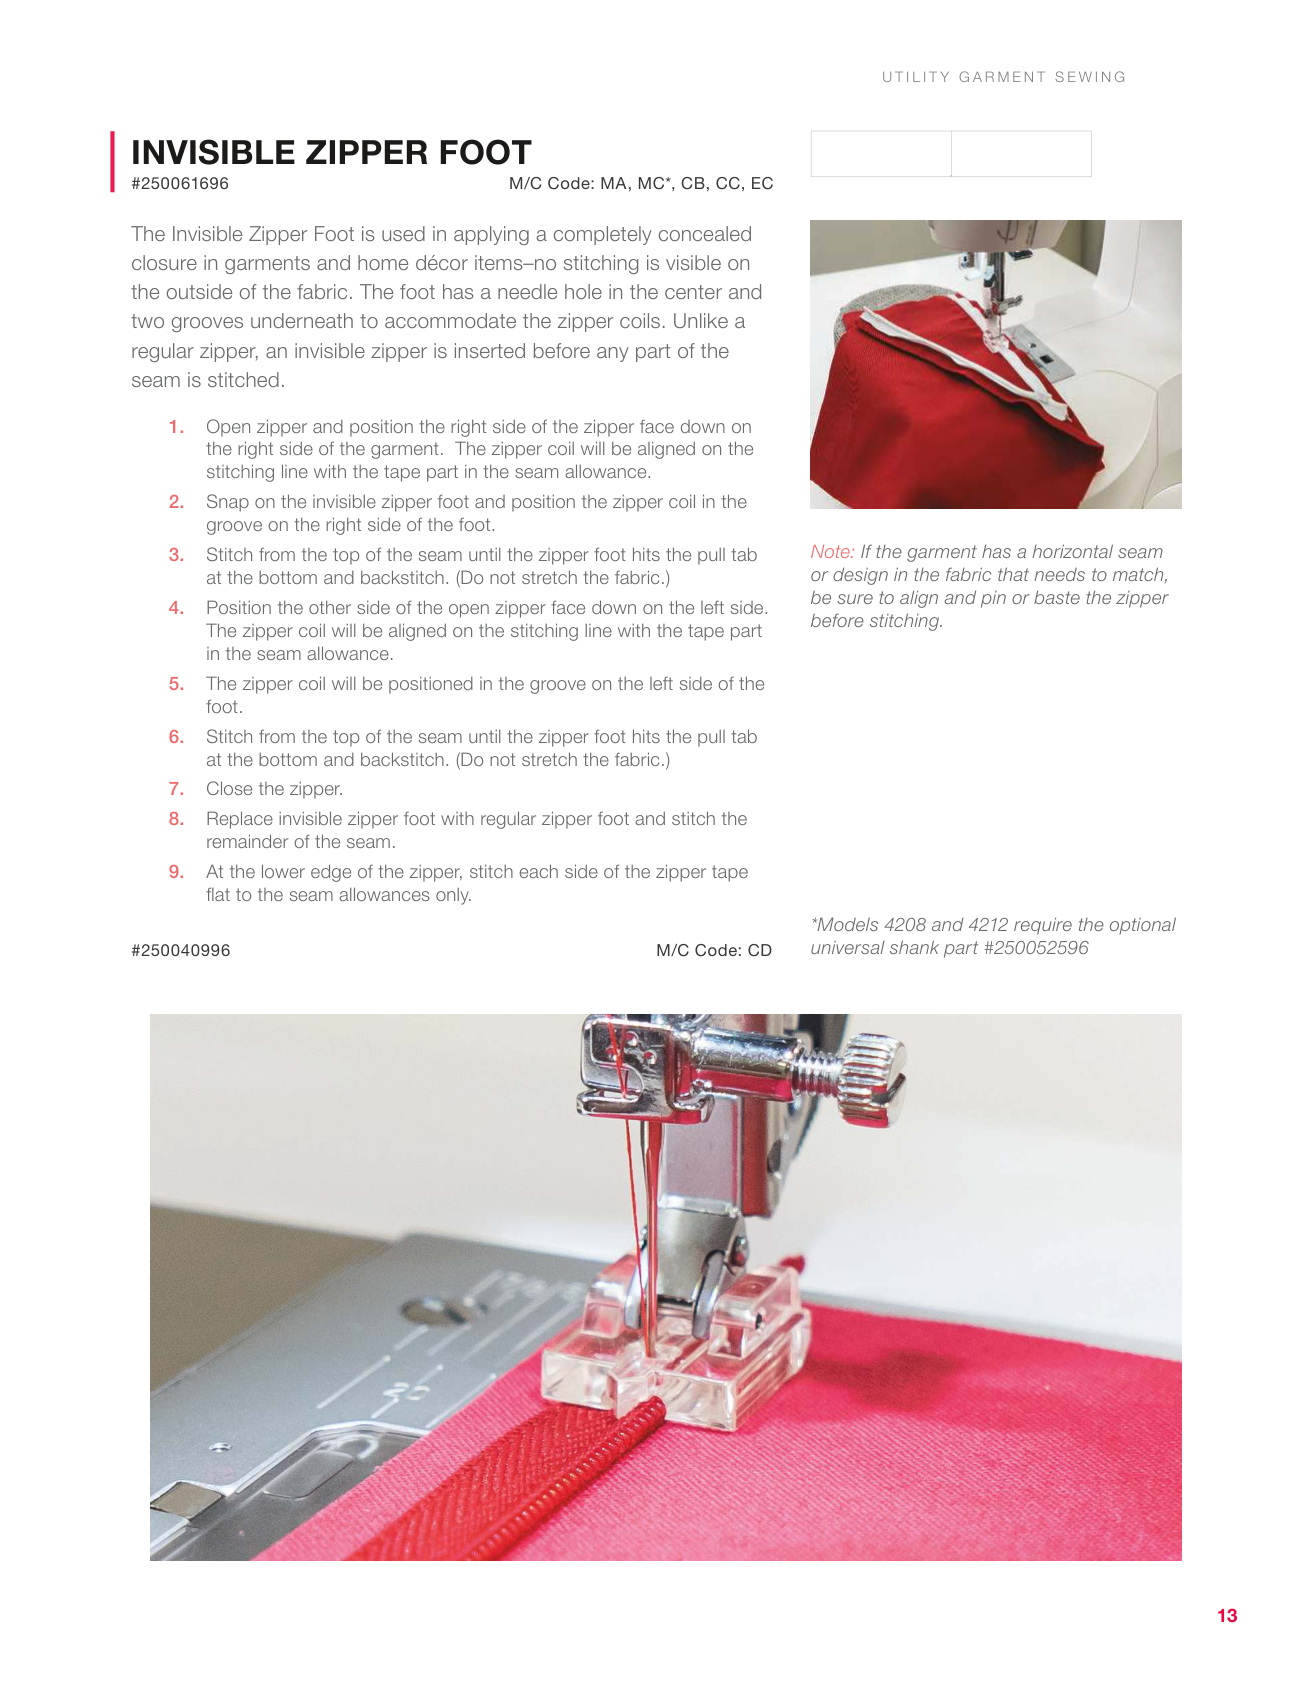
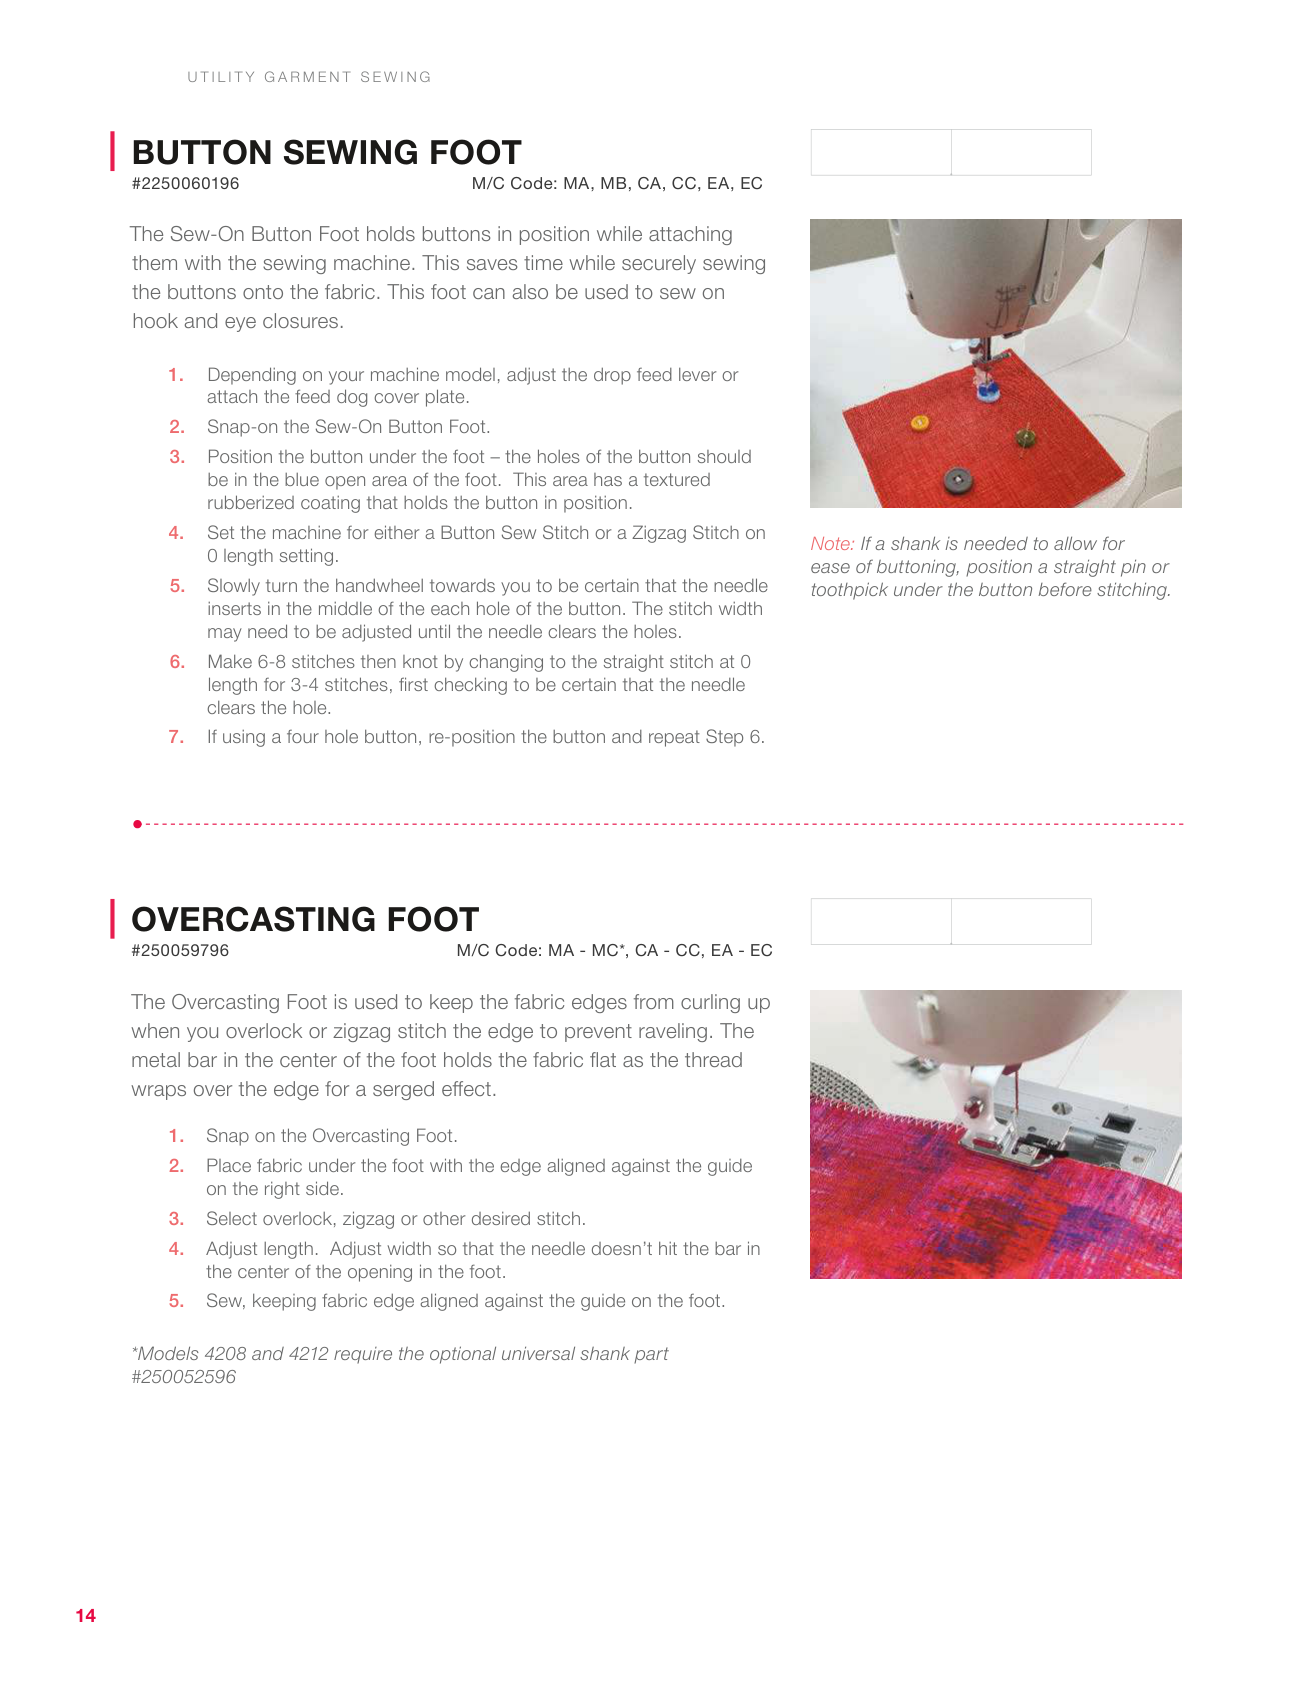
#250061696 M/C Code: MA, MC*, CB, CC, EC The Invisible Zipper Foot is used in applying a completely concealed closure in garments and home décor items–no stitching is visible on the outside of the fabric. The foot has a needle hole in the center and two grooves underneath to accommodate the zipper coils. Unlike a regular zipper, an invisible zipper is inserted before any part of the seam is stitched.M/C Code: CD *Models 4208 and 4212 require the optional universal shank part #250052596 Note: If the garment has a horizontal seam or design in the fabric that needs to match, be sure to align and pin or baste the zipper before stitching.
U T I L I T Y G A R M E N T S E W I N G
14
Button Sewing Foot
#2250060196M/C Code: MA, MB, CA, CC, EA, EC
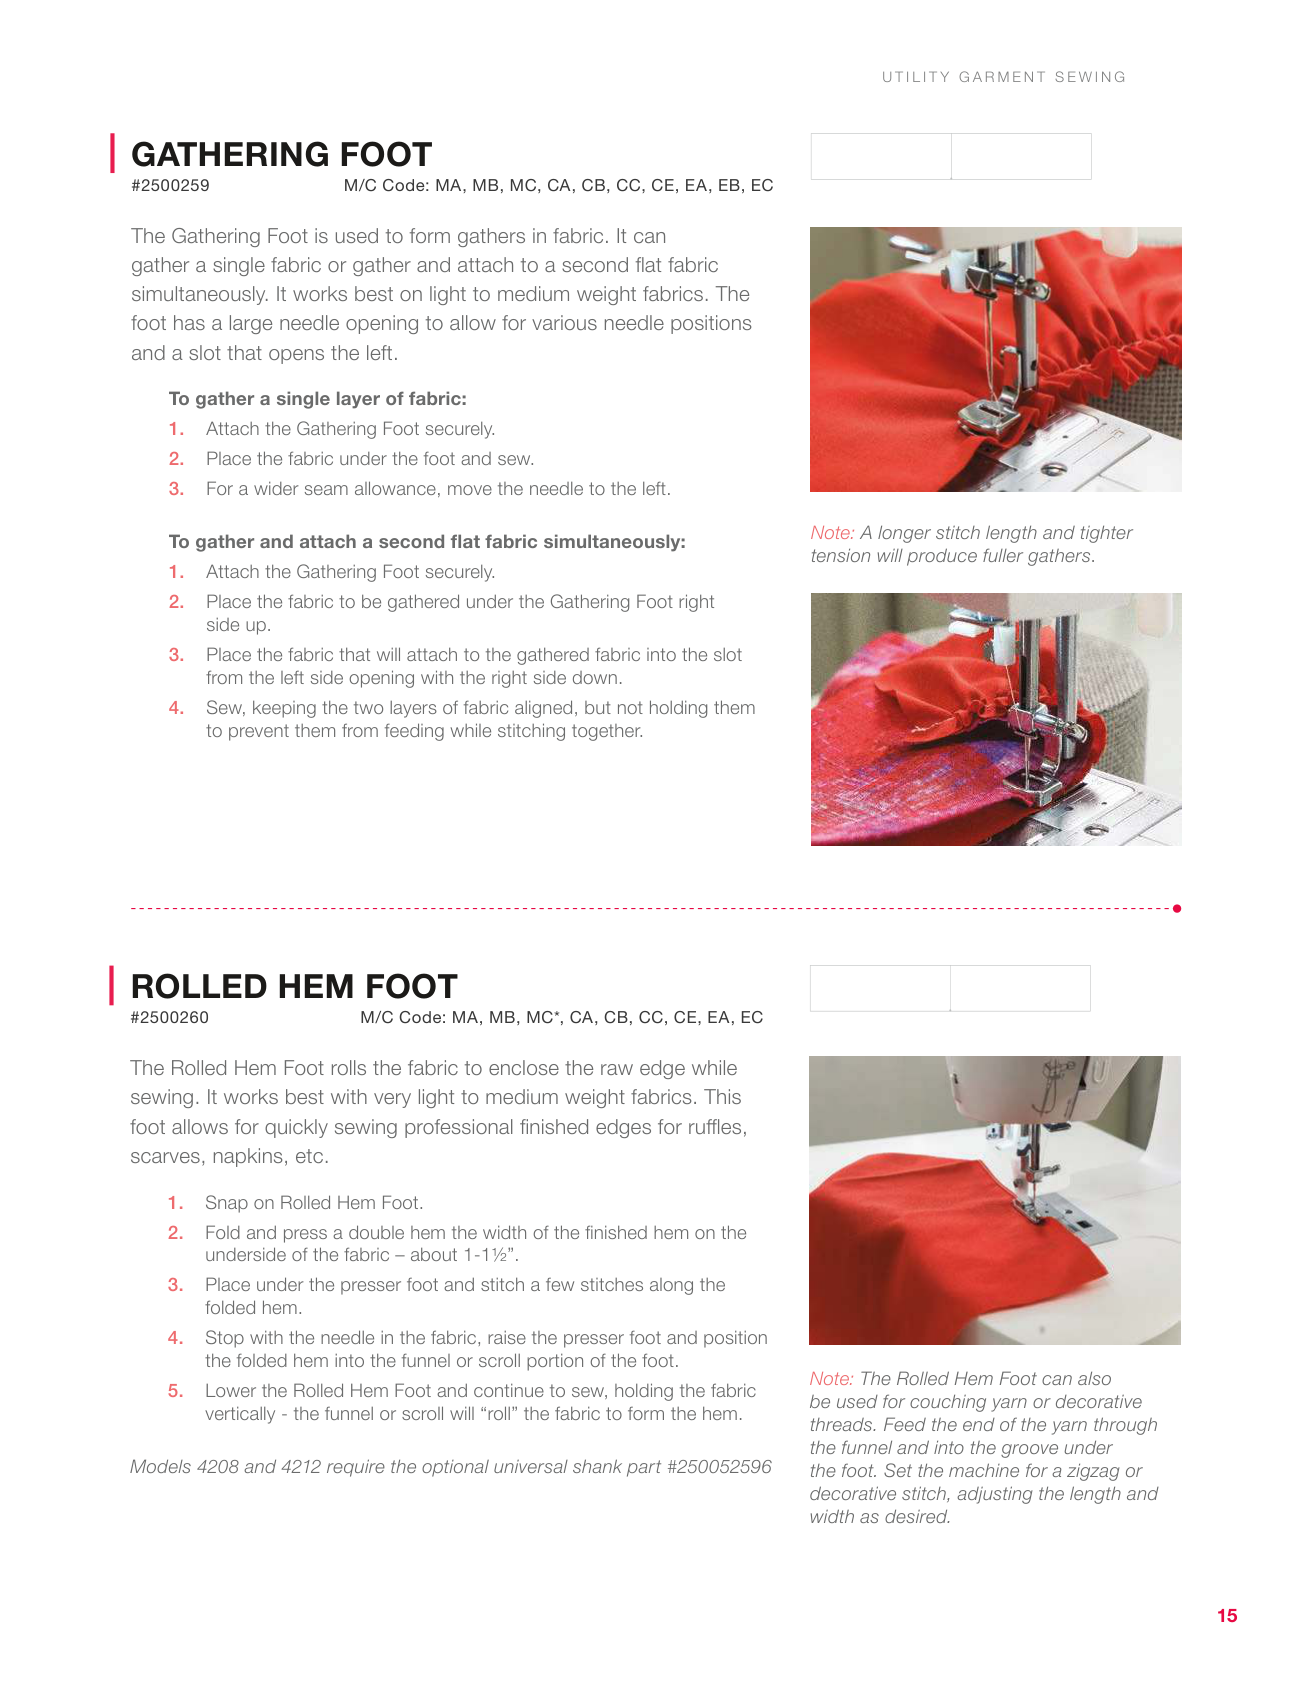
The Sew-On Button Foot holds buttons in position while attaching them with the sewing machine. This saves time while securely sewing the buttons onto the fabric. This foot can also be used to sew on hook and eye closures.
U T I L I T Y G A R M E N T S E W I N G
Overcasting Foot
#250059796M/C Code: MA - MC*, CA - CC, EA - EC The Overcasting Foot is used to keep the fabric edges from curling up when you overlock or zigzag stitch the edge to prevent raveling. The metal bar in the center of the foot holds the fabric flat as the thread wraps over the edge for a serged effect.
15
Gathering Foot
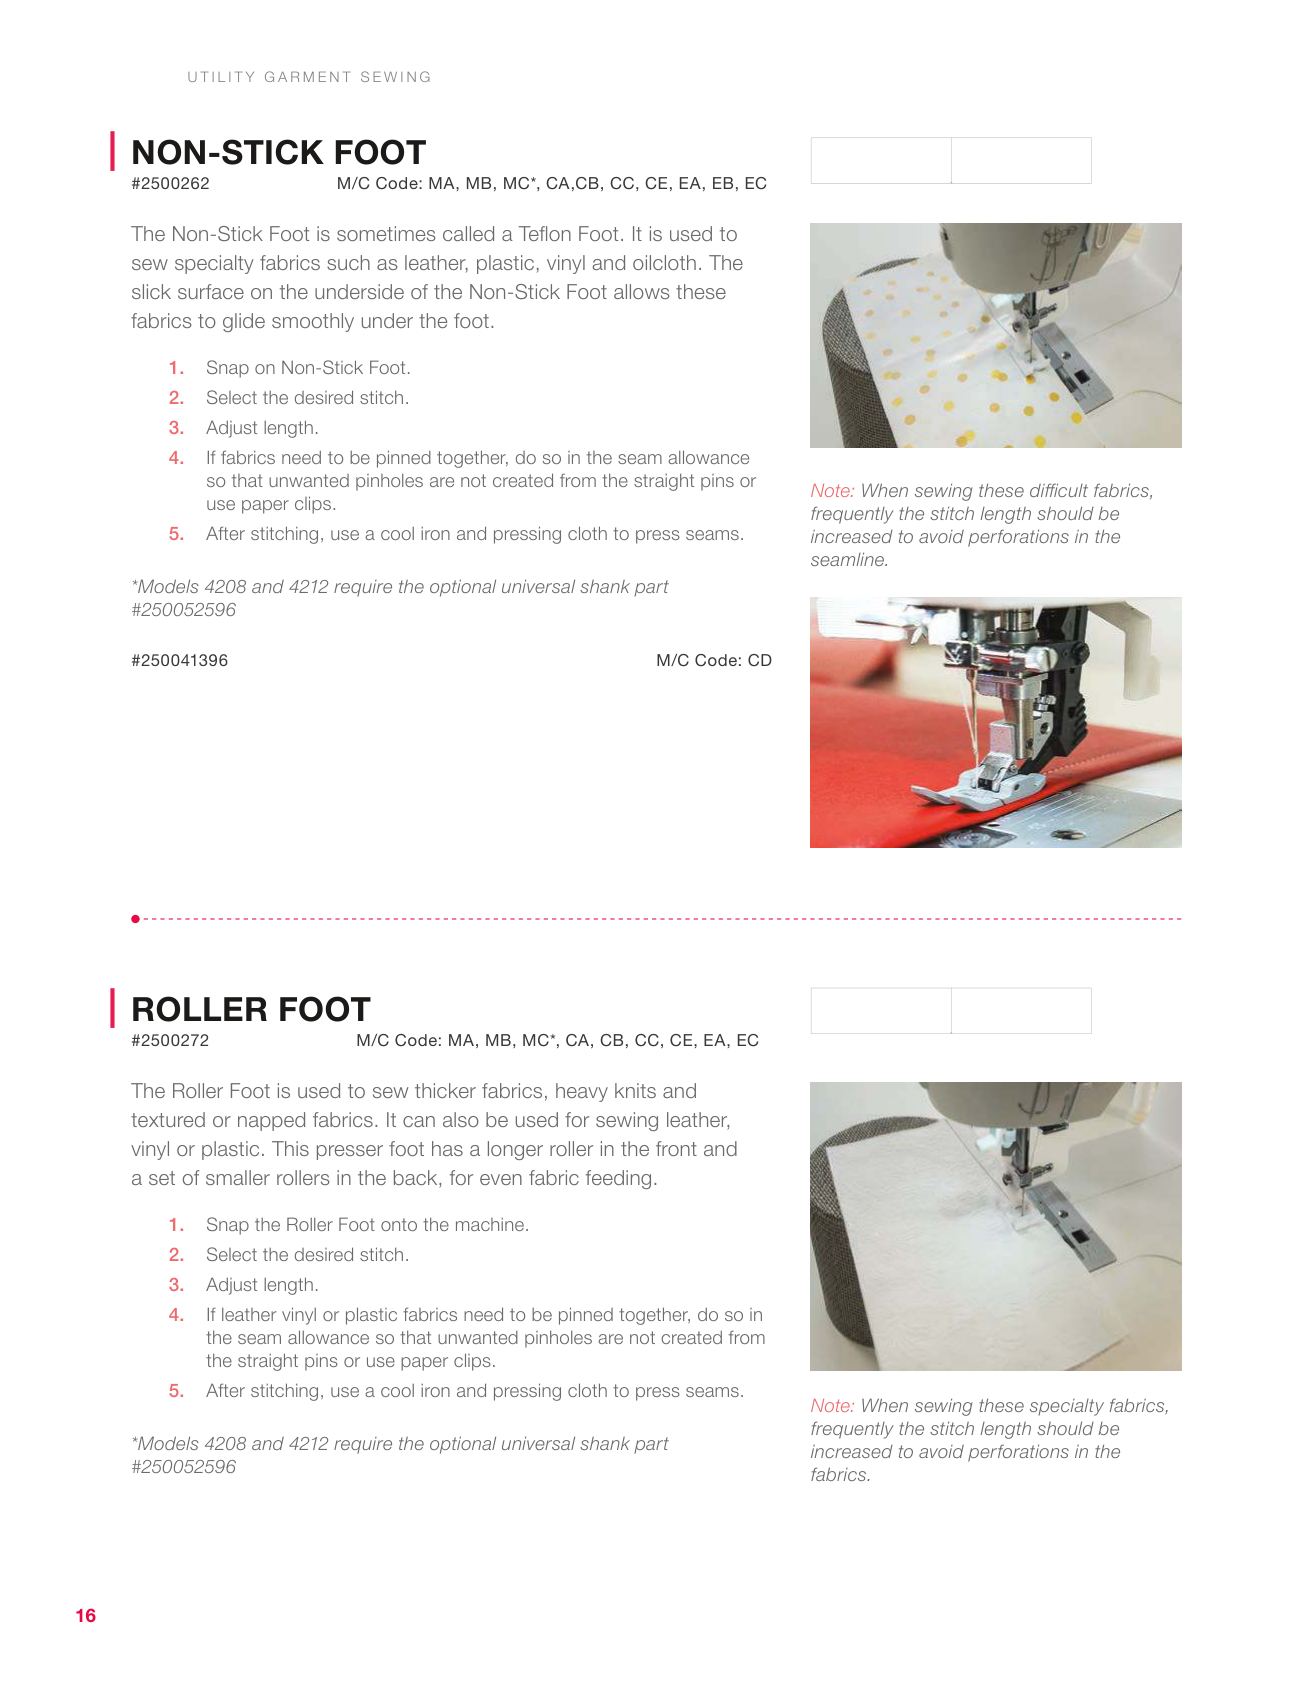
#2500259 M/C Code: MA, MB, MC, CA, CB, CC, CE, EA, EB, EC The Gathering Foot is used to form gathers in fabric. It can gather a single fabric or gather and attach to a second flat fabric simultaneously. It works best on light to medium weight fabrics. The foot has a large needle opening to allow for various needle positions and a slot that opens the left. To gather a single layer of fabric:To gather and attach a second flat fabric simultaneously:
U T I L I T Y G A R M E N T S E W I N G
Rolled Hem Foot
#2500260M/C Code: MA, MB, MC*, CA, CB, CC, CE, EA, EC The Rolled Hem Foot rolls the fabric to enclose the raw edge while sewing. It works best with very light to medium weight fabrics. This foot allows for quickly sewing professional finished edges for ruffles, scarves, napkins, etc.
16
Non-Stick Foot
#2500262 M/C Code: MA, MB, MC*, CA,CB, CC, CE, EA, EB, EC The Non-Stick Foot is sometimes called a Teflon Foot. It is used to sew specialty fabrics such as leather, plastic, vinyl and oilcloth. The slick surface on the underside of the Non-Stick Foot allows these fabrics to glide smoothly under the foot.M/C Code: CD Note: When sewing these difficult fabrics, frequently the stitch length should be increased to avoid perforations in the seamline.
U T I L I T Y G A R M E N T S E W I N G
Roller Foot
#2500272M/C Code: MA, MB, MC*, CA, CB, CC, CE, EA, EC The Roller Foot is used to sew thicker fabrics, heavy knits and textured or napped fabrics. It can also be used for sewing leather, vinyl or plastic. This presser foot has a longer roller in the front and a set of smaller rollers in the back, for even fabric feeding.
17
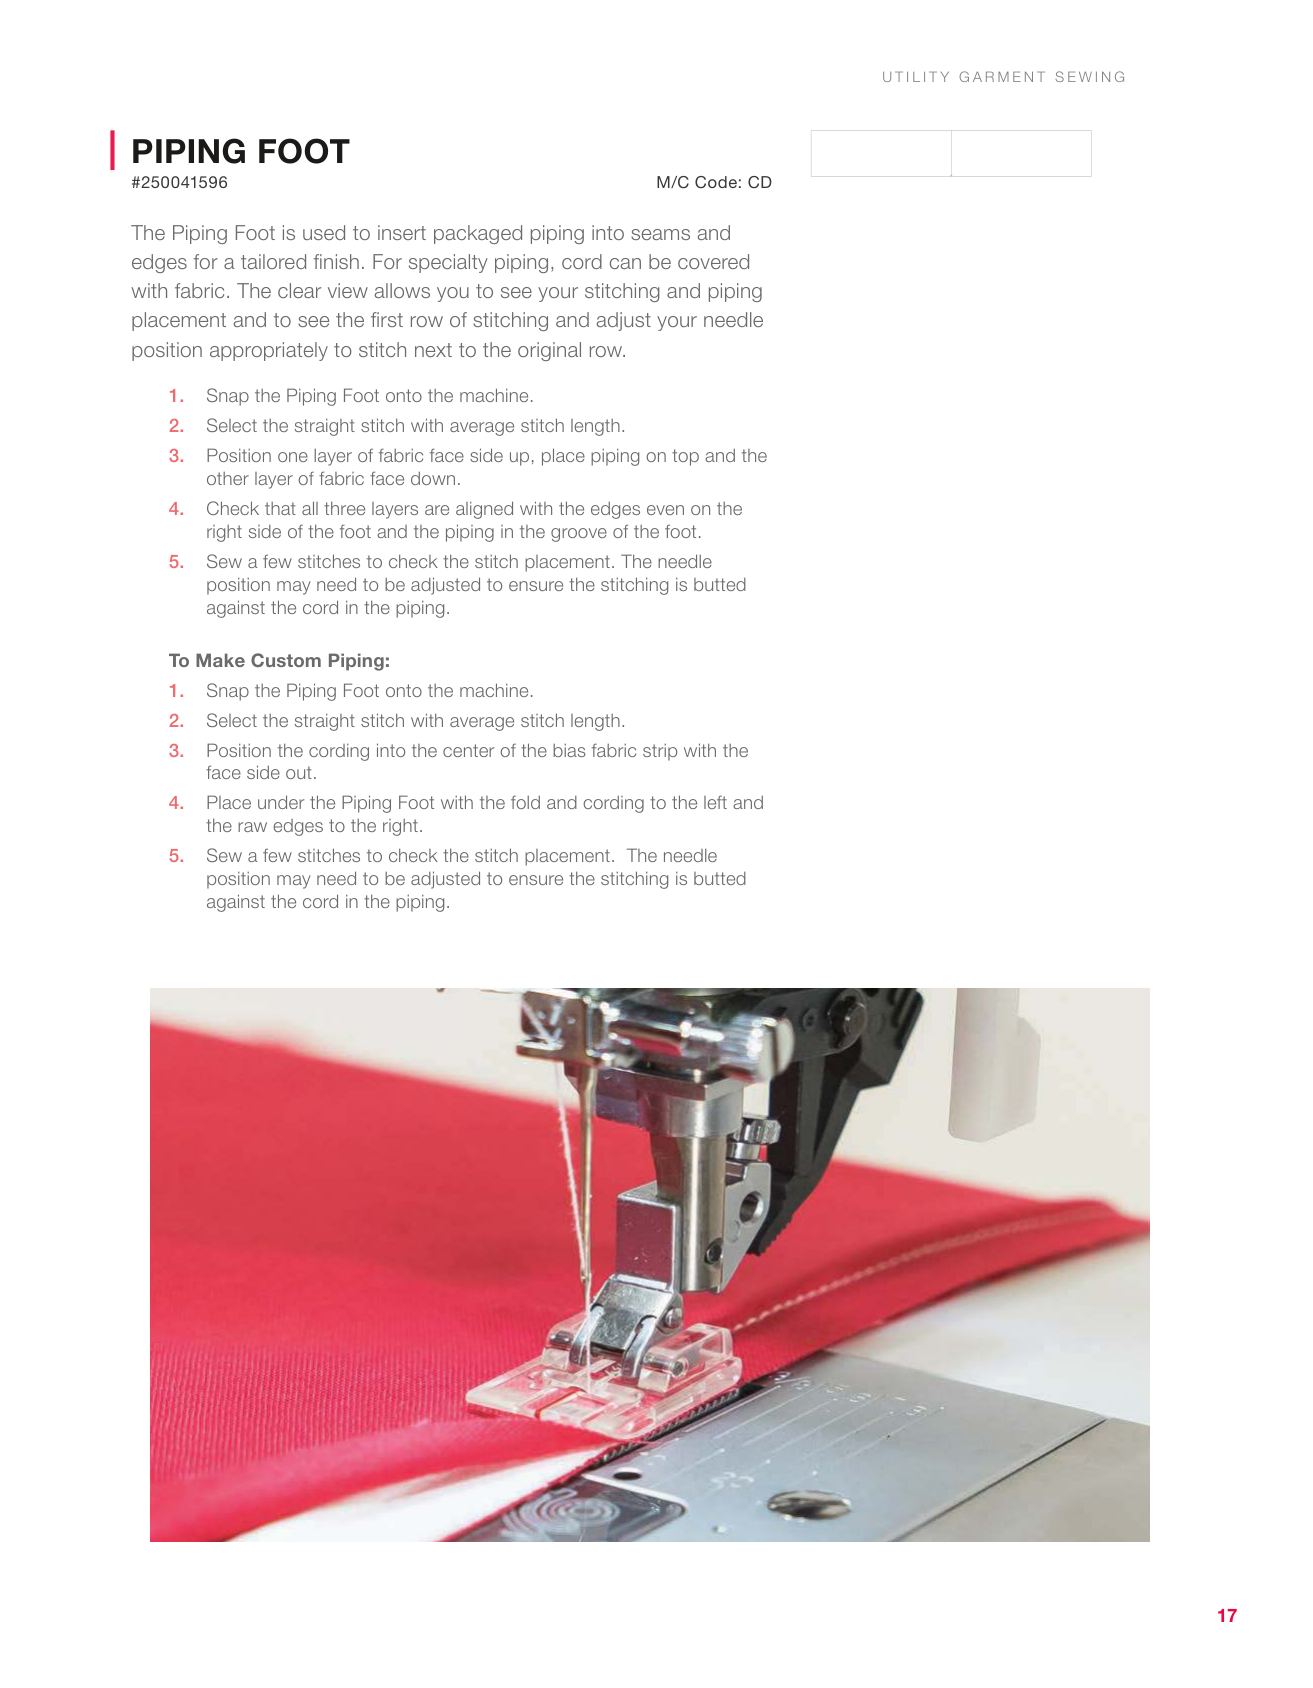
Piping Foot
#250041596M/C Code: CD The Piping Foot is used to insert packaged piping into seams and edges for a tailored finish. For specialty piping, cord can be covered with fabric. The clear view allows you to see your stitching and piping placement and to see the first row of stitching and adjust your needle position appropriately to stitch next to the original row.
U T I L I T Y G A R M E N T S E W I N G

19 Decorative & Crafting Sewing
20
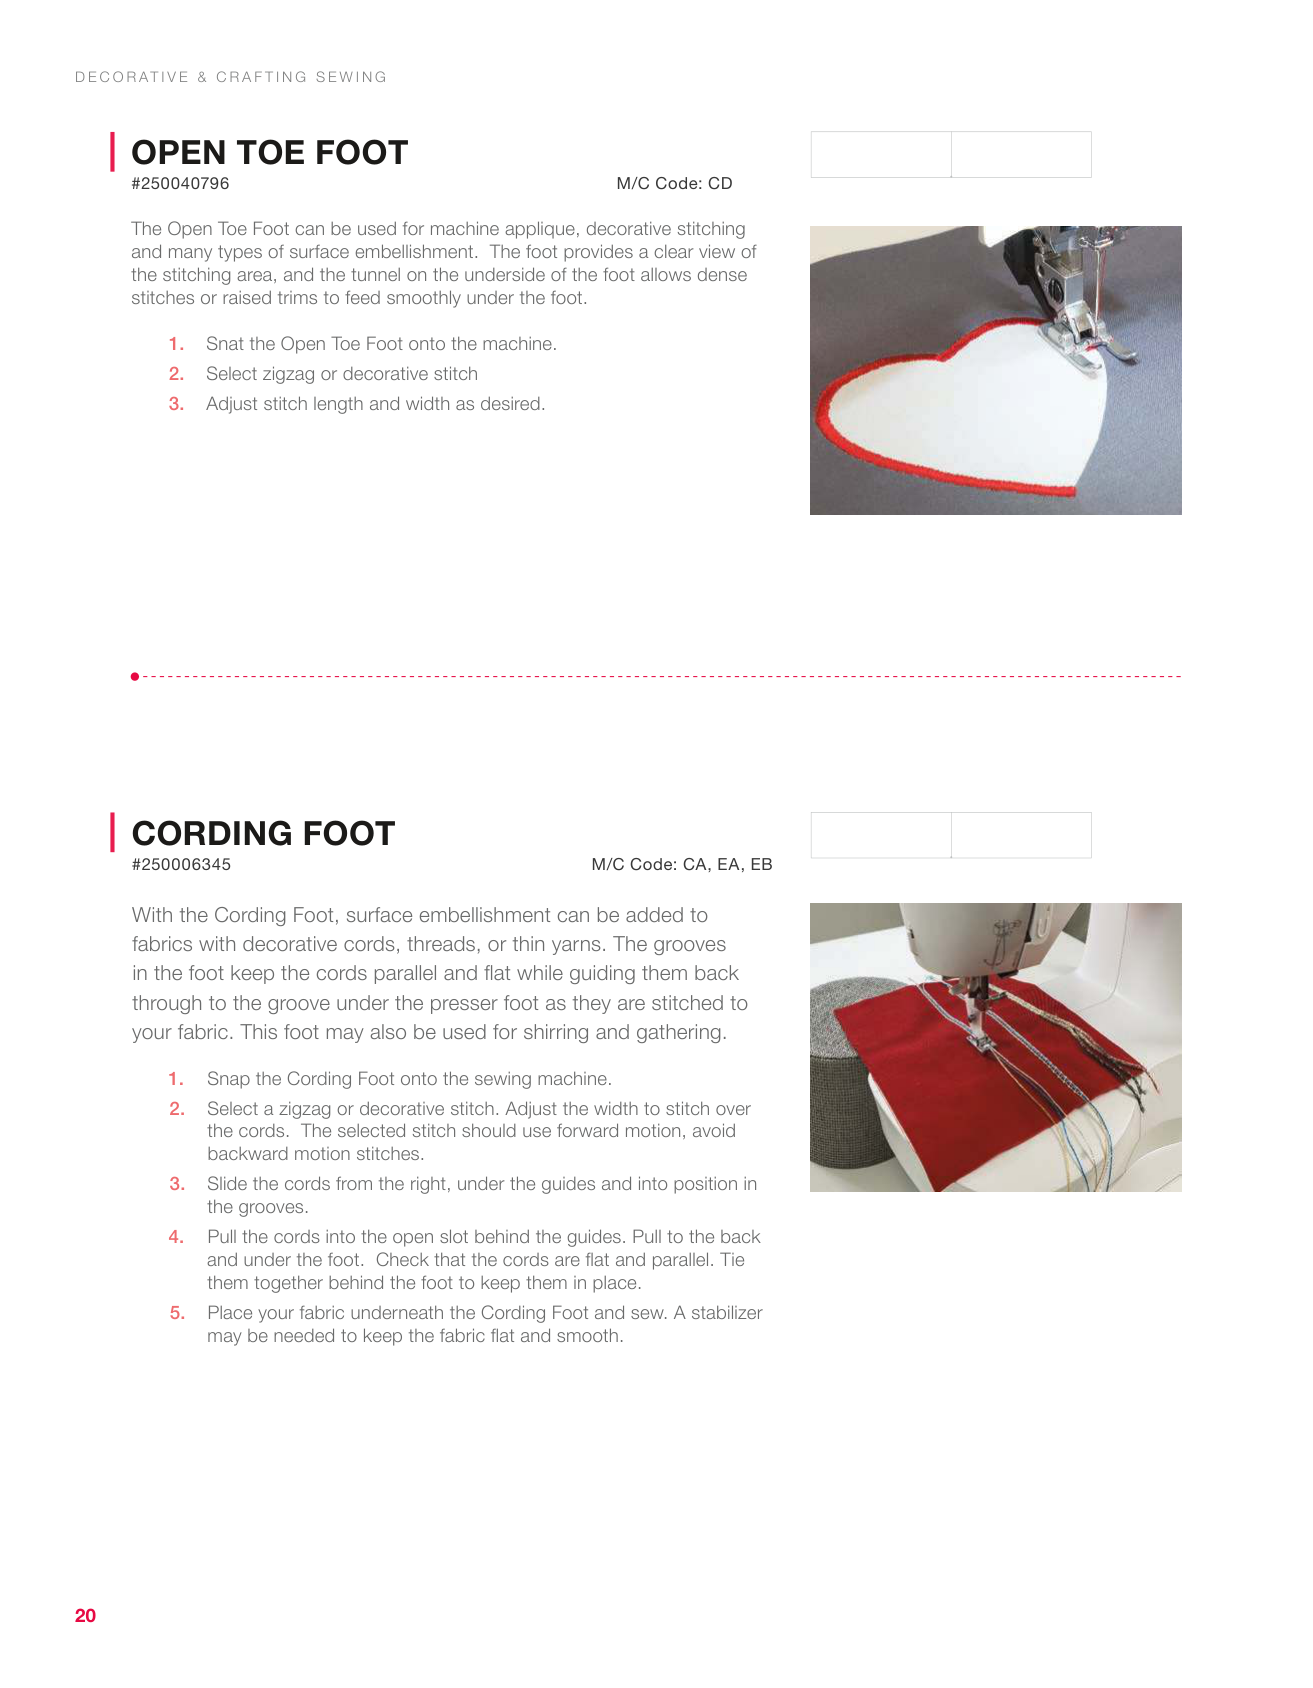
Open Toe Foot
#250040796M/C Code: CD The Open Toe Foot can be used for machine applique, decorative stitching and many types of surface embellishment. The foot provides a clear view of the stitching area, and the tunnel on the underside of the foot allows dense stitches or raised trims to feed smoothly under the foot.
Cording Foot
#250006345 M/C Code: CA, EA, EB With the Cording Foot, surface embellishment can be added to fabrics with decorative cords, threads, or thin yarns. The grooves in the foot keep the cords parallel and flat while guiding them back through to the groove under the presser foot as they are stitched to your fabric. This foot may also be used for shirring and gathering.D E C O R At I V E & C R A F T I N G S E W I N G
21
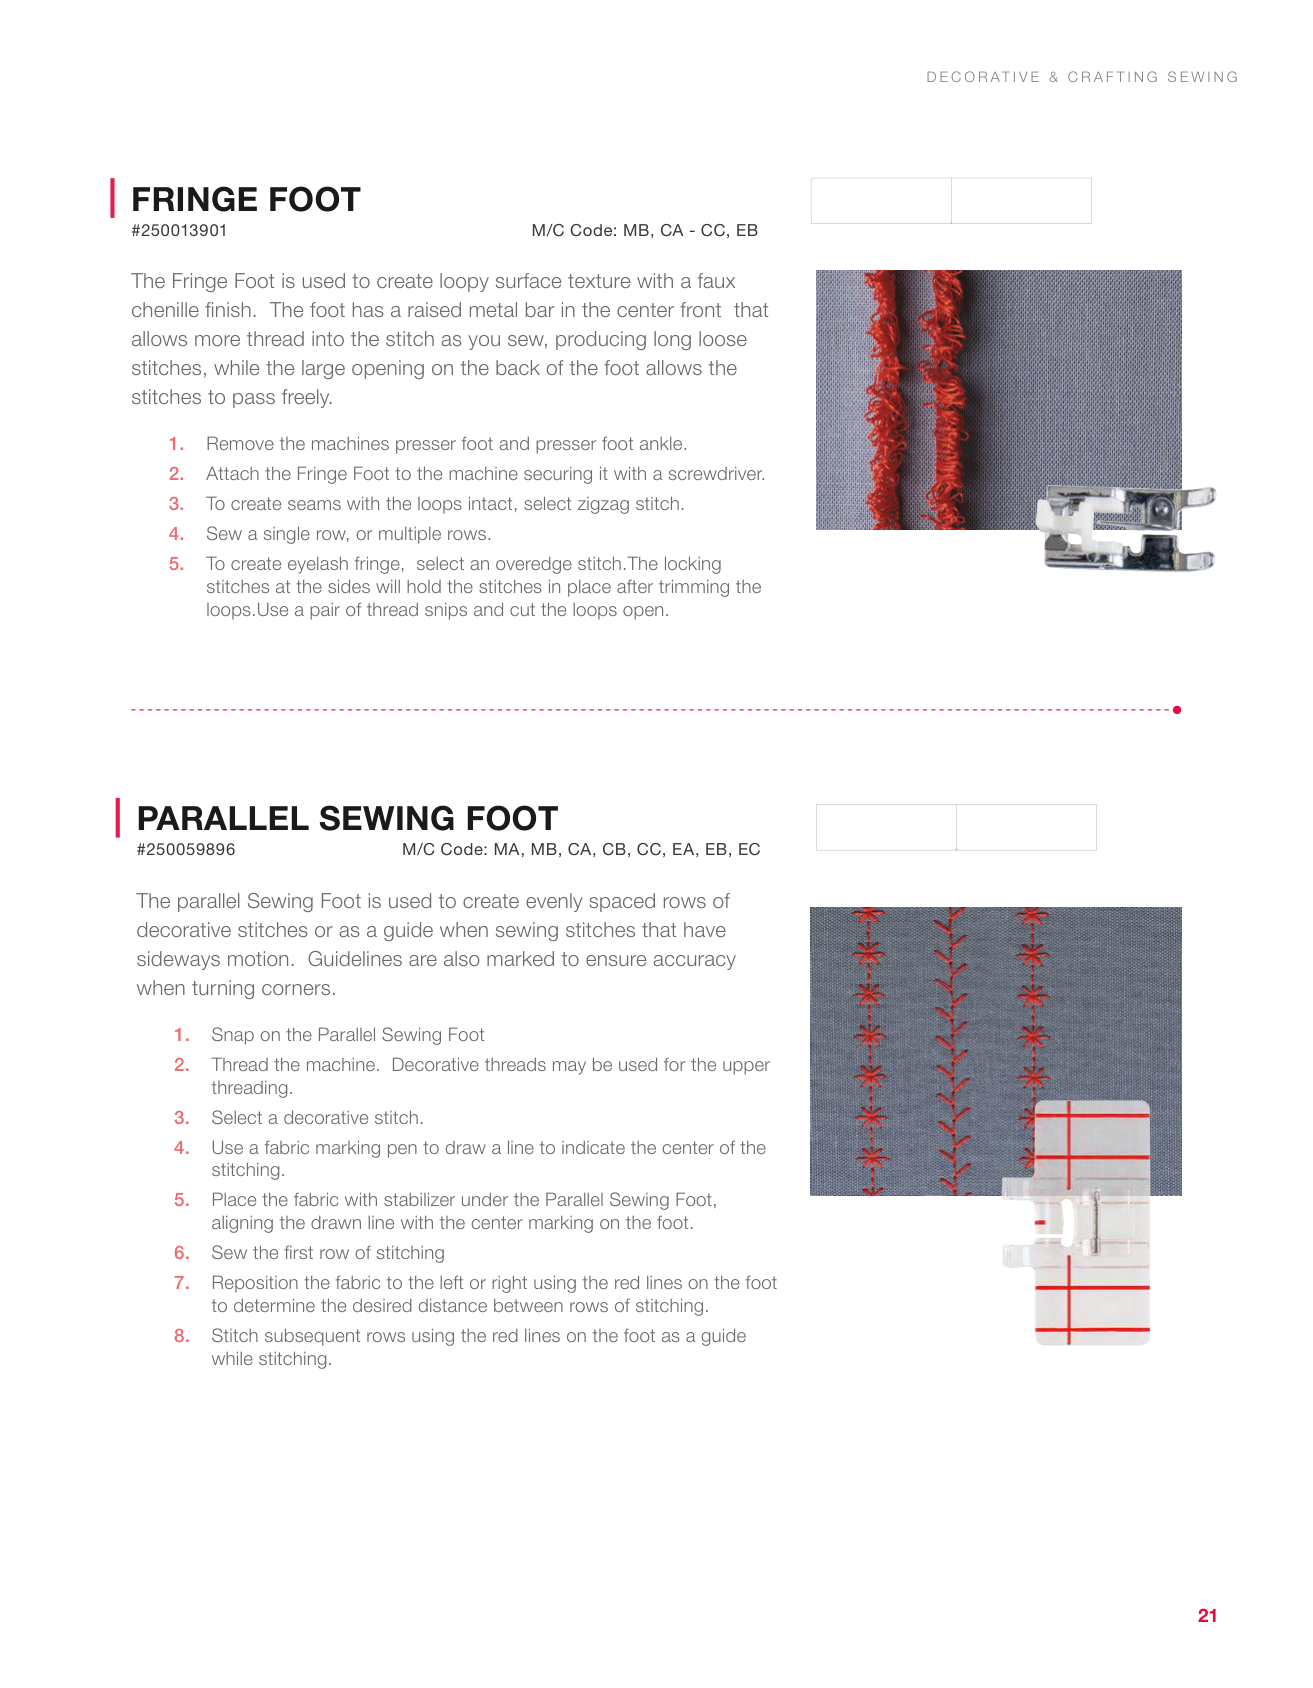
Fringe Foot
#250013901M/C Code: MB, CA - CC, EB The Fringe Foot is used to create loopy surface texture with a faux chenille finish. The foot has a raised metal bar in the center front that allows more thread into the stitch as you sew, producing long loose stitches, while the large opening on the back of the foot allows the stitches to pass freely.
Parallel Sewing Foot
#250059896M/C Code: MA, MB, CA, CB, CC, EA, EB, EC The parallel Sewing Foot is used to create evenly spaced rows of decorative stitches or as a guide when sewing stitches that have sideways motion. Guidelines are also marked to ensure accuracy when turning corners.
D E C O R At I V E & C R A F T I N G S E W I N G
22
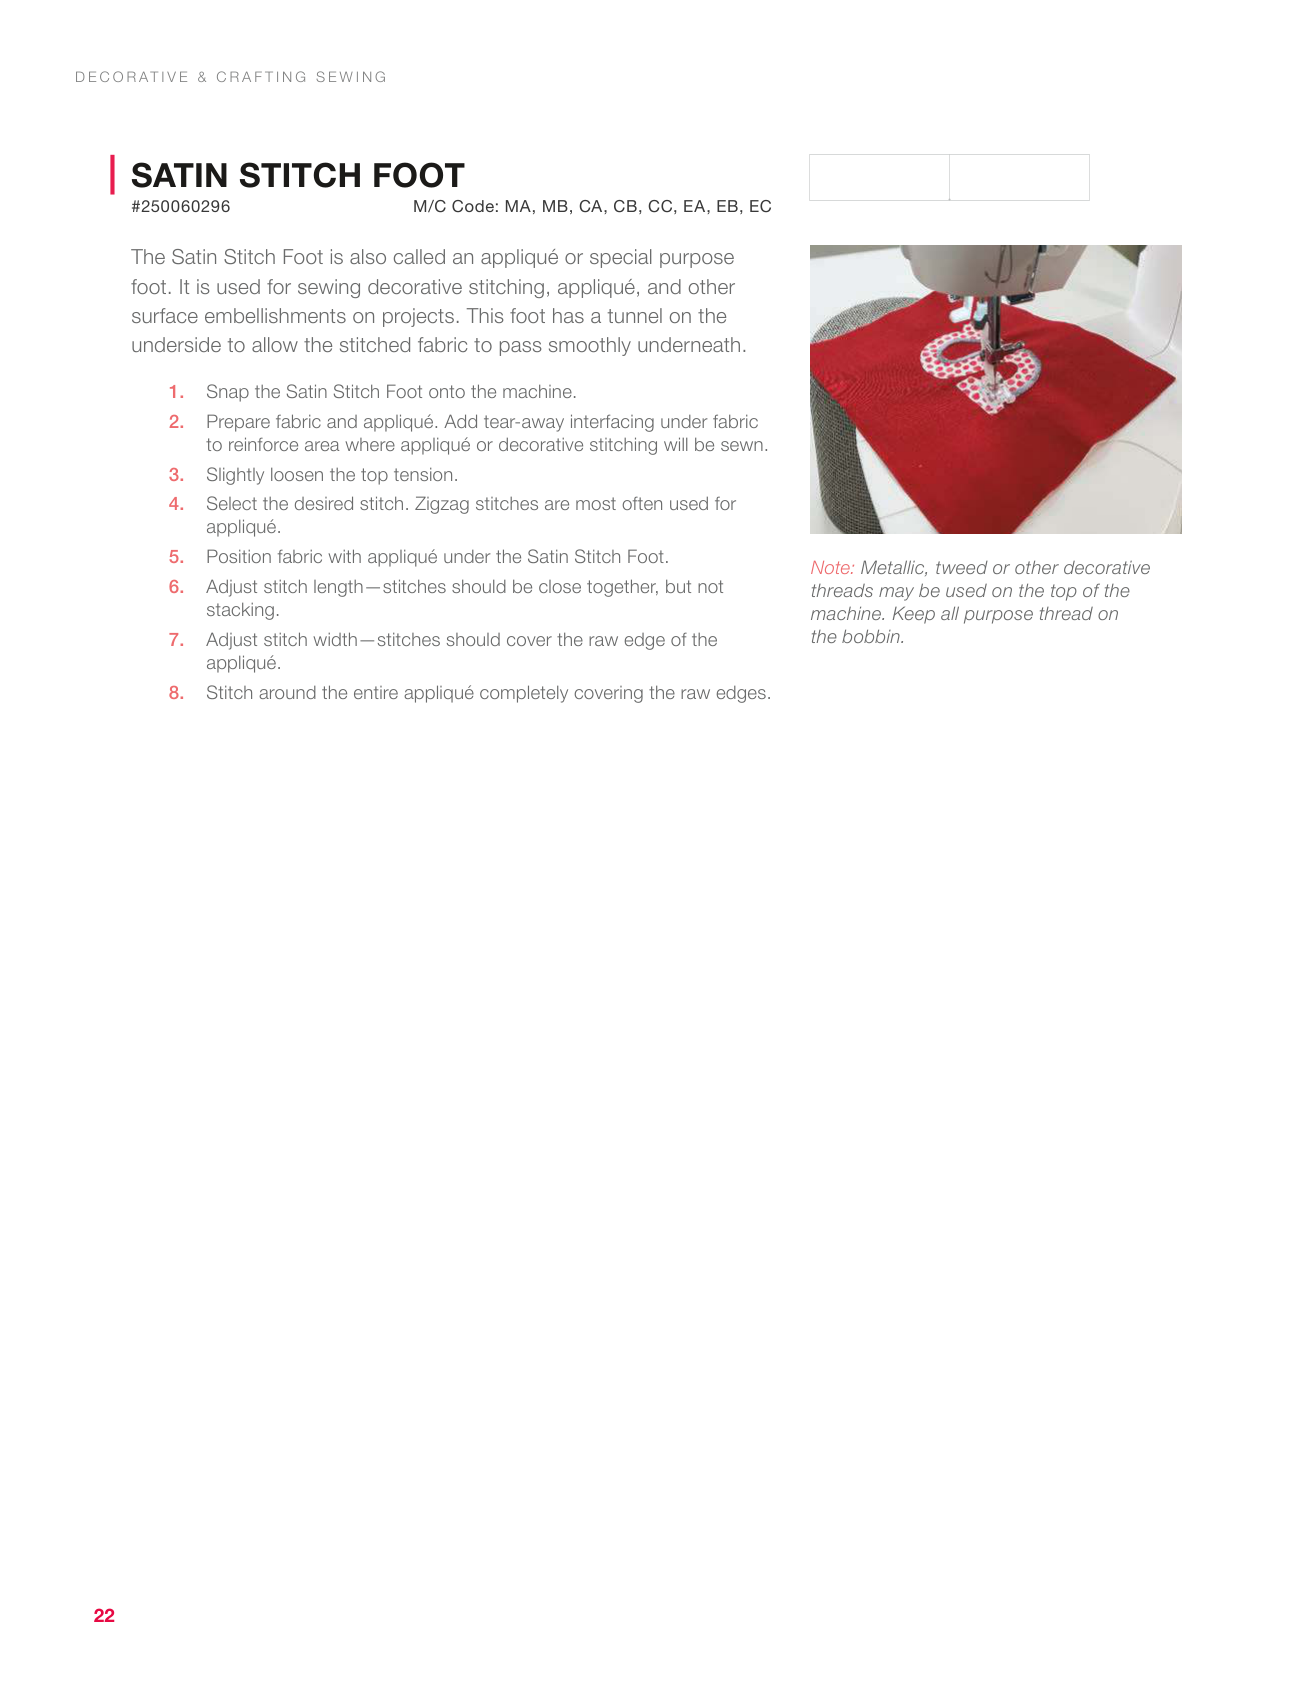
Satin Stitch Foot
#250060296 M/C Code: MA, MB, CA, CB, CC, EA, EB, EC The Satin Stitch Foot is also called an appliqué or special purpose foot. It is used for sewing decorative stitching, appliqué, and other surface embellishments on projects. This foot has a tunnel on the underside to allow the stitched fabric to pass smoothly underneath.D E C O R At I V E & C R A F T I N G S E W I N G
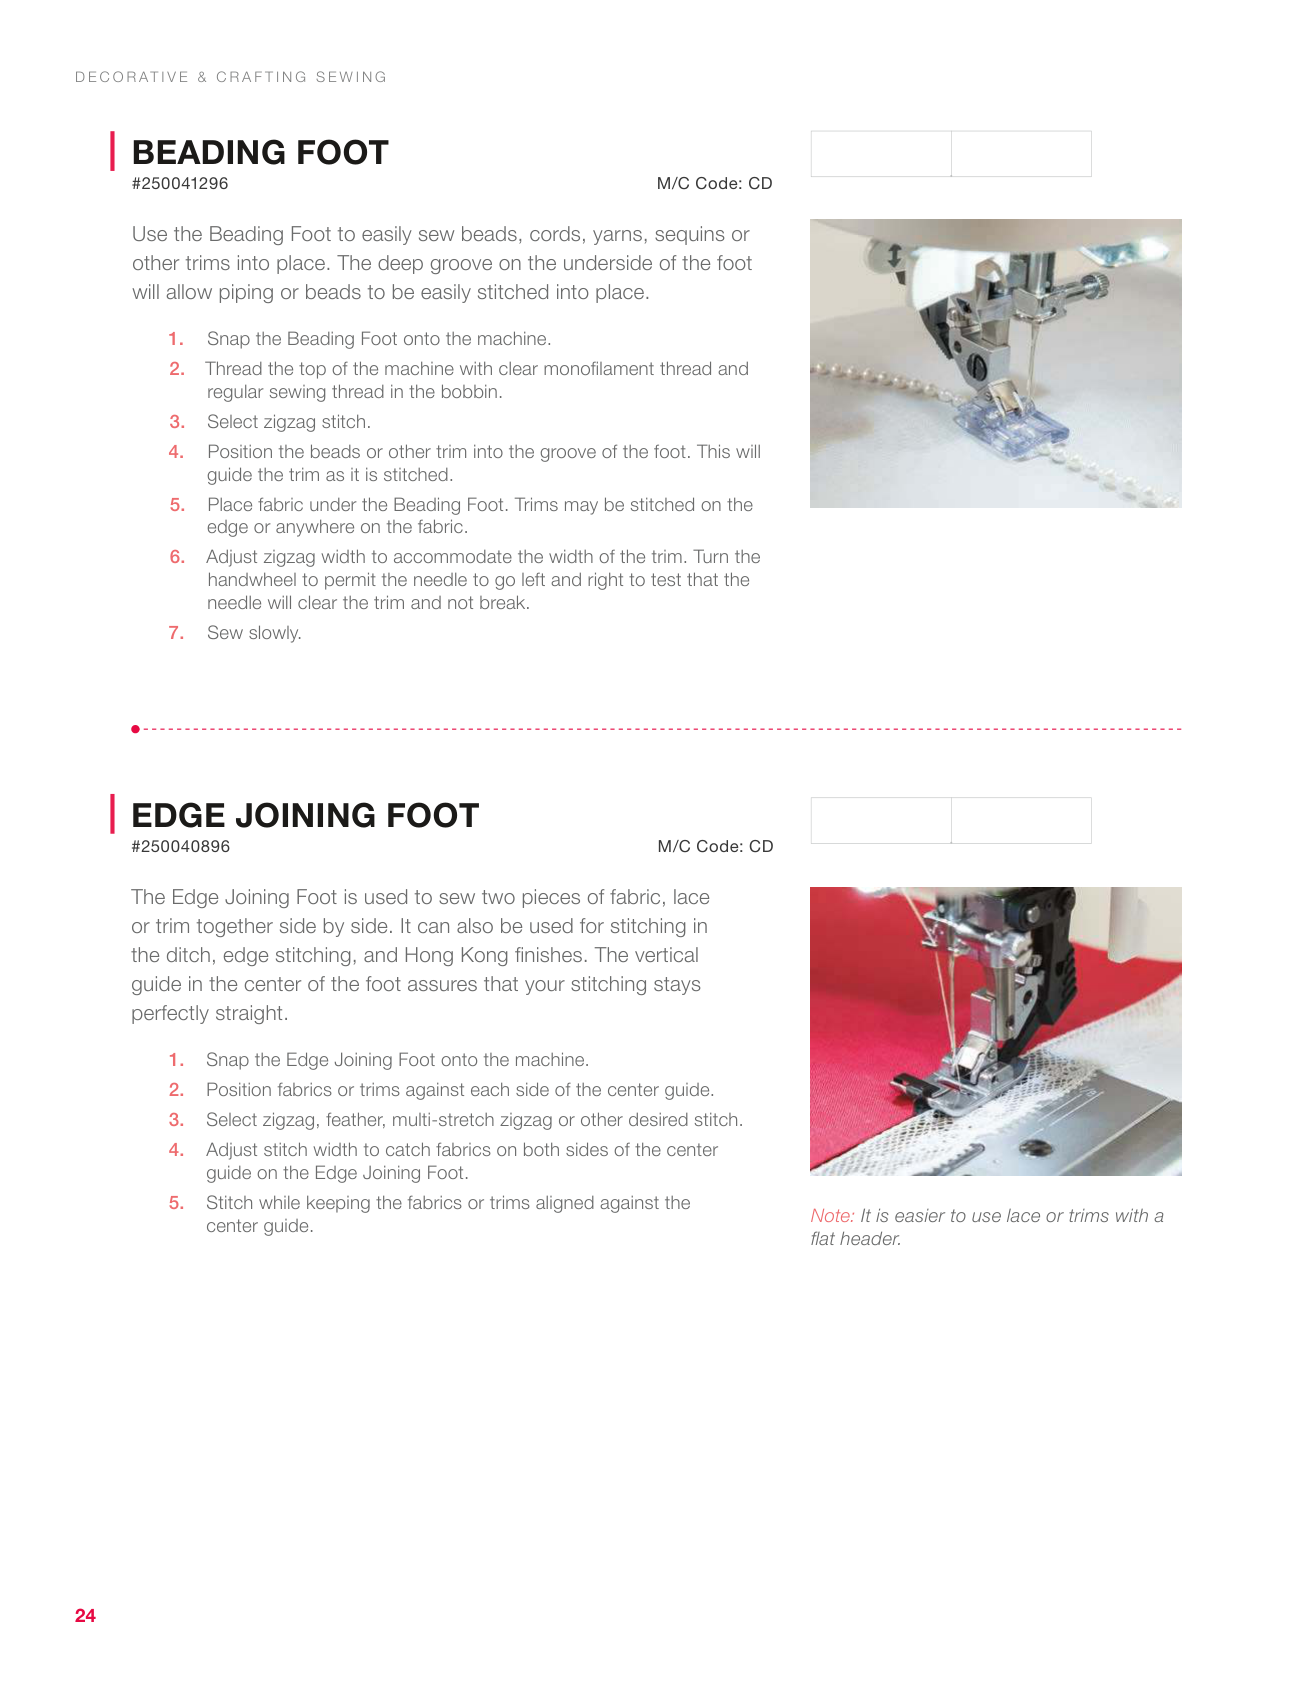
23 Note: A contrasting thread will produce a more pronounced tuck. Twin Needle Style 2025 #D043090 (4mm size 90 regular point) #D07419 (4mm stretch)
Pintuck Foot
#2500264 M/C Code: MA, MB, CA, CB, CC, EA, EB, EC The Pintuck Foot is used for heirloom sewing, embellishing garments, table linens and bed linens. Generally, this foot is used with a twin needle (SINGER® Style 2025) to create evenly-spaced raised tucks in the fabric. It works best with very fine to medium weight fabrics. A series of grooves on the underside of the foot keep the tucks from being flattened and serves as guides for stitching parallel rows of tucks.Clear Open Toe Foot
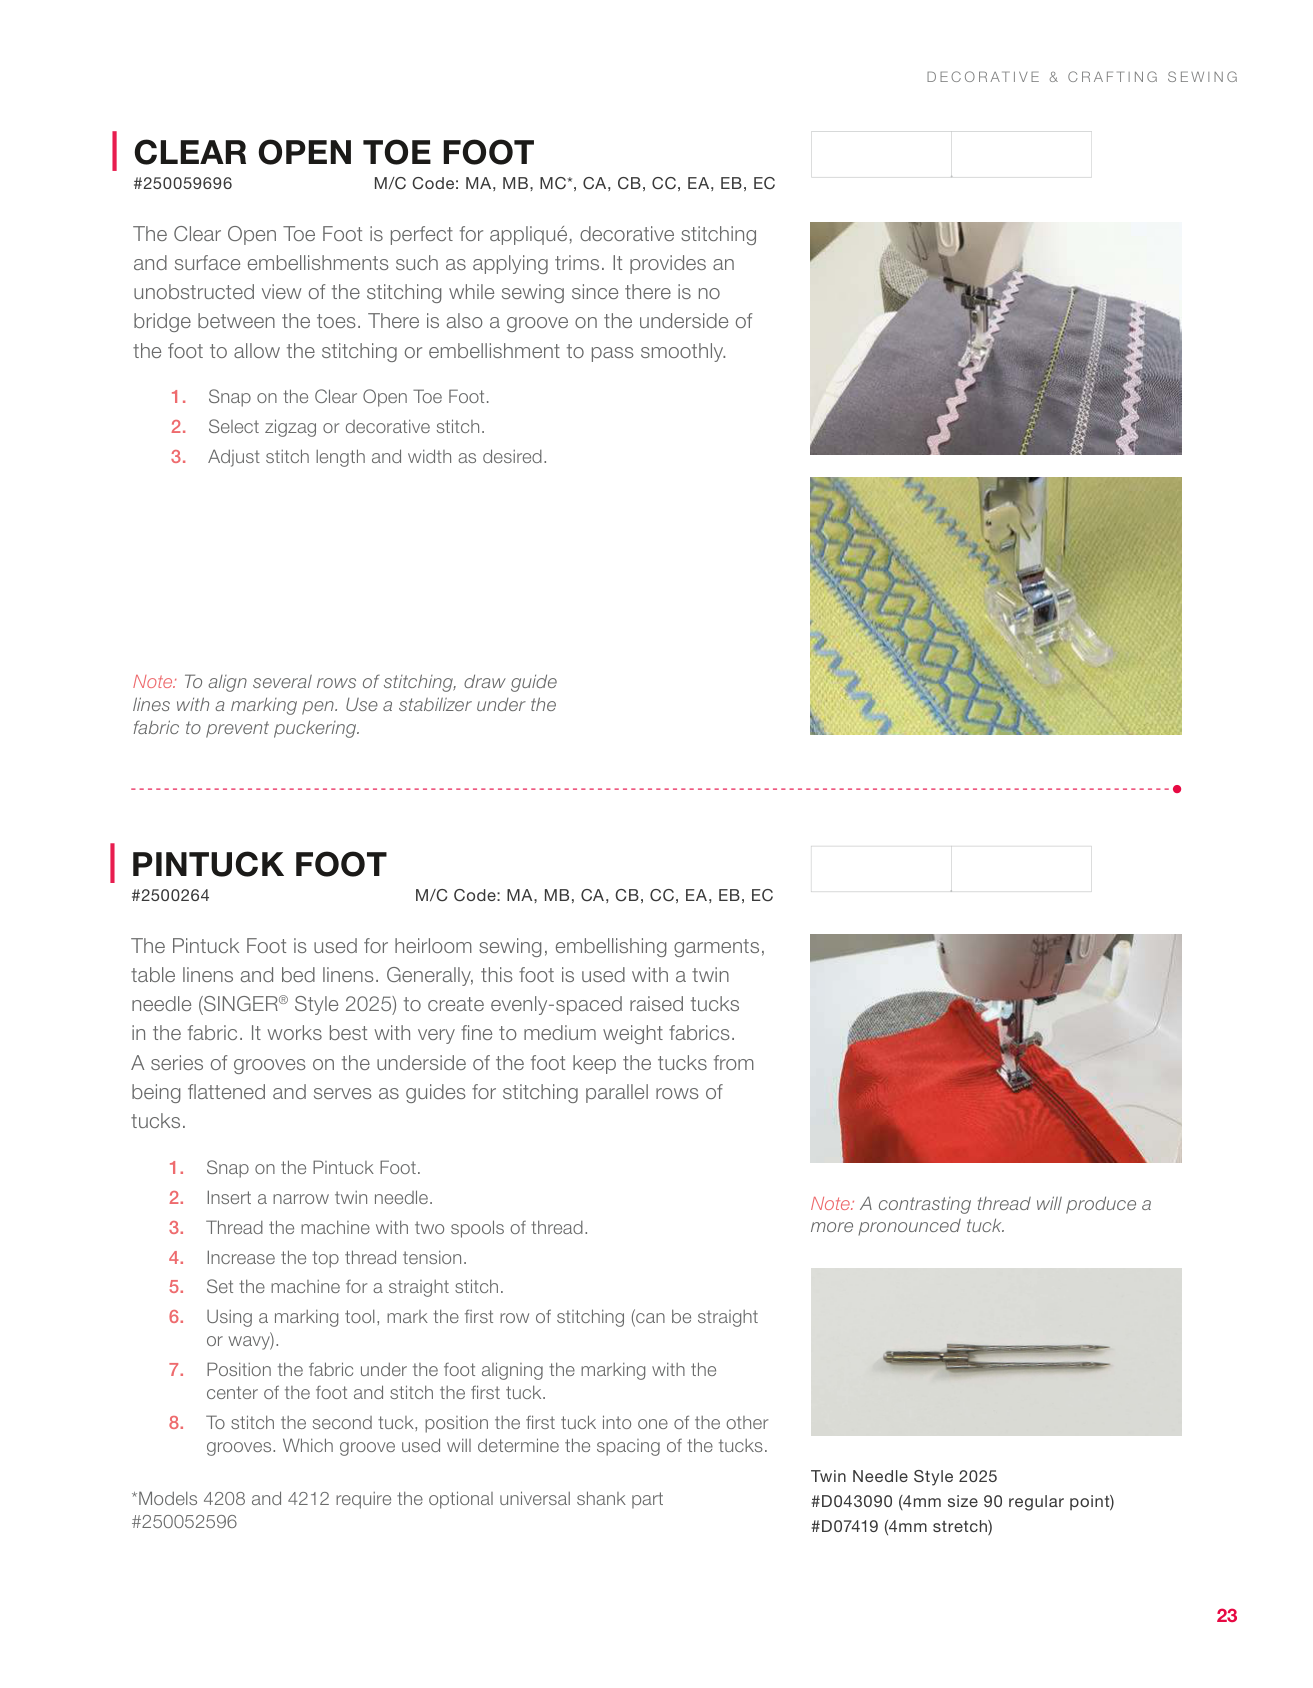
#250059696 M/C Code: MA, MB, MC*, CA, CB, CC, EA, EB, EC The Clear Open Toe Foot is perfect for appliqué, decorative stitching and surface embellishments such as applying trims. It provides an unobstructed view of the stitching while sewing since there is no bridge between the toes. There is also a groove on the underside of the foot to allow the stitching or embellishment to pass smoothly.D E C O R At I V E & C R A F T I N G S E W I N G
24
Beading Foot
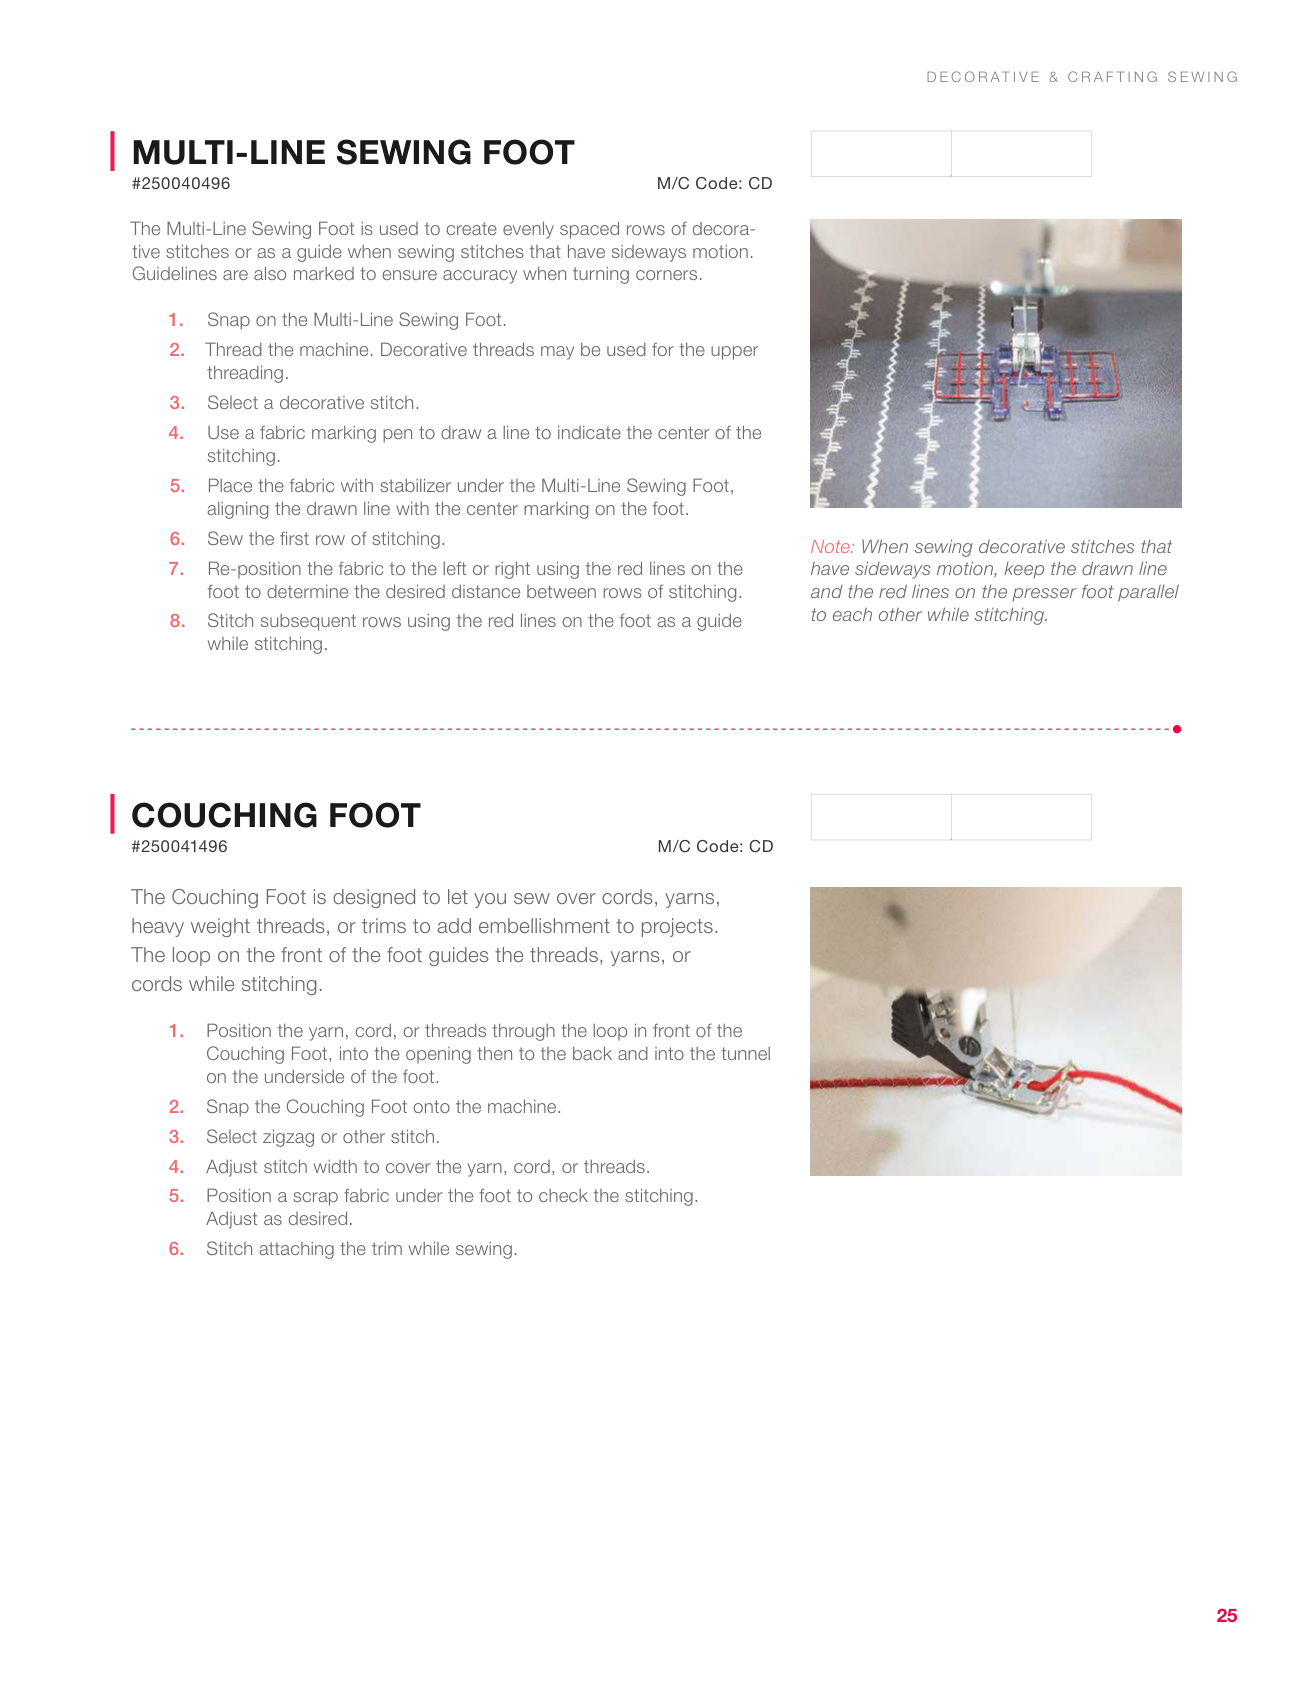
#250041296 M/C Code: CD Use the Beading Foot to easily sew beads, cords, yarns, sequins or other trims into place. The deep groove on the underside of the foot will allow piping or beads to be easily stitched into place.Edge Joining Foot
#250040896 M/C Code: CD The Edge Joining Foot is used to sew two pieces of fabric, lace or trim together side by side. It can also be used for stitching in the ditch, edge stitching, and Hong Kong finishes. The vertical guide in the center of the foot assures that your stitching stays perfectly straight.D E C O R At I V E & C R A F T I N G S E W I N G
25
Multi-Line Sewing Foot
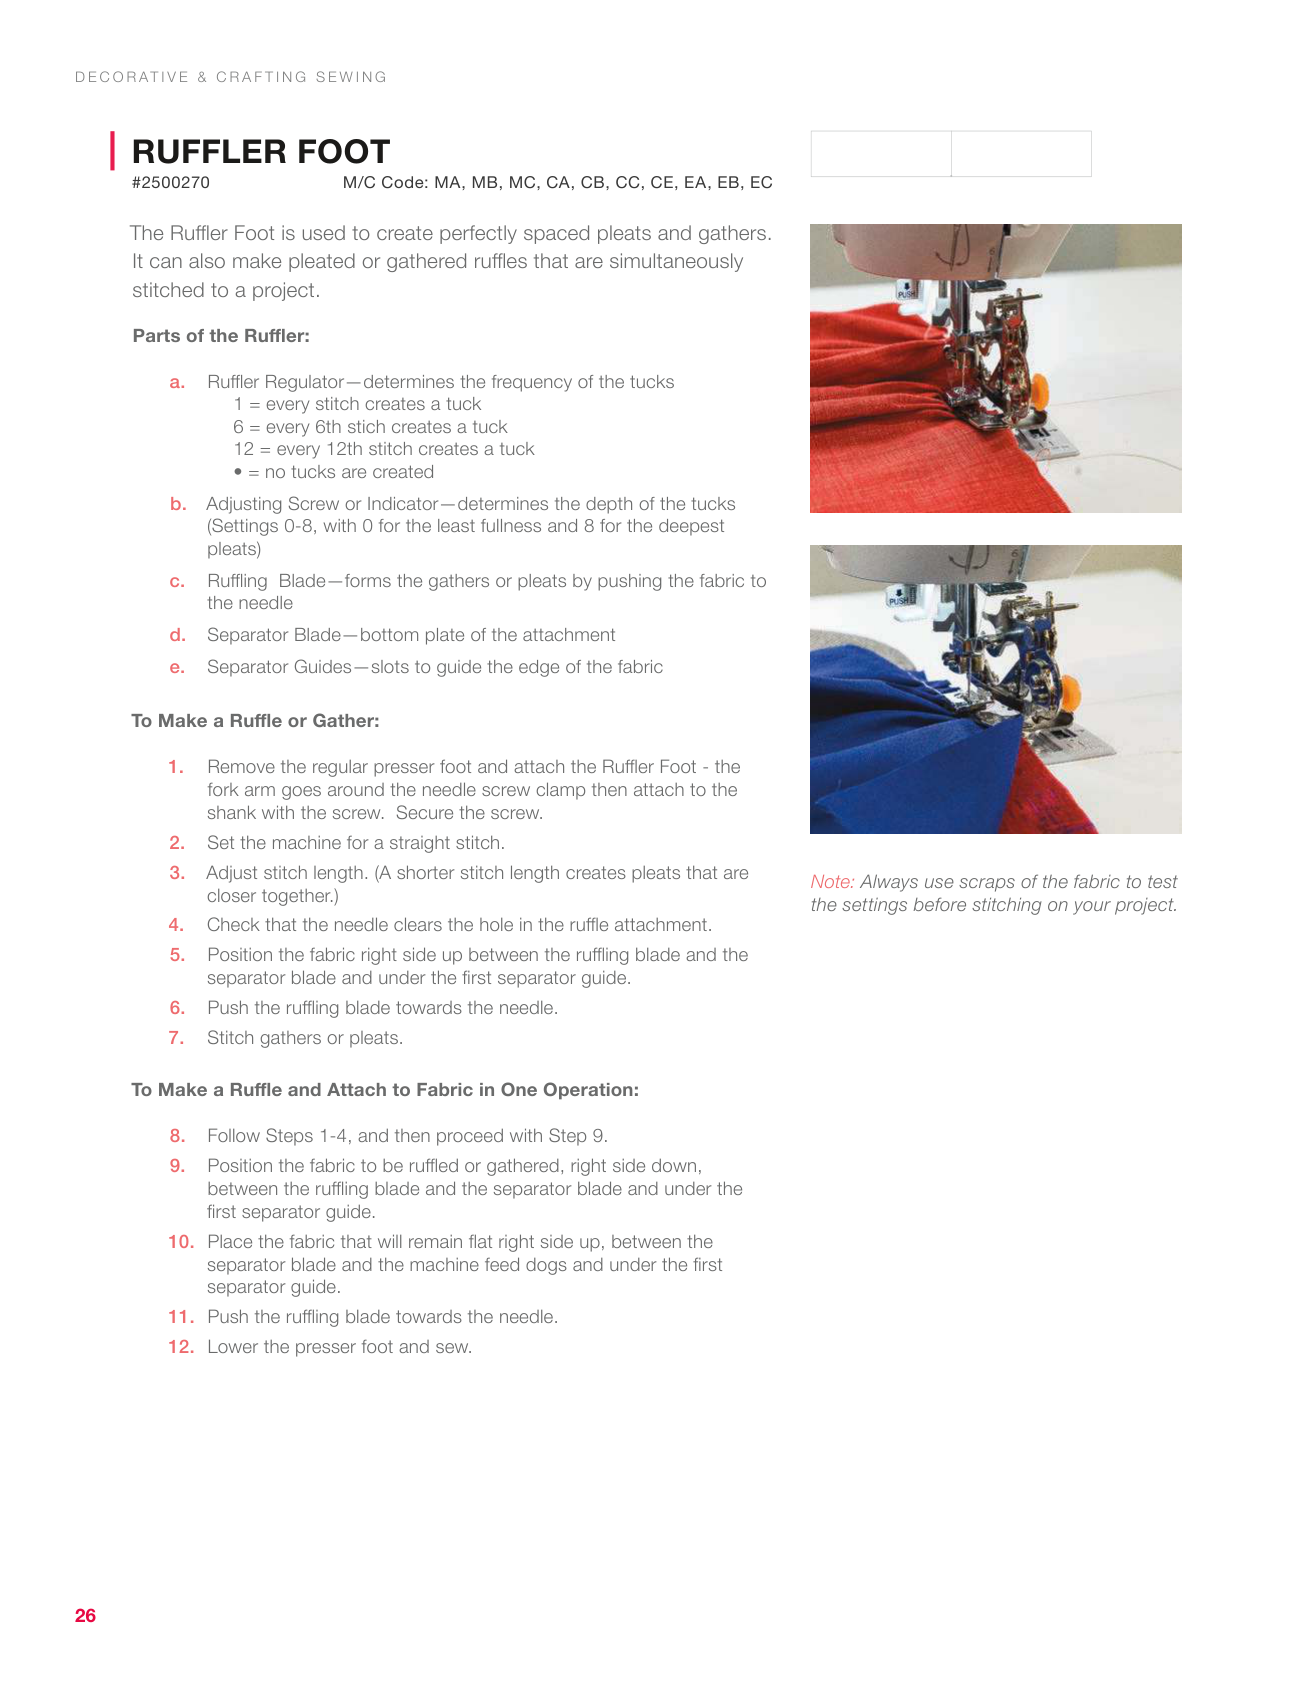
#250040496 M/C Code: CD The Multi-Line Sewing Foot is used to create evenly spaced rows of decora- tive stitches or as a guide when sewing stitches that have sideways motion. Guidelines are also marked to ensure accuracy when turning corners.Couching Foot
#250041496 M/C Code: CD The Couching Foot is designed to let you sew over cords, yarns, heavy weight threads, or trims to add embellishment to projects. The loop on the front of the foot guides the threads, yarns, or cords while stitching.D E C O R At I V E & C R A F T I N G S E W I N G
26
Ruffler Foot
#2500270 M/C Code: MA, MB, MC, CA, CB, CC, CE, EA, EB, EC The Ruffler Foot is used to create perfectly spaced pleats and gathers. It can also make pleated or gathered ruffles that are simultaneously stitched to a project. Parts of the Ruffler: a. Ruffler Regulator—determines the frequency of the tucks 1 = every stitch creates a tuck 6 = every 6th stich creates a tuck 12 = every 12th stitch creates a tuckD E C O R At I V E & C R A F T I N G S E W I N G
27
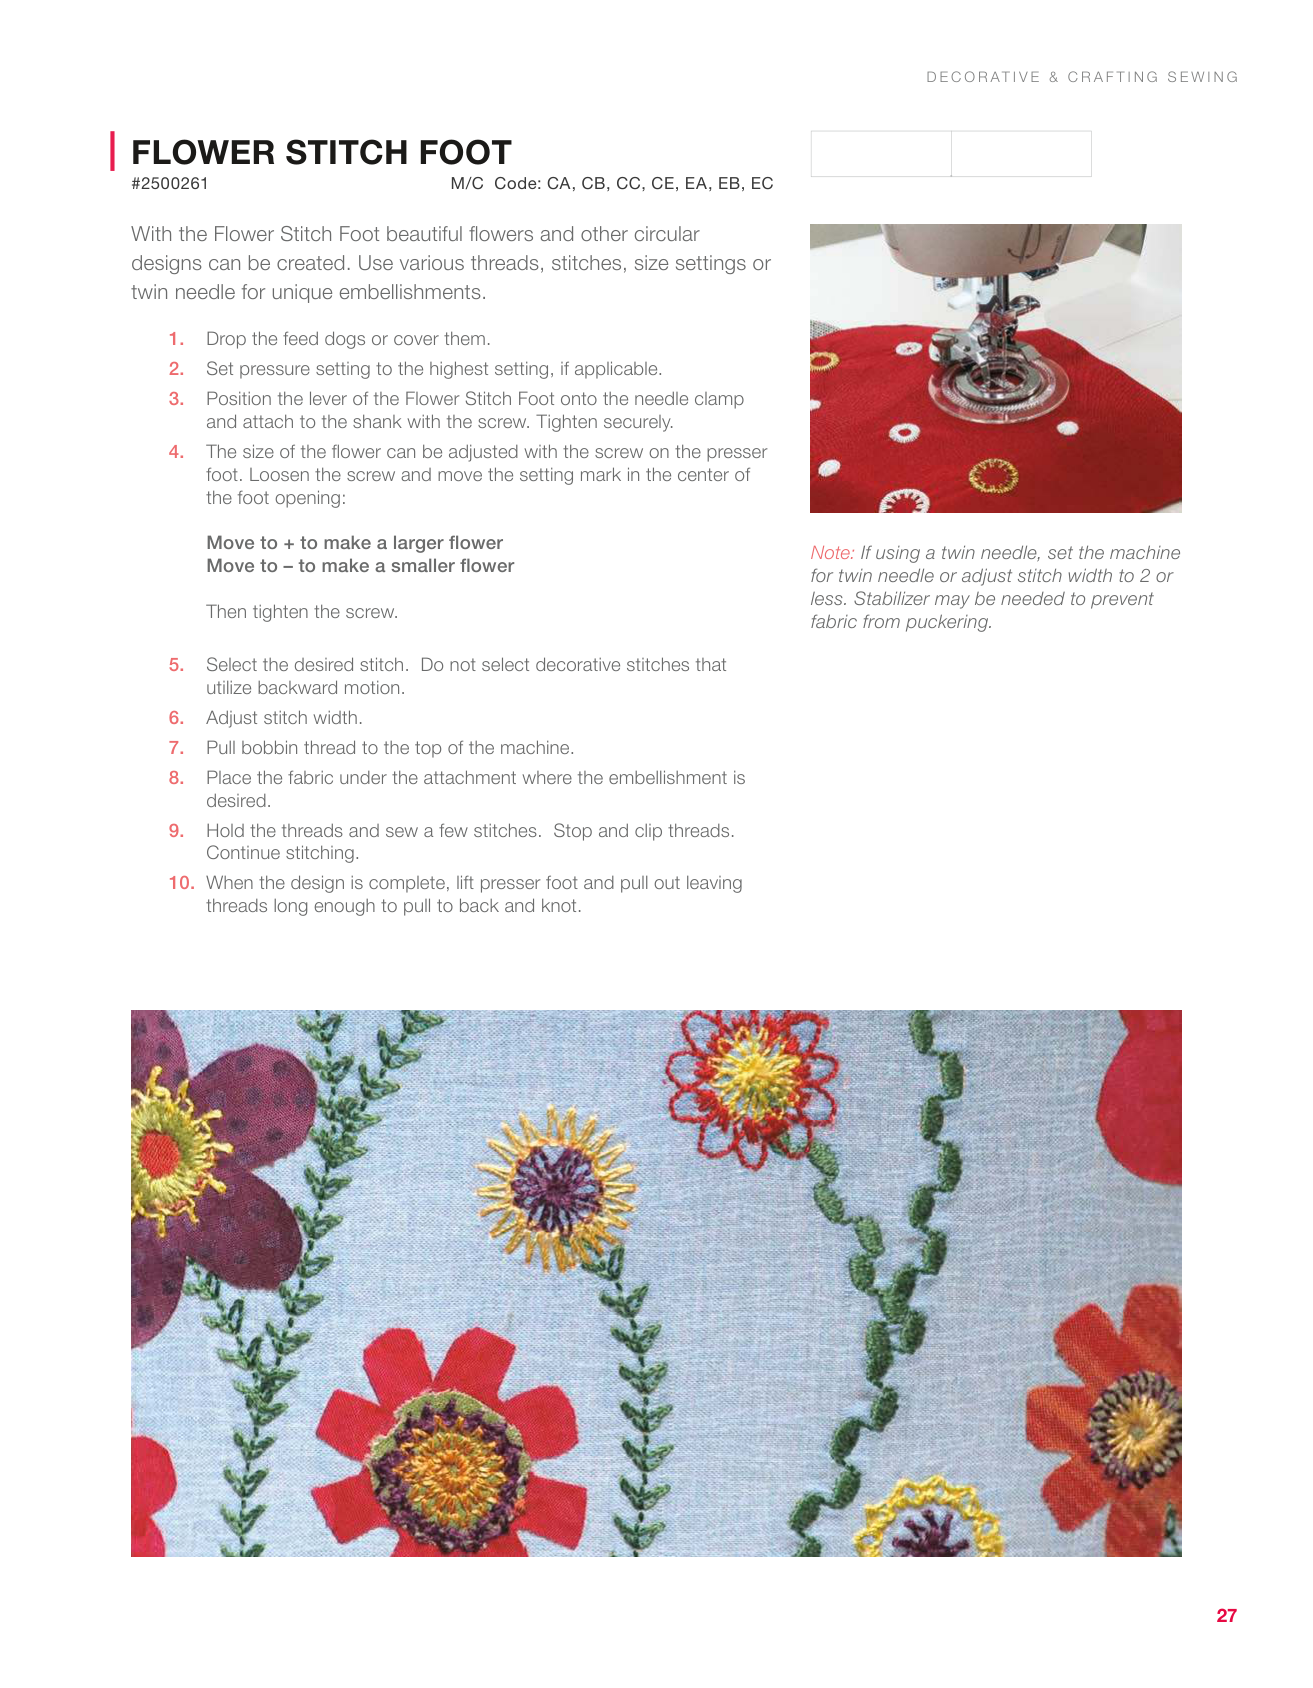
Flower Stitch Foot
#2500261 M/C Code: CA, CB, CC, CE, EA, EB, EC With the Flower Stitch Foot beautiful flowers and other circular designs can be created. Use various threads, stitches, size settings or twin needle for unique embellishments.Move to + to make a larger flower Move to – to make a smaller flower
Then tighten the screw.
D E C O R At I V E & C R A F T I N G S E W I N G
28 Quilting
29
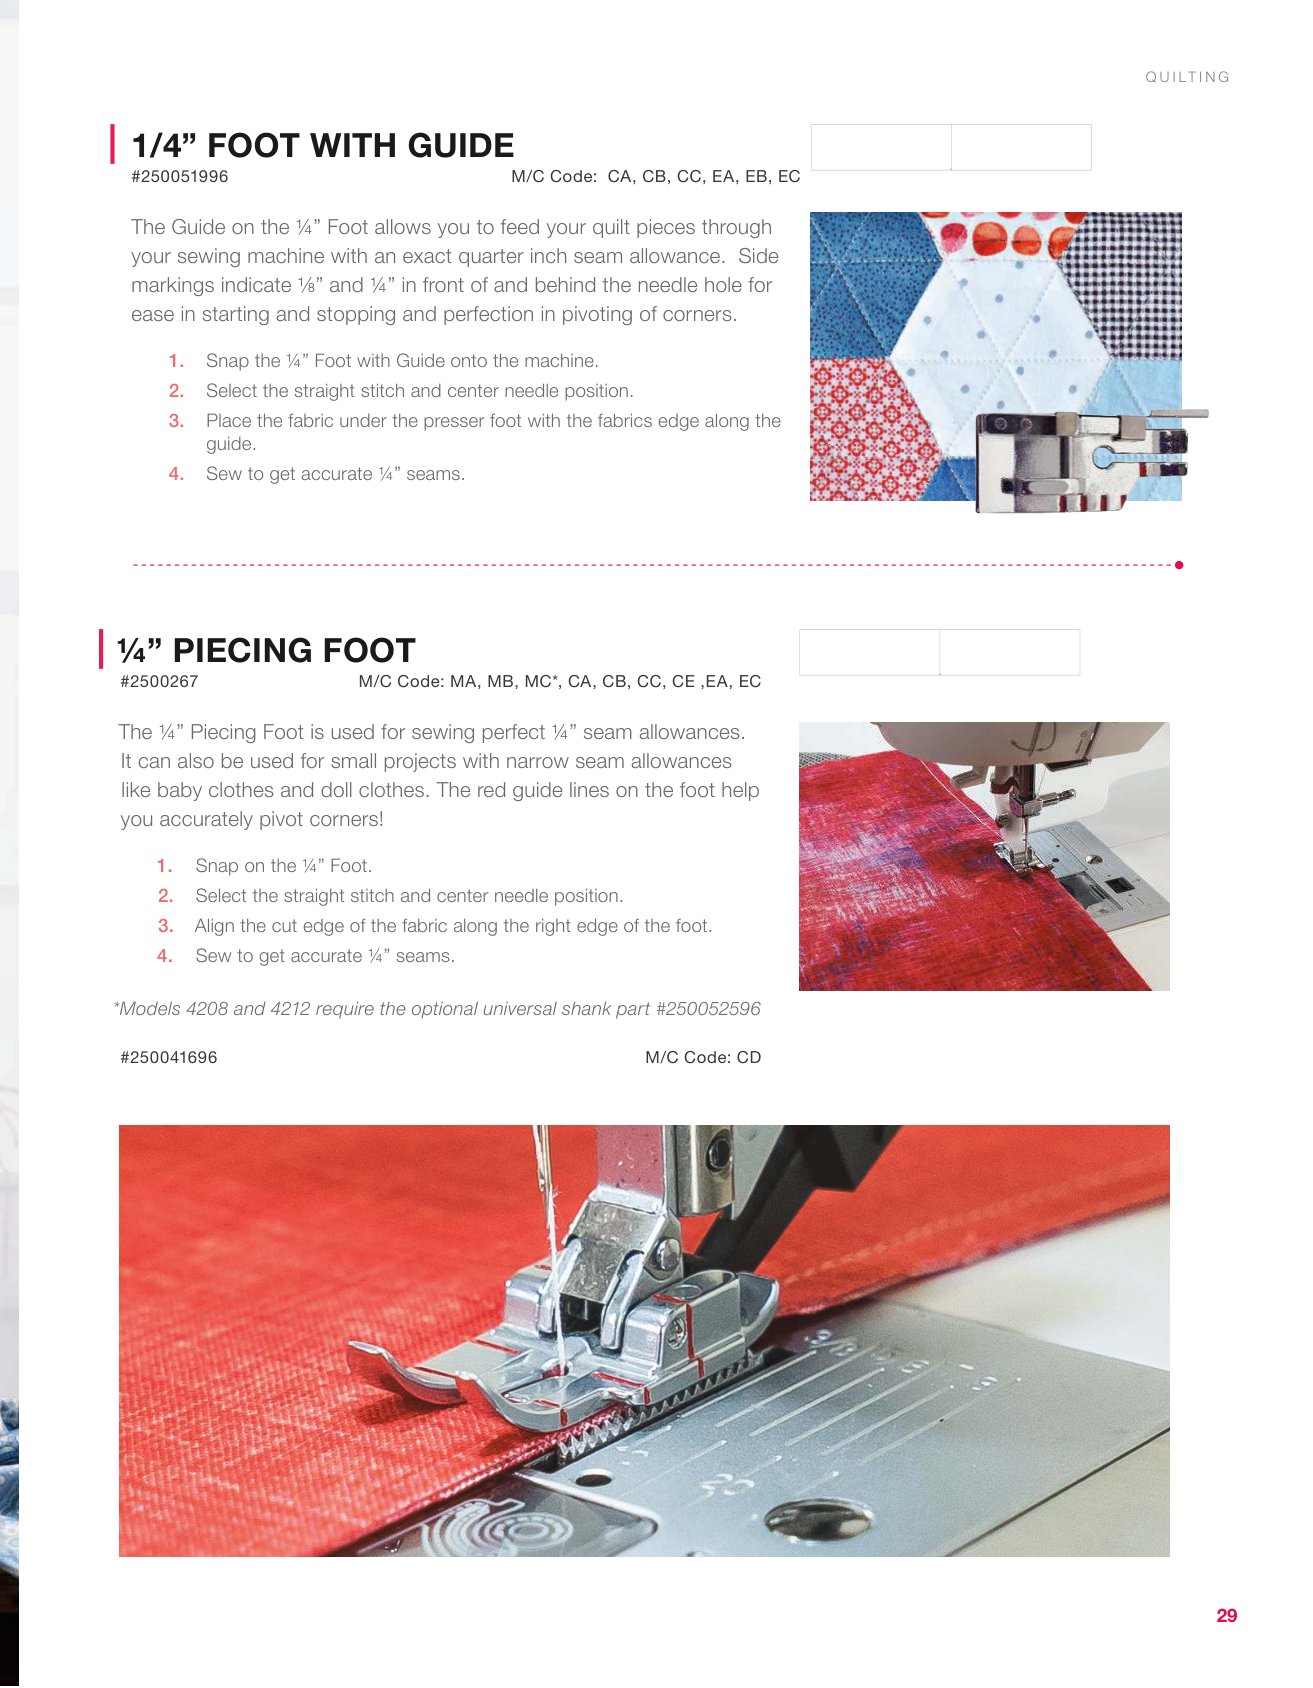
1/4” Foot With Guide
#250051996M/C Code: CA, CB, CC, EA, EB, EC The Guide on the ¼” Foot allows you to feed your quilt pieces through your sewing machine with an exact quarter inch seam allowance. Side markings indicate ⅛” and ¼” in front of and behind the needle hole for ease in starting and stopping and perfection in pivoting of corners.
Q U I Lt I N G
¼” Piecing Foot
#2500267 M/C Code: MA, MB, MC*, CA, CB, CC, CE ,EA, EC The ¼” Piecing Foot is used for sewing perfect ¼” seam allowances. It can also be used for small projects with narrow seam allowances like baby clothes and doll clothes. The red guide lines on the foot help you accurately pivot corners!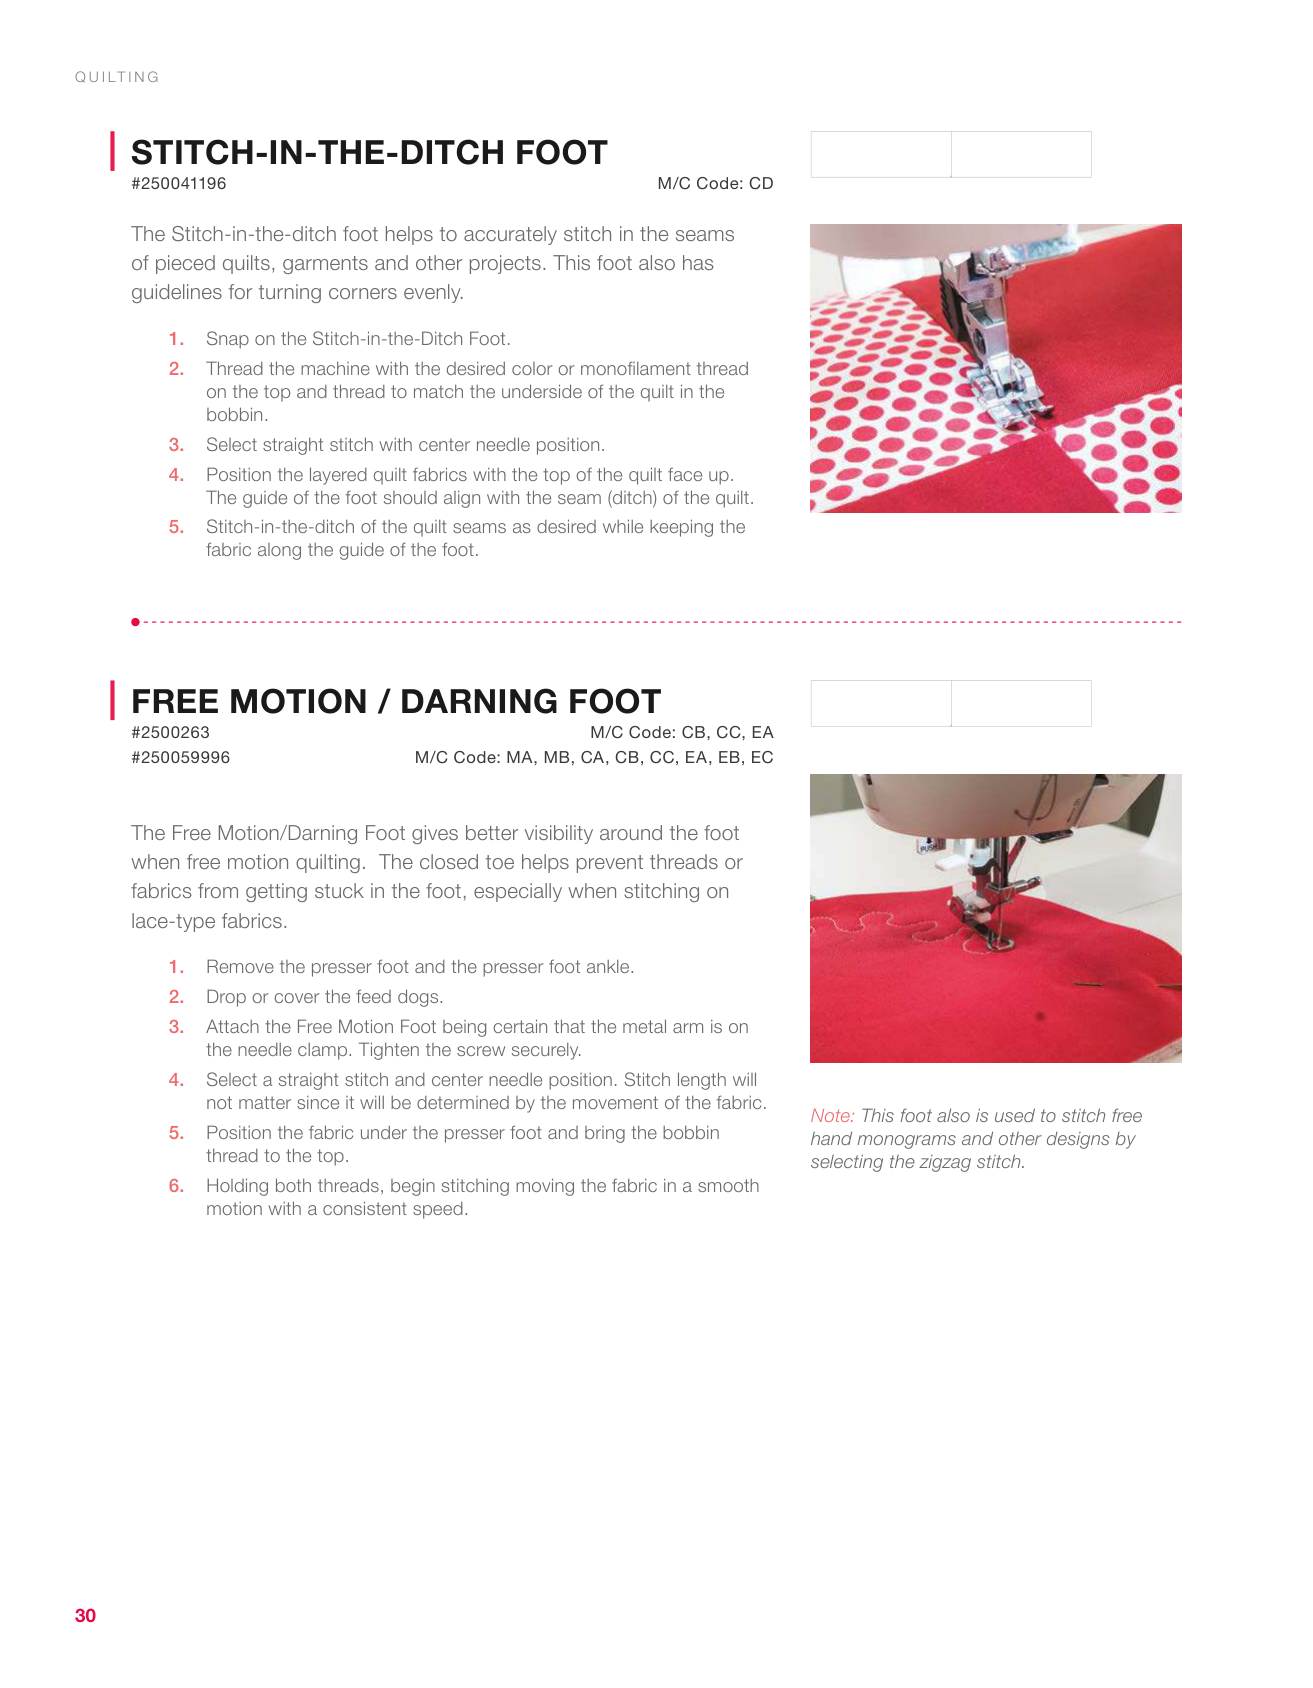
30
Stitch-In-The-Ditch Foot
#250041196 M/C Code: CD The Stitch-in-the-ditch foot helps to accurately stitch in the seams of pieced quilts, garments and other projects. This foot also has guidelines for turning corners evenly.Free Motion / Darning Foot
#2500263 M/C Code: CB, CC, EA #250059996 M/C Code: MA, MB, CA, CB, CC, EA, EB, EC The Free Motion/Darning Foot gives better visibility around the foot when free motion quilting. The closed toe helps prevent threads or fabrics from getting stuck in the foot, especially when stitching on lace-type fabrics.Q U I Lt I N G

31
Clear Open Toe Free-Motion
#250041096 M/C Code: CD The Clear Open Toe Free-Motion Foot provides an unobstructed view for free motion sewing or stippling around pieced quilts or embroidered designs.Even Feed Foot
#250060096 M/C Code: MA, MB, CA, CB, CC, EA, EB, EC The Even Feed Foot, also known as a walking foot makes it much easier to match plaids or stripes, sew several fabric layers such as quilting, sewing napped or slippery fabrics. This foot has its own set of feed dogs that work in conjunction with the machines feed dogs to improve the flow of the fabric. The Even Feed Foot securely grips the top layer or layers of fabric while your sewing machine feeds the fabric from below. Plaids, stripes, and quilt layers stay perfectly aligned and leathers, suedes, vinyls and other problematic fabrics flow easily through your machine.Note: As the needle goes up and down, the feed dogs also move up and down, thus pulling the upper layer of fabric evenly along with the lower fabric.
Q U I Lt I N G

32
Heavy Duty Computerised
Extension Table
#250051396Hd6600, Hd6700, Hd6800
Perfect for sewing large projects or quilting. Easily snaps onto the free arm of the machine. Legs fold away for storage.Heavy Duty Mechanical
Extension Table
#250051596 Perfect for sewing large projects or quilting. Easily snaps onto the free arm of the machine. Legs fold away for storage.Q U I Lt I N G

33
Legacy Extension Table
#250032496 M/C Code: EB The Large Extension Table provides a stable, level surface for sewing larger projects such as quilts. It has a ruler at the front for a quick reference or guide.Q U I Lt I N G
Featherweight Extension Table
#250033296 M/C Code: CD The Featherweight Extension Table is perfect for sewing large projects or for quilting. It has a ruler at the front for a quick reference or guide and the adjustable-height legs provide added stability. Table Measurement (Inches): 15.75 L X 10.13 W X 1.25 H
36 Presser Feet Kits

37
Singer® Road Show Presser Feet
Kit
#u2-SU5-021 This set features nine presser feet and a twin needle in a SINGER® display case. Included are:Blind Hem Foot
Cording Foot
Even Feed Foot
Free Motion/Darning Foot
Gathering Foot
Overcasting Foot
Rolled Hem Foot
Satin Stitch Foot
Straight Stitch Foot
Twin Needle, Size 90/14
P R E S S E R F E E T K I T S

38 Embroidery

39
Endless Embroidery Hoop
#250031796 M/C Code: EB The Endless Hoop makes it very simple to create borders for garments and home decorator projects. The hoop size is 7” x 4” (180mm x 100 mm) and includes six border designs.5” X 7” Embroidery Hoop
#250031696 M/C Code: EB Many commercial embroidery designs are designated as 5” x 7” in size, making this hoop perfect to use when embroidering these designs. It holds your fabric taut and permits precise placement of your 5” x 7” design. It also eliminates the use of excess stabilizer when using a larger hoop than needed. Six free downloadable 5” x 7” embroidery designs are included.E M B R O I D E R Y

40 Additional Accessories

41
Bobbins
#250061096 M/C Code: MA, MB, CC, CD, EB 10 pack of plastic class 15 Made of transparent durable plastic for strength and visibility. Thread the bobbin easily when winding thanks to the hole on the side of the bobbin.Bobbins
#250052496 M/C Code: CB, EA 10 pack of plastic class 15J Made of transparent durable plastic for strength and visibility. Thread the bobbin easily when winding thanks to the hole on the side of the bobbin.A D D I T I O N A L A C C E S S O R I E S
Bobbin Case
#2500269 M/C Code: MA Perfect as a spare bobbin case for specialty sewing such as bobbin work. Easily sew with thicker threads by adjusting the tension screw on the bobbin case.
42 Overlock Sewing and Embellishment

43
Elastic Foot
#250060396 M/C Code: SA The Elastic Foot is used for stretching and attaching elastic to a project. The amount of stretch can be adjusted easily. The foot can also be used to attach a stay tape to a seam to prevent stretching. Setting up the Serger: Needles: One or two Stitch Type: Three-thread overlock or four-thread ultra stretch mock safety stitch Stitch Length: 4 Differential Feed: Normal Upper Knife: Engaged or disengagedBlind Hem Foot
#250060496 M/C Code: SA The Blind Hem Foot stitches the hem, overcasts the edge and trims all in one step. The stitching occurs on the wrong side of the fabric, and the stitches barely catch the right side of the fabric. Setting up the Serger: Needle: Right needle Stitch Type: Three-thread overlock Stitch Length: 3 - 4 Differential Feed: Normal Upper Knife: EngagedO V E R L O C K S E W I N G A N D E M B E L L I S H M E N T

44
Gathering Foot
#250060596 M/C Code: SA The Gathering Foot is used to form gathers in fabric. It can gather a single fabric or gather and attach to a second flat fabric simultaneously. It works best on light to medium weight fabrics. Setting up the Serger: Needles: Two or one Stitch Type: Three or four-thread overlock Stitch Length: Longer Stitch Differential Feed: Higher Setting Upper Knife: Engaged To gather a single layer of fabric:To gather and attach a second flat fabric simultaneously:
O V E R L O C K S E W I N G A N D E M B E L L I S H M E N T

45
Beading Foot
#250060796 M/C Code: SA The Beading Foot is used to apply beads, pearls, sequins or other trims to projects. It can also be used with a rolled hem stitch to make wire-edge ribbon for craft and home dec projects. Setting up the Serger: Needle: Right or left needle Stitch Type: Three-thread overlock Stitch Length: 2-4 Differential Feed: Normal Upper Knife: Engaged or disengagedLace Foot
#250060696 M/C Code: SA The Lace Foot makes it easy to serge lace and delicate trims together or onto fabric without damaging the header. The adjustable guide of the foot ensures that the stitching will be accurate as well as ensure that your lace stays intact. Setting up the Serger: Needle: Right needle Stitch Type: Three-thread overlock Stitch Length: 2-4 Differential Feed: Normal Upper Knife: EngagedO V E R L O C K S E W I N G A N D E M B E L L I S H M E N T

46
Piping Foot
#250060896 M/C Code: SA The Piping Foot is sometimes called a Cording Foot. It is used to cover cording to make piping or for inserting piping into seams. The groove in the bottom of the foot guides the cording or piping while stitching. Setting up the Serger: Needle: One or two Stitch Type: Three or four-thread overlock stitch Stitch Length: 3-5 mm Differential Feed: Normal Upper Knife: Engaged or disengaged To make piping:O V E R L O C K S E W I N G A N D E M B E L L I S H M E N T

48 Notions (Needles, Scissors & Dress Forms) For optimum performance, SINGER® recommends to change your needle every 6-8 hours of sewing and/ or type of fabric.

49
Universal Needle
250055196Size 70/10 - 5 Count
250058896Size 70/10 - 10 Count
250052796Size 80/12 - 5 Count
250052796Size 80/12 - 10 Count
250053096Size 90/14 - 5 Count
250053996Size 90/14 - 10 Count
250055896Size 100/16 - 5 Count
250059296Size 100/16 - 10 Count
250057696Size 110/18 - 5 Count
250052696Asst - 5 Count
250053396Asst - 10 Count
Easily slips through weave of knits and woven fabric with rounded tip and tapered end Not available in the USBall Point Needle
250056696Size 70/10 – 5 Count
250054396Size 80/12 – 5 Count
250055796Size 90/14 – 5 Count
250057596Asst – 5 Count
Designed to slide between the yarns of knit fabrics withoutsnagging with a rounded tip Not available in the US
Overlock Needle
250054696Size 80/12 – 5 Count
250054496Size 90/14 – 5 Count
250057596Asst – 5 Count
Designed specifically for overlock stitching Not available in the USN O T I O N S ( N E E D L E S , S C I S S O R S A N D D R E S S F O R M S )

50
Microtex Needle
250057496 Size 60/08 – 5 Count
250055396 Size 70/10 – 5 Count
250053296 Size 80/12 – 5 Count
250054796 Size 90/14 – 5 Count
250056496 Asst – 5 Count
Perfect for microfibers, polyester and other synthetic fabrics. This needle is indicated for topstitching and precision quilt piecing due to very slim acute point. Not available in the USLeather Needle
250058596 Size 80/12– 5 Count
250055496 Size 90/14– 5 Count
250056996 Size 100/16– 5 Count
250057996 Size 110/18 – 5 Count
Cuts through leather and other heavy non-woven imitation leathers and suedes without creating large holes due to the needles wedge shape slightly sharp cutting point Not available in the USN O T I O N S ( N E E D L E S , S C I S S O R S A N D D R E S S F O R M S )
Denim Needle
250056396 Size 80/12 – 5 Count
250053496 Size 90/14 – 5 Count
250053696 Size 100/16 – 5 Count
250054596 Size 110/18 – 5 Count
250055096 Asst – 5 Count
Reduces breakage and skip stitches due to reinforced blade with the rounded tip and tapered end Not available in the US
51
Topstitch Needle
250040496 Size 80/12 – 5 Count
250056696 Size 90/14 – 5 Count
250040496 Size 100/16 – 5 Count
Achieve perfectly straight stitch lines for heavy or multiple threads with this very long eye of the needle Not available in the USEmbroidery Needle
250053196 Size 80/12 – 5 Count
250052896 Size 90/14 – 5 Count
250054196 Asst – 5 Count
Guard against excess friction allowing trouble-free embroidery and decorative stitching due to big eye and rounded point Not available in the USN O T I O N S ( N E E D L E S , S C I S S O R S A N D D R E S S F O R M S )
Heavy Duty Titanium Needle
250054096 Embroidery Size 80/12 – 5 Count
250054996 Embroidery Size 90/14 – 5 Count
250057196 Quilting Size 80/12 – 5 Count
250056096 Quilting Size 90/14 – 5 Count
250056196 Universal Size 80/12 – 5 Count
250056896 Universal Size 90/14 – 5 Count
The heavy duty titanium coating resists adhesives, improves needle wear & penetration of densely woven fabrics. Not available in the US
52
Twin Needle
250058796Denim Size 100/16 - 4Mm – 1 Count
250059096Universal Size 80/12 - 1.6Mm – 1 Count
250056596Universal Size 80/12 - 2Mm – 1 Count
250056296Universal Size 80/12 - 2.5Mm – 1 Count
250056796Universal Size 80/12 - 4Mm – 1 Count
250058096Universal Size 90/14 - 3Mm – 1 Count
250058496Universal Size 90/14 - 4Mm – 1 Count
250059396Universal Size 100/16 - 4Mm – 1 Count
250057096Stretch Size 80/12 - 2.5Mm – 1 Count
250055696Stretch Size 80/12 - 4Mm – 1 Count
Create two rows of stitches simultaneously and uses two spools of thread and one bobbin thread Not available in the USWing Needle
250057296 Size 100/16 – 1 Count
250057896 Size 120/19 – 1 Count
For beautiful hem stitches, wing needle punches a hole into your fabric while the sewing machine stitches around the piercing Not available in the USN O T I O N S ( N E E D L E S , S C I S S O R S A N D D R E S S F O R M S )

53
Quilting Needle
250055296 Size 80/12 – 5 Count
250054296 Size 90/14 – 5 Count
250055596 Asst – 5 Count
Allows easier fabric penetration and helps eliminate skipped stitches with a special tapered tip of the needle Not available in the USN O T I O N S ( N E E D L E S , S C I S S O R S A N D D R E S S F O R M S )
Stretch Needle
250053796 Size 80/12 – 5 Count
250053896 Size 90/14 – 5 Count
Perfect for sewing through stretch fabrics with the rounded point to pierce through thicker threads Not available in the US
54
7.75 Inch (19.7 Cm) All Purpose
Scissor Green
#250015601 This Multi-purpose scissor can be used for a variety of sewing and craft projects. Not available in the US7.75 Inch (19.7 Cm) All Purpose
Scissor Pink
#250015801This Multi-purpose scissor can be used for a variety of sewing and craft projects. Not available in the US
7.75 Inch (19.7 Cm) All Purpose
Scissor Blue
#250015701 This Multi-purpose scissor can be used for a variety of sewing and craft projects. Not available in the USN O T I O N S ( N E E D L E S , S C I S S O R S A N D D R E S S F O R M S )

55
7.75 Inch (19.7 Cm) All Purpose
Scissor Black
#250015901This Multi-purpose scissor can be used for a variety of sewing and craft projects. Not available in the US
7.75 Inch (19.7 Cm) All Purpose
Scissor Purple
#250016001This Multi-purpose scissor can be used for a variety of sewing and craft projects. Not available in the US
8 Inch (20.3 Cm) All Purpose
Scissor Black
#250020396This Multi-purpose scissor can be used for a variety of sewing and craft projects. Not available in the US
N O T I O N S ( N E E D L E S , S C I S S O R S A N D D R E S S F O R M S )

56
7 Inch (17.8 Cm) All Purpose
Scissor Black
#250020296 This Multi-purpose scissor can be used for a variety of sewing and craft projects. Not available in the US9 Inch (22.9 Cm) All Purpose
Scissor Black
#250020496This Multi-purpose scissor can be used for a variety of sewing and craft projects. Not available in the US
N O T I O N S ( N E E D L E S , S C I S S O R S A N D D R E S S F O R M S )
9.5 Inch (24.1 Cm) Pinking Scissor
Black
#250016601Sewing enthusiasts and crafters alike will love how quickly you can finish seam edges using these pinking shears. Not available in the US

57
4 Inch (10.2 Cm) Needlecraft
Scissor, Speckled, Light Blue
#2500145014 Inch (10.2 Cm) Needlecraft
Scissor, Speckled, Blue,
White, And Pink
#250014401N O T I O N S ( N E E D L E S , S C I S S O R S A N D D R E S S F O R M S )
4.75 Inch (12.1Cm) Thread Snip,
Black
#250015101 These are useful for quickly trimming thread while at your sewing machine and for snipping off thread ends. Not available in the US
58
4 Inch (10.2 Cm) Needlecraft
Scissor Speckled, Multi Color
Floral
#2500146014 Inch (10.2 Cm) Needlecraft
Scissor, Speckled, Green Floral
#250014801N O T I O N S ( N E E D L E S , S C I S S O R S A N D D R E S S F O R M S )
4 Inch (10.2 Cm) Needlecraft
Speckled, Scissor Pink
#250014701
59
4 Inch (10.2 Cm) Precision Detail
Scissor
#2500142014 Inch (10.2 Cm) Angled Needlecraft
Scissor, Speckled, Green And
Yellow Floral
#250015001N O T I O N S ( N E E D L E S , S C I S S O R S A N D D R E S S F O R M S )
4 Inch (10.2 Cm) Needlecraft
Scissor, Speckled, Blue Floral
#250014901
60
4 Inch (10.2 Cm) Titanium Precision
Detail Scissor
#2500141014 Inch (10.2 Cm) Embroidery Scissor
#250014301 These short and sharp embroidery scissors feature a lightly curved blade for trimming threads and making detailed cuts in fabrics. Not available in the US5 Inch (12.7 Cm) Embroidery Scissor
#250015201 These short and sharp embroidery scissors feature a lightly curved blade for trimming threads and making detailed cuts in fabrics. Not available in the USN O T I O N S ( N E E D L E S , S C I S S O R S A N D D R E S S F O R M S )

61
N O T I O N S ( N E E D L E S , S C I S S O R S A N D D R E S S F O R M S )
6 Inch (15.2 Cm) Fabric Scissor
#2500154017 Inch (17.8 Cm) Fabric Scissor
#2500155016 Inch (15.2 Cm) Embroidery Scissor
#250015301 These short and sharp embroidery scissors feature a lightly curved blade for trimming threads and making detailed cuts in fabrics. Not available in the US
62
N O T I O N S ( N E E D L E S , S C I S S O R S A N D D R E S S F O R M S )
7 Inch (17.8 Cm) Bent Fabric Scissor
#250016101Use these dressmaker shears for cutting light weight fabrics. Cut without lifting the fabric. Not available in the US
8 Inch (20.3 Cm) Bent Fabric Scissor
#250016201Use these dressmaker shears to cut medium weight fabrics. Cut without lifting the fabric. Not available in the US
8 Inch (20.3 Cm) Fabric Scissor
#250017401
63
9 Inch (22.9 Cm) Bent Fabric Scissor
#250016301These professional shears are ideal for cutting heavy weight fabrics. Not available in the US
N O T I O N S ( N E E D L E S , S C I S S O R S A N D D R E S S F O R M S )

64 Red Dress Form (S/M)
#Df150Sm_Rd
Perfect for fitting garments. Get a perfect fit every time you sew a garment with this adjustable small to medium dress form. Foam backed for easy pinning and marking, features 12 dials to set to your size in seconds. Also includes a built in hem gauge for accuracy when hemming your projects.#Df151Ml_Gr
Perfect for fitting garments. Get a perfect fit every time you sew a garment with this adjustable medium to large dress form. Foam backed for easy pinning and marking, features 12 dials to set to your size in seconds. Also includes a built in hem gauge for accuracy when hemming your projects.N O T I O N S ( N E E D L E S , S C I S S O R S A N D D R E S S F O R M S )

66
Bobbin Winder
#250050596 - Battery Operated #220445112 - Power Supply Easy one-touch Bobbin winding with auto shut off. Portable for on the go sewers.Stitch Sew Quick Mending
Machine
#220017096 Small, compact and battery operated. Perfect for small, quick and easy repairs to everyday household items.Lint Remover
#220015096 - Battery Operated Compact design with a detachable lint catcher, 3 stainless steel rotary blades and ergonomic handle design. Compact size make it perfect for travel and storage. Battery powered for the on-the-go consumer or traveler.N O T I O N S ( N E E D L E S , S C I S S O R S A N D D R E S S F O R M S )

67
Cutting Mat
#250050696 Durable self-healing material with a large 13” x 19” cutting surface. Allows you to cut larger projects using the printed grid.Mending Kit
#250048096Perfect compact, travel mending kit Everything You Need to Handle Your On-The-Go Mending Needs Contents Include: TAPE MEASURE, PINS, THIMBLE, NEEDLE
Threader, Thread, Needles, Buttons, Scissors,
Magnifying Glass
Not available in the USBeginner Sewing Kit
#250047996Sewing Made Easy with this beginner sewing kit. Everything You Need to Get Started Sewing Contents Include: GAUGE, TAPE MEASURE, PINS, NEEDLES,
Thimble, Pencil, Pin Cushion, Needle Threader,
Tweezers, Scissors (2)
Not available in the USN O T I O N S ( N E E D L E S , S C I S S O R S A N D D R E S S F O R M S )

68
Deluxe Sewing Kit
#250047896 Perfect accompaniment for your sewing machine. Perfect for all of your sewing and mending needs. Every essential tool needed to gauge, cut, pin and stitch in style Contents include: TAPE MEASURE, STRAIGHT AND SAFETY PINS,Needle Threader, Tweezers, Seam Ripper, Pin Cushion,
Pencil, Assorted Buttons/Snaps/Hook & Eyes, Assorted
Sewing Machine Needles And Thread, Scissors (2)
Not available in the USPremium Sewing Kit
#250061596 - Mint #250062096 - Lilac #250067096 - Gray Premium Sewing kit in three accent colors - Lilac, Mint, Gray. Color mached accessories with premium carry case. Every essential tool needed to gauge, cut, pin and stitch in style Contents Include: SEAM GAUGE, TAPE MEASURE, SNIPS,Pins, Pin Cushion, 8” Scissors (With Color Accent),
Leather Thimble, Seam Ripper
Not available in the USN O T I O N S ( N E E D L E S , S C I S S O R S A N D D R E S S F O R M S )
(Mint) (Lilac) (Gray)
70
Bobbins & Tools
page 41 Bobbin Case
page 41 Bobbins (Class 15)
page 41 Bobbins (Class 15J)
page 41
Dress Forms
page 64 Gray, M-L
page 64 Red, S-M
page 64
Extension Tables
page 32-33 Heavy Duty Computerised Extension Table page 32 Heavy Duty Mechanical Extension Table page 32 Legacy Extension Table
page 33 Featherweight Extension Table
page 33
Hoops
page 39 5” x 7” Embroidery Hoop
page 39 Endless Embroidery Hoop
page 39
Machine Codes
page 4-7
Ca
page 5
Cb
page 6
Cc
page 6
Cd
page 7
Ce
page 6
Ea
page 7
Eb
page 7
Ma
page 5
Mb
page 5
Mc
page 5
Sa
page 7
Needles
page 49-53 Ballpoint page 49 Denim page 50 Embroidery page 51 Leather page 50 Microtex page 50 Quilting page 53 Stretch page 53 Overlock page 49 Heavy Duty Titanium page 51 Topstitch page 51 Twin page 52 Universal page 49 Wing page 52
Overlock Presser Feet
page 43-46 Beading Foot - Overlock/Serger page 45 Blind Hem Foot - Overlock/Serger page 43 Elastic Foot - Overlock/Serger page 43 Gathering Foot - Overlock/Serger page 44 Lace Foot - Overlock/Serger page 45 Piping Foot - Overlock/Serger page 46Presser Feet Kits
page 37 SINGER® Road Show Presser Feet Kit page 37 Index Alphabetical Order

71
Sewing Machine
Presser Feet
page 9-31 ¼” Foot with Guide page 29 ¼” Piecing Foot page 29 All-Purpose Foot page 10 Beading Foot page 24 Blind Hem Foot page 11 Button Sewing Foot page 14 Clear Open Toe Foot page 23 Clear Open Toe Free-Motion Foot page 31 Cording Foot page 20 Couching Foot page 25 Edge Joining Foot page 24 Even Feed Foot page 31 Free Motion / Darning Foot page 30 Fringe Foot page 21 Flower Stitch Foot page 27 Gathering Foot page 15 Invisible Zipper Foot page 13 Multi-Line Sewing Foot page 25 Non-Stick Foot page 16 Open Toe Foot page 20 Overcasting Foot page 14 Parallel Sewing Foot page 21 Pintuck Foot page 23 Piping Foot page 17 Rolled Hem Foot page 15 Roller Foot page 16 Ruffler Foot page 26 Satin Stitch Foot page 22 Sew-Easy Foot page 9 Straight Stitch Foot page 9 Side Cutter Attachment page 11 Stitch-in-the-Ditch Foot page 30 Zipper Foot page 12 Universal Shank page 9Scissors
page 54-63 7.75 Inch All Purpose Scissor (Green) page 54 7.75 Inch All Purpose Scissor (Pink) page 54 7.75 Inch All Purpose Scissor (Blue) page 54 7.75 Inch All Purpose Scissor (Black) page 55 7.75 Inch All Purpose Scissor (Purple) page 55 8 Inch All Purpose Scissor (Black) page 55 7 Inch All Purpose Scissor (Black) page 56 9 Inch All Purpose Scissor (Black) page 56 9.5 Inch Pinking Scissor (Black) page 56 4.75 Inch Thread Snip (Black) page 57 4 Inch NeedleCraft Scissor (Blue, White, & Pink) page 57 4 Inch NeedleCraft Scissor (Light Blue) page 57 4 Inch NeedleCraft Scissor (Multi Color Floral) page 58 4 Inch NeedleCraft Scissor (Green Floral) page 58 4 Inch NeedleCraft Scissor (Pink) page 58 4 Inch NeedleCraft Scissor (Blue Floral) page 59 4 Inch Precision Detail Scissor page 59 4 Inch NeedleCraft Scissor (Green, Yellow Floral) page 59 4 Inch Titanium Precision Detail Scissor page 60 4 Inch Embroidery Scissor page 60 5 Inch Embroidery Scissor page 60 6 Inch Embroidery Scissor page 61 6 Inch Fabric Scissor page 61 7 Inch Fabric Scissor page 61 8 Inch Fabric Scissor page 62 7 Inch Bent Fabric Scissor page 62 8 Inch Bent Fabric Scissor page 62 9 Inch Bent Fabric Scissor page 63
© copyright 2022