
Ask AI
— answers from the official manualAnswers from the official manual.
Common questions
Common Questions
45 totalWhat should I keep away from the front of the fireplace for safety?
You must keep combustible materials such as furniture, pillows, bedding, papers, clothes, and curtains at least 3 feet (0.9 meters) from the front of the appliance. This safety distance helps prevent fire hazards.
How do I assemble the legs on my Duraflame Electric Fireplace?
First, align the 2 mounting tabs into the bracket. Then slide the legs outward to lock them in place, which will align the screw hole. Finally, fasten the legs to the base using the included screws, with 1 screw per leg.
What should I do if the heater doesn't work even though the Power and Heater buttons are ON?
The thermal protector has likely tripped. Turn all buttons to the OFF position and unplug the unit from the wall outlet for 5 minutes. After 5 minutes, plug the unit back into a wall outlet and operate as normal.
How do I disable or re-enable the heater function?
Press and hold the power button on the control panel for 10 seconds. Once disabled or re-enabled, the ember bed lights will flash multiple times to confirm the change.
What are the thermostat temperature settings available?
The default temperature is 72°F, and the thermostat setting range is 62°F – 82°F (17°C – 27°C), or you can select continuously ON or OFF (00). The thermostat is adjustable by 2°F or 1°C increments by pressing the HEATER button on the control panel.
How far away should combustible materials be from the fireplace?
Keep combustible materials such as furniture, pillows, bedding, papers, clothes, and curtains at least 3 feet (0.9 m) from the front of the appliance and keep them away from the sides and the rear.
Show 39 more questions
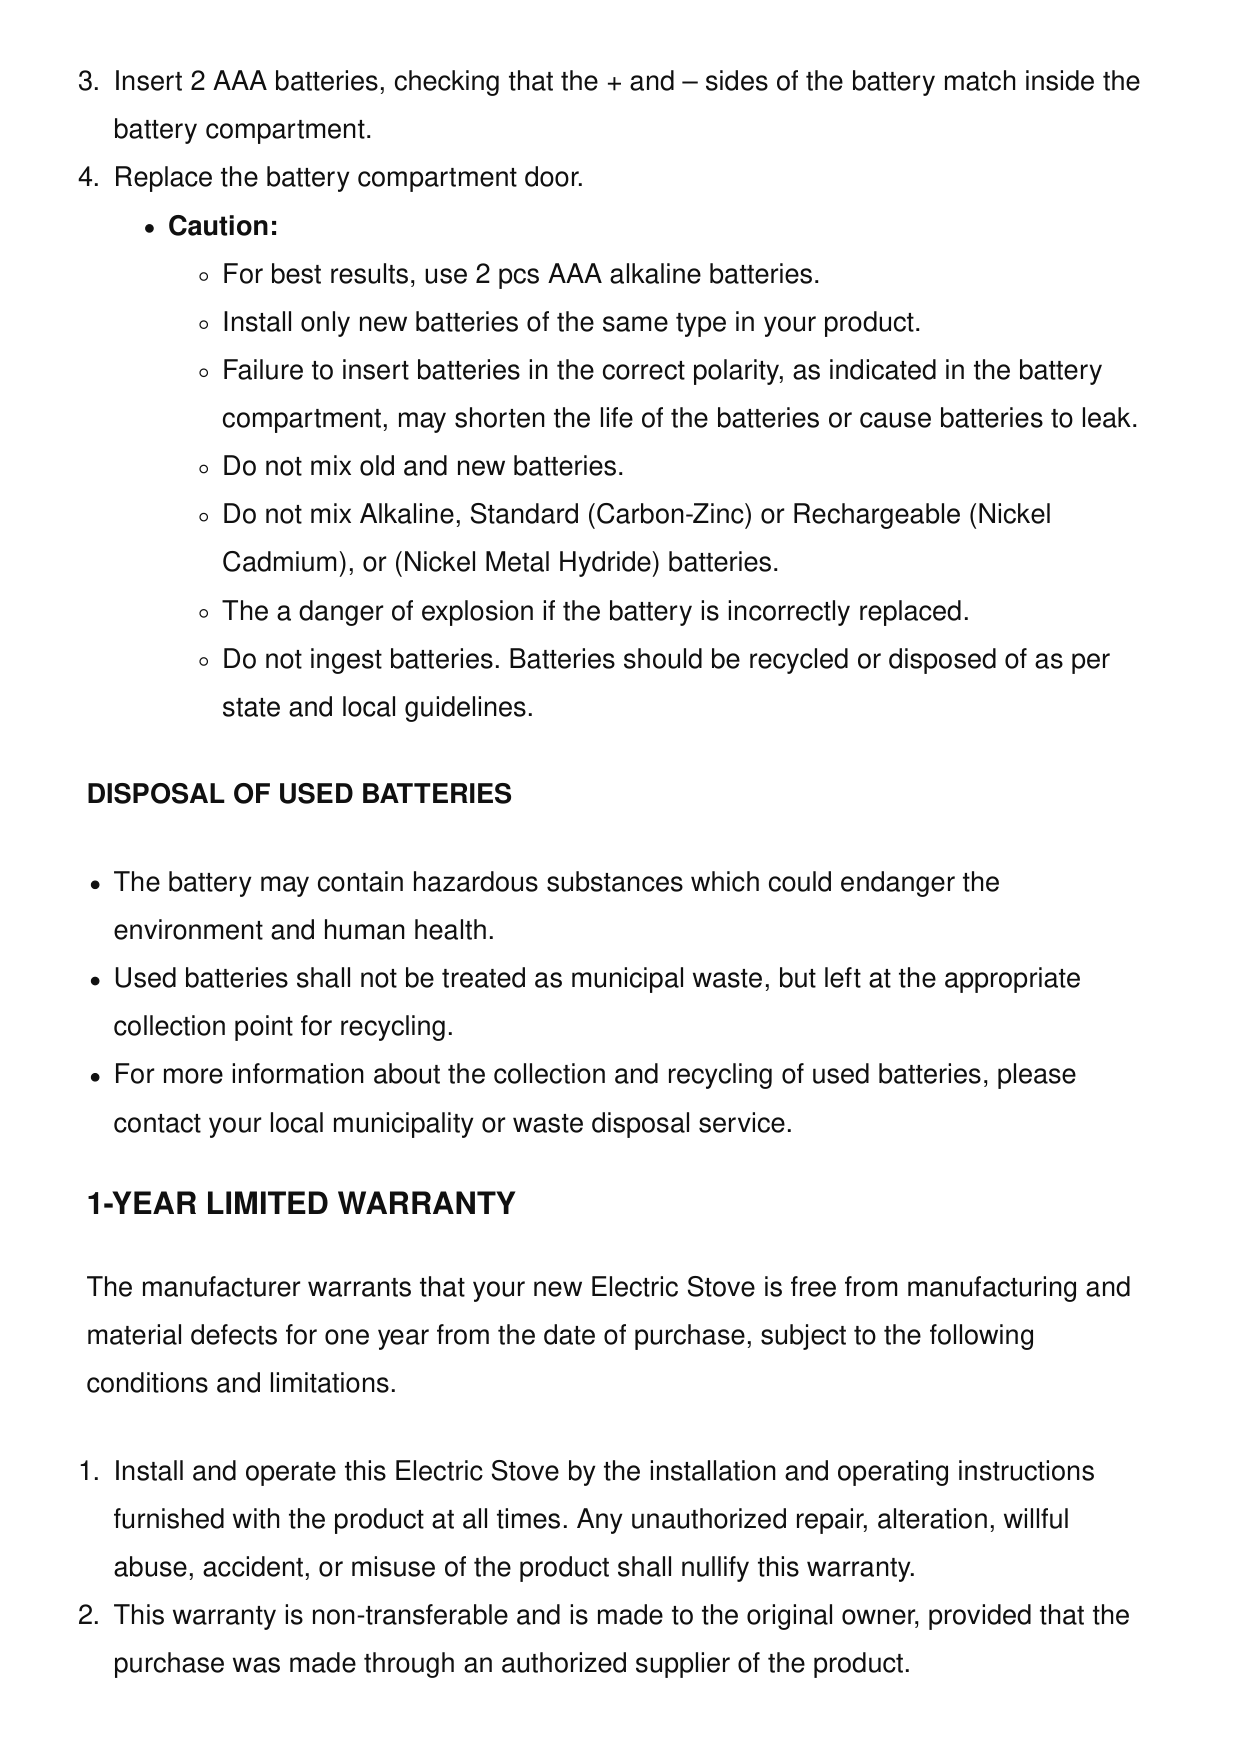
What type of batteries does the remote control use?
How many square feet can this fireplace heat?
What should I do if flames are not visible in the fireplace?
How do I assemble the Duraflame Electric Fireplace when I first receive it?
How do I replace the batteries in the remote control?
What type of batteries should I use in the remote?
What should I do if the fireplace does not turn on?
How do I fix the flame effect if it's not working?
What should I do if the heater is not producing warmth?
How should I clean and maintain the fireplace exterior?
What are the electrical specifications for this fireplace?
How long is the warranty coverage and what voids it?
How do I assemble the legs on my Duraflame DFI-550 fireplace?
What should I do if there's a smell when I first use the heater?
How do I enable or disable the heater function?
How do I change between Fahrenheit and Celsius?
What timer options are available?
What should I do if the thermal protector trips and the heater stops working?
How large of an area will the Duraflame DFI-550 heat?
How should I clean and maintain the trim on my fireplace?
What should I do if there's an odor when I first run the heater?
What are the flame brightness settings available?
What is the temperature range for the thermostat?
Can I burn wood or firewood logs in this electric fireplace?
How many flame brightness levels are available?
How far should I keep combustible materials from my fireplace?
How do I contact Duraflame customer service?
What is the maximum temperature setting for the thermostat?
How do I disable the heater function without turning off the entire unit?
Why does my fireplace smell when I first turn on the heater?
What timer options are available on the Duraflame DFI-550?
How do I contact customer service for help?
Can I burn real wood or firelogs in this electric fireplace?
What are the power specifications for this fireplace?
How do I assemble the legs on my Duraflame DFI-550 fireplace?
How far should I keep flammable materials from the fireplace?
How do I put the fireplace in standby mode?
What are the power specifications for the Duraflame DFI-550?
How do I disable or re-enable the heater function?
Full Manual
18 pages
☰ Home » duraflame » duraflame DFI-550 Black Infrared Freestanding Electric Fireplace Instruction Manual Contents [ hide ] 1 duraflame DFI-550 Black Infrared Freestanding Electric Fireplace 2 Product Information 3 FAQs
4 Assembly Instructions
5 Operating Instructions
6 Product Specifications
7 Important Instructions
8 Battery Replacement9 1-Year Limited Warranty
10 Troubleshooting Guide
11 Exploded View
12 Care And Maintenance
13 Fcc
14 Documents / Resources 14.1 References 15 Related Posts duraflame DFI-550 Black Infrared Freestanding Electric Fireplace Manuals+ duraflame-logo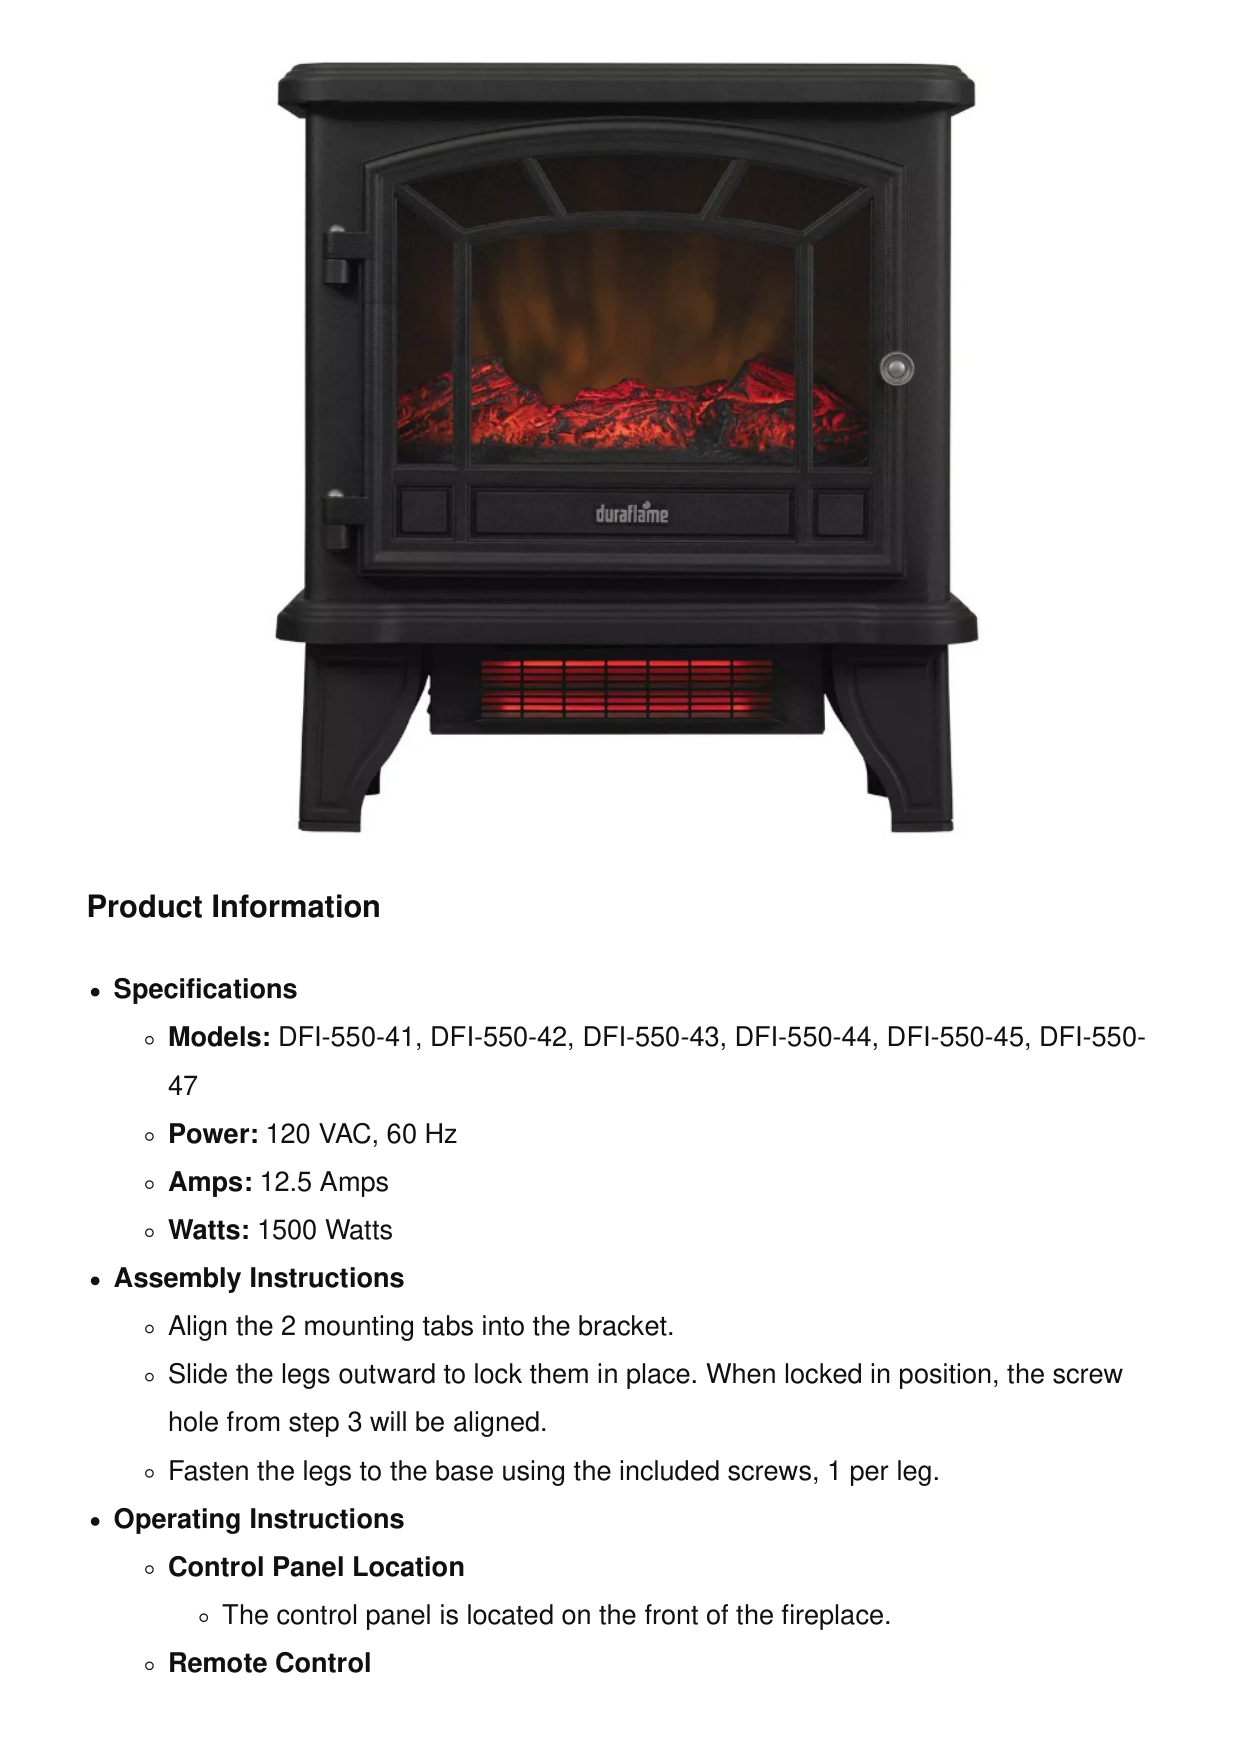
Product Information Specifications Models: DFI-550-41, DFI-550-42, DFI-550-43, DFI-550-44, DFI-550-45, DFI-550- 47 Power: 120 VAC, 60 Hz Amps: 12.5 Amps Watts: 1500 Watts Assembly Instructions Align the 2 mounting tabs into the bracket. Slide the legs outward to lock them in place. When locked in position, the screw hole from step 3 will be aligned. Fasten the legs to the base using the included screws, 1 per leg. Operating Instructions Control Panel Location The control panel is located on the front of the fireplace. Remote Control

The remote control allows you to operate the fireplace from a distance. Power The power button supplies power to all of the fireplace functions. Pressing the power button will put the insert in standby mode, turning off all functions but retaining the settings in memory. Pressing the power button again will turn on the unit with the retained settings. To disable or re-enable the heater function, press and hold the power button on the control panel for 10 seconds. Once disabled or re-enabled, the ember bed lights will flash multiple times. Flame The flame settings allow you to adjust the brightness. 5 brightness levels can be selected, as well as an OFF (00) setting. Settings F5 – F1 decrease in brightness. The default setting is F5. Heater The stove contains a fan-forced infrared element heater. When first running the heater, there may be an odor. This is normal as the heater has a surface coating on the internal parts. For the first several hours of operation, the coating reacts with the internal parts to permanently protect them. The odor is safe, but if you are sensitive to it, it is recommended to run the heater in a well-ventilated area until the odor dissipates. Timer Pressing the timer button will cycle through the timer settings: 30 minutes, 1 Hour, 2H, 3H, 4H, 5H, 6H, 7H, 8H, 9H, and off (00). Important Instructions Read all instructions before using this appliance. This appliance is hot when in use. To avoid burns, do not let bare skin touch hot surfaces. If provided, use handles when moving this appliance. Keep combustible materials, such as furniture, pillows, bedding, papers, clothes, and curtains at least 3 feet (0.9 m) from the front of this appliance and keep away from the sides and the rear. To disconnect this appliance, turn the controls to the off position, then remove the
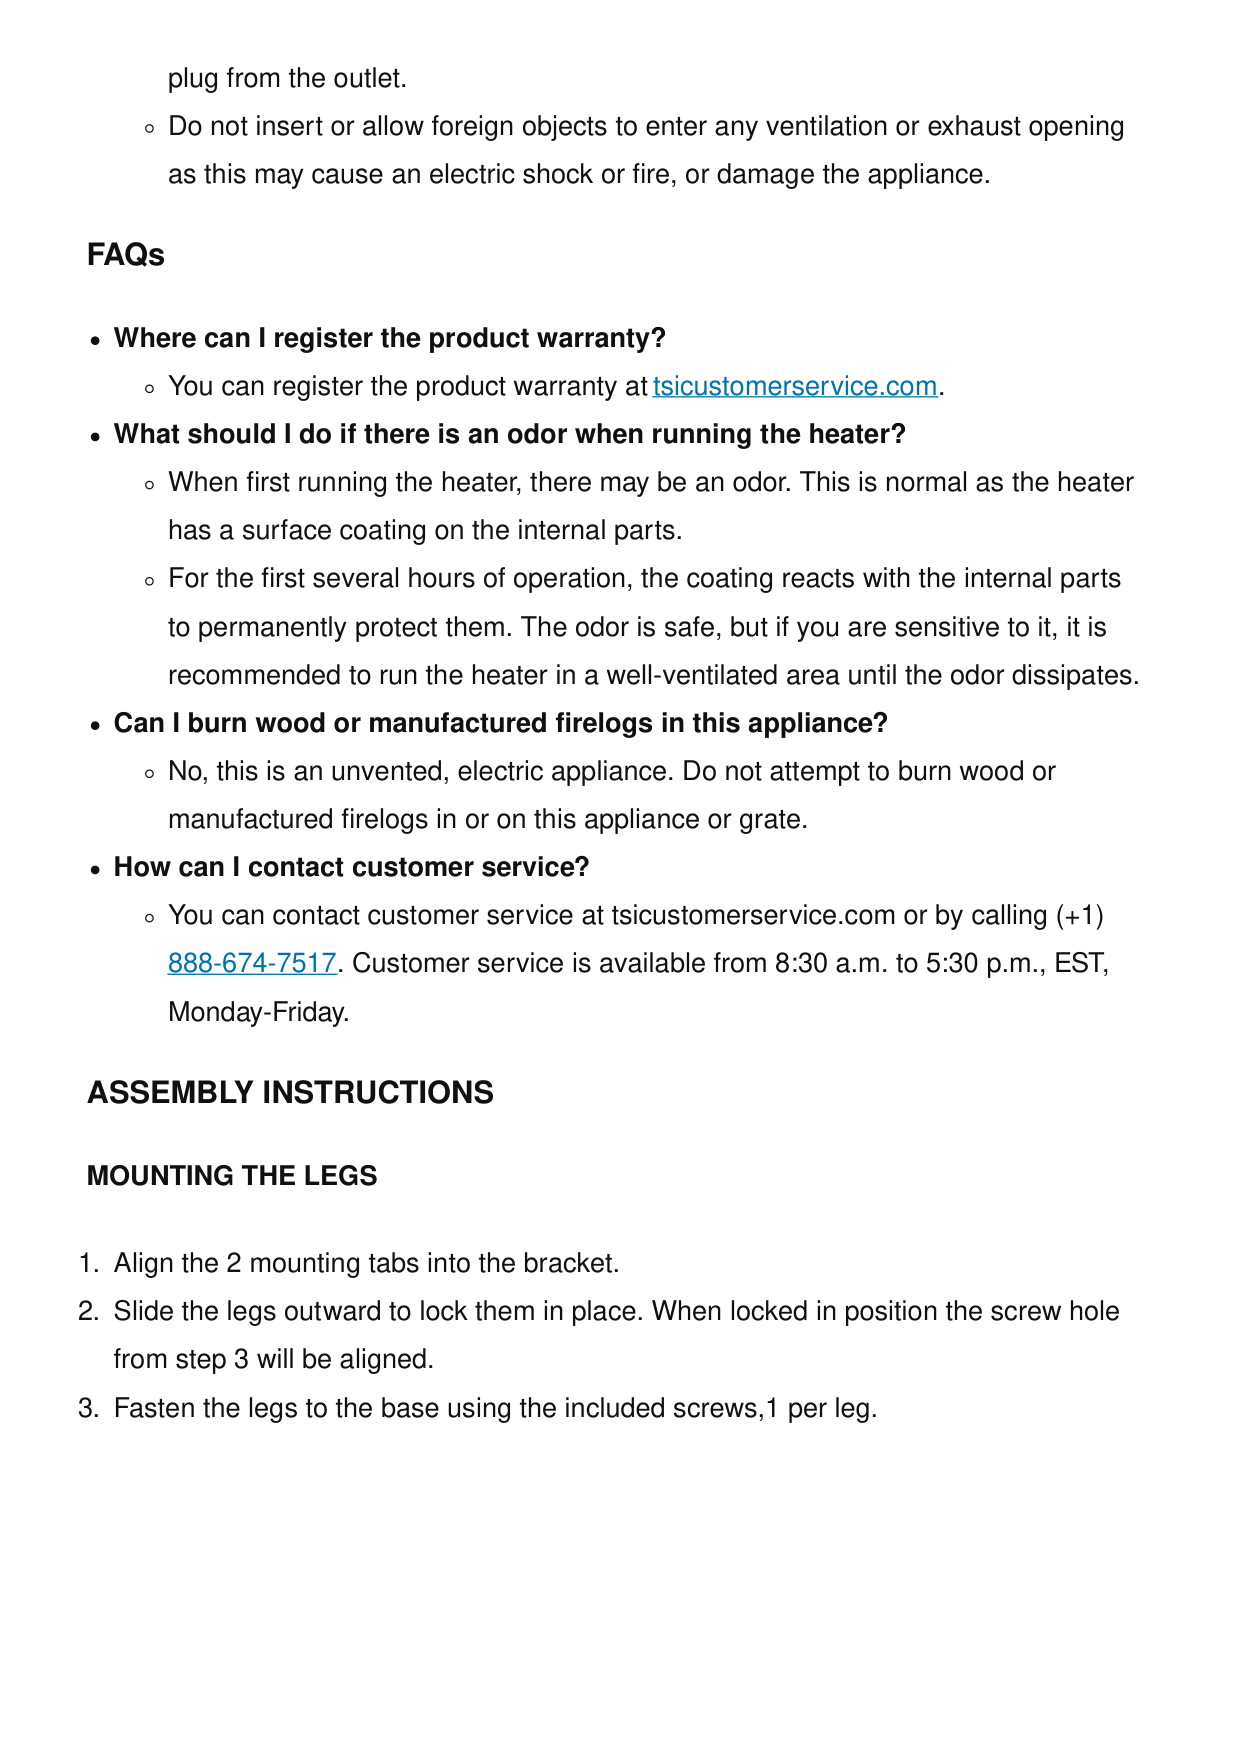
plug from the outlet. Do not insert or allow foreign objects to enter any ventilation or exhaust opening as this may cause an electric shock or fire, or damage the appliance. FAQs Where can I register the product warranty? You can register the product warranty at tsicustomerservice.com. What should I do if there is an odor when running the heater? When first running the heater, there may be an odor. This is normal as the heater has a surface coating on the internal parts. For the first several hours of operation, the coating reacts with the internal parts to permanently protect them. The odor is safe, but if you are sensitive to it, it is recommended to run the heater in a well-ventilated area until the odor dissipates. Can I burn wood or manufactured firelogs in this appliance? No, this is an unvented, electric appliance. Do not attempt to burn wood or manufactured firelogs in or on this appliance or grate. How can I contact customer service? You can contact customer service at tsicustomerservice.com or by calling (+1) 888-674-7517. Customer service is available from 8:30 a.m. to 5:30 p.m., EST, Monday-Friday.
Assembly Instructions
Mounting The Legs
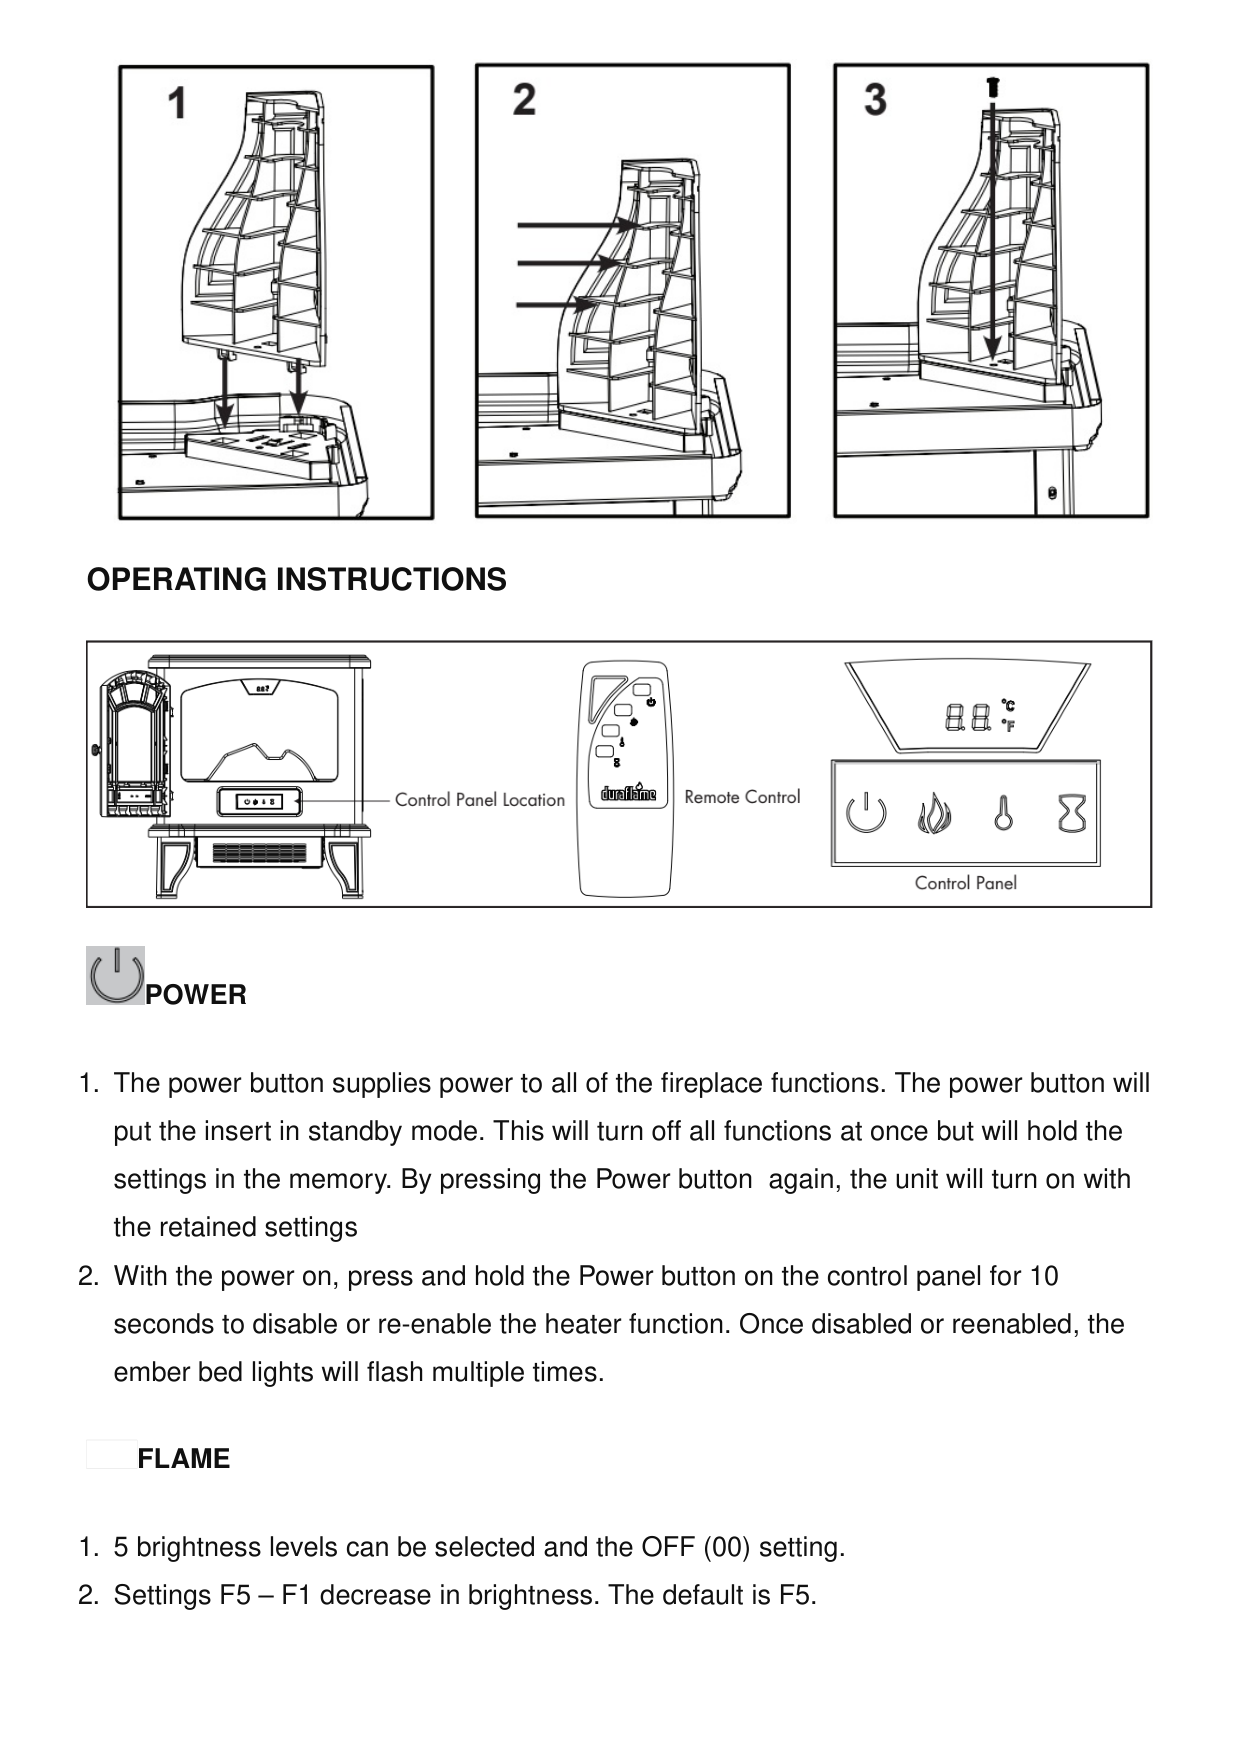
Operating Instructions
Power
Flame
Heater
Off(00).
Timer
Product Specifications
Voltage
120 VAC, 60 HzAmps
12.5 AmpsWatts
1500 Watts For Customer Service: tsicustomerservice.com. (+1) 888-674-7517 8:30 a.m.-5:30 p.m., EST, Monday-Friday
Note: When first running the heater there may be an odor. This is normal as the heater has a surface coating on the internal parts. For the first several hours of operation, the coating reacts with the internal parts to permanently protect them. The odor is safe; if you aresensitive to the odor, it is recommended to run the heater in a well-ventilated area until the odor dissipates. Warning: This is an unvented, electric appliance. DO NOT attempt to burn wood or manufactured firelogs in or on this appliance or grate.
Important Instructions
When using electrical appliances, basic precautions should always be followed to reduce the risk of fire, electrical shock, and injury to persons including the following:
Disposal Of Used Batteries
The battery may contain hazardous substances which could endanger the environment and human health. Used batteries shall not be treated as municipal waste, but left at the appropriate collection point for recycling. For more information about the collection and recycling of used batteries, please contact your local municipality or waste disposal service.1-Year Limited Warranty
The manufacturer warrants that your new Electric Stove is free from manufacturing and material defects for one year from the date of purchase, subject to the following conditions and limitations.
If Warranty Service Is Needed
Contact the manufacturer by calling the customer service department at 1-888-674- 7517, 7 days a week 24 hours a day at our toll-free helpline. Our Consumer Service department is available Monday – Friday 8:30 am – 5:30 pmEst.
Make sure you have your warranty, your sales receipt, the location of purchase, and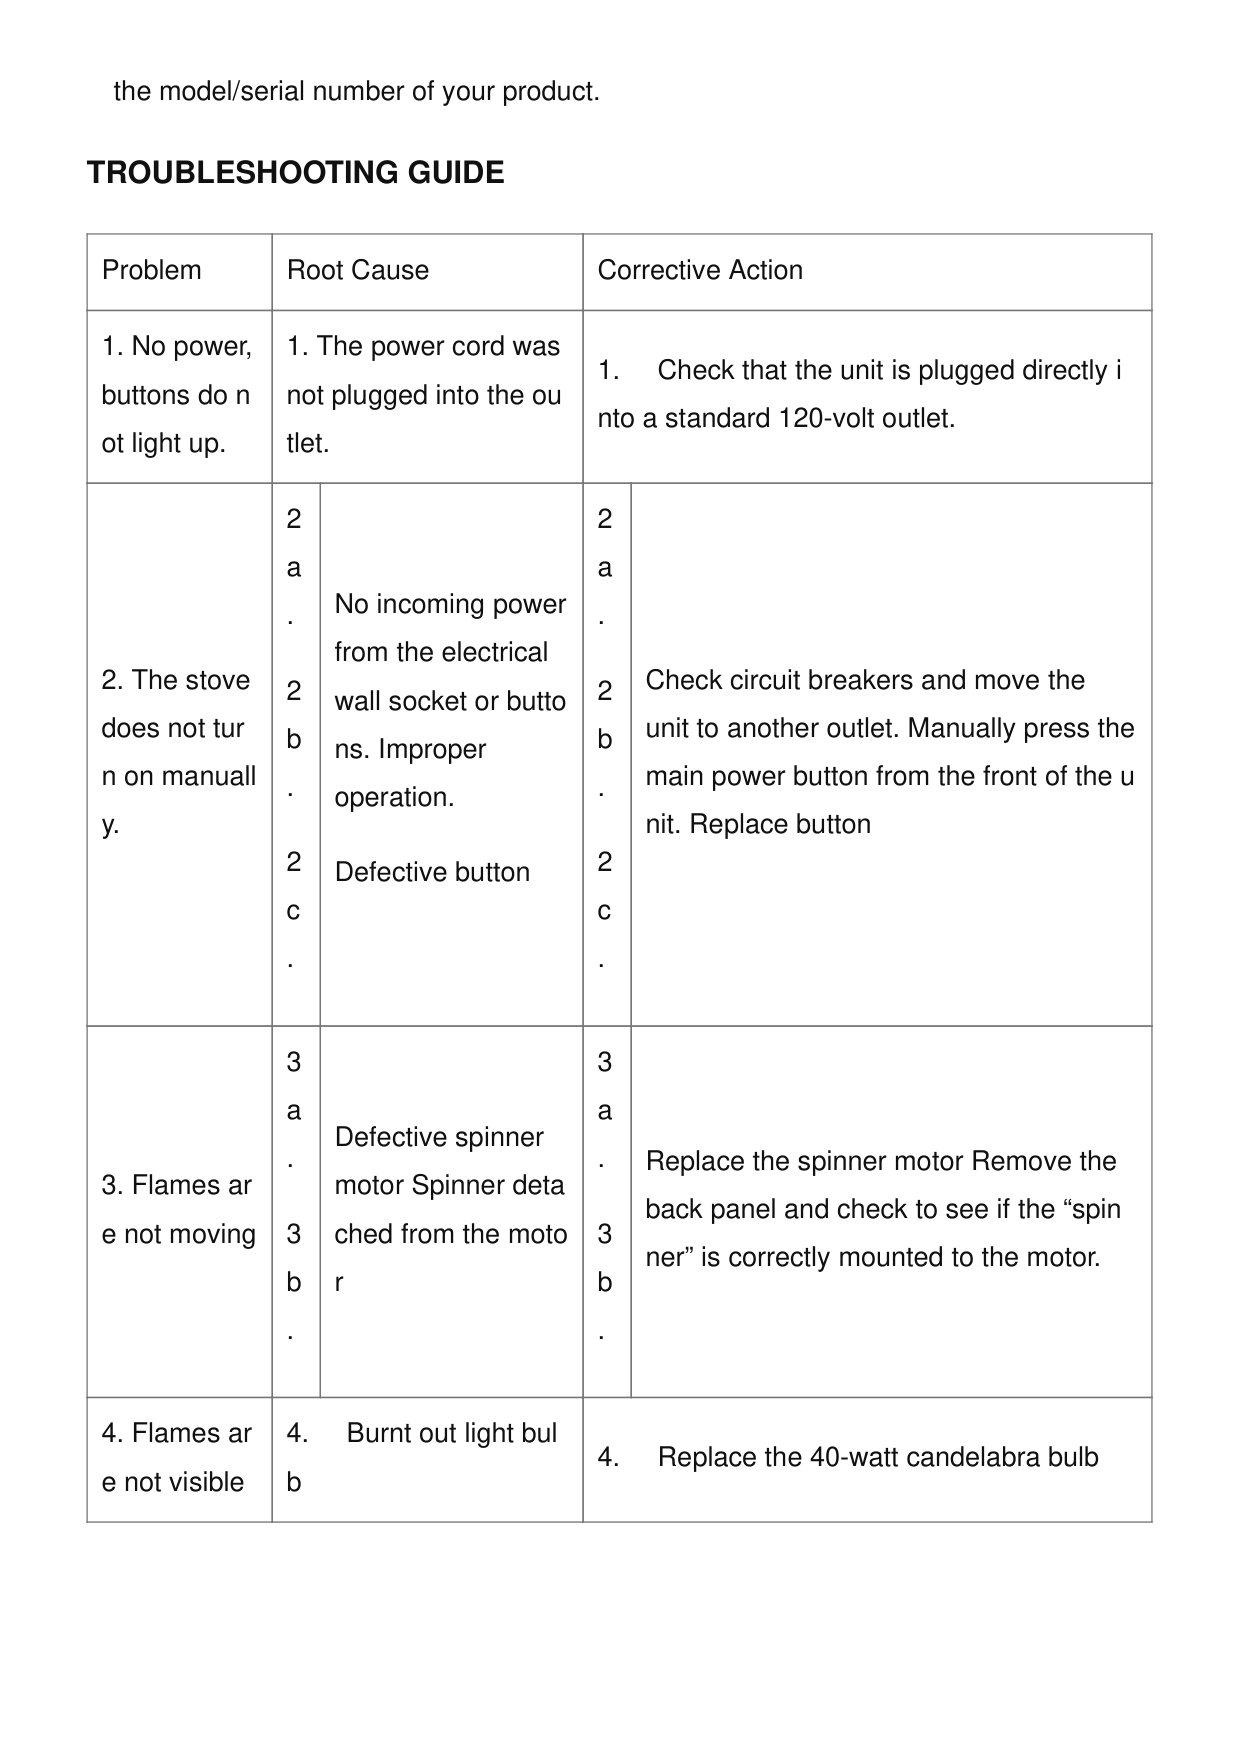
the model/serial number of your product.
Troubleshooting Guide
Problem Root Cause Corrective Action

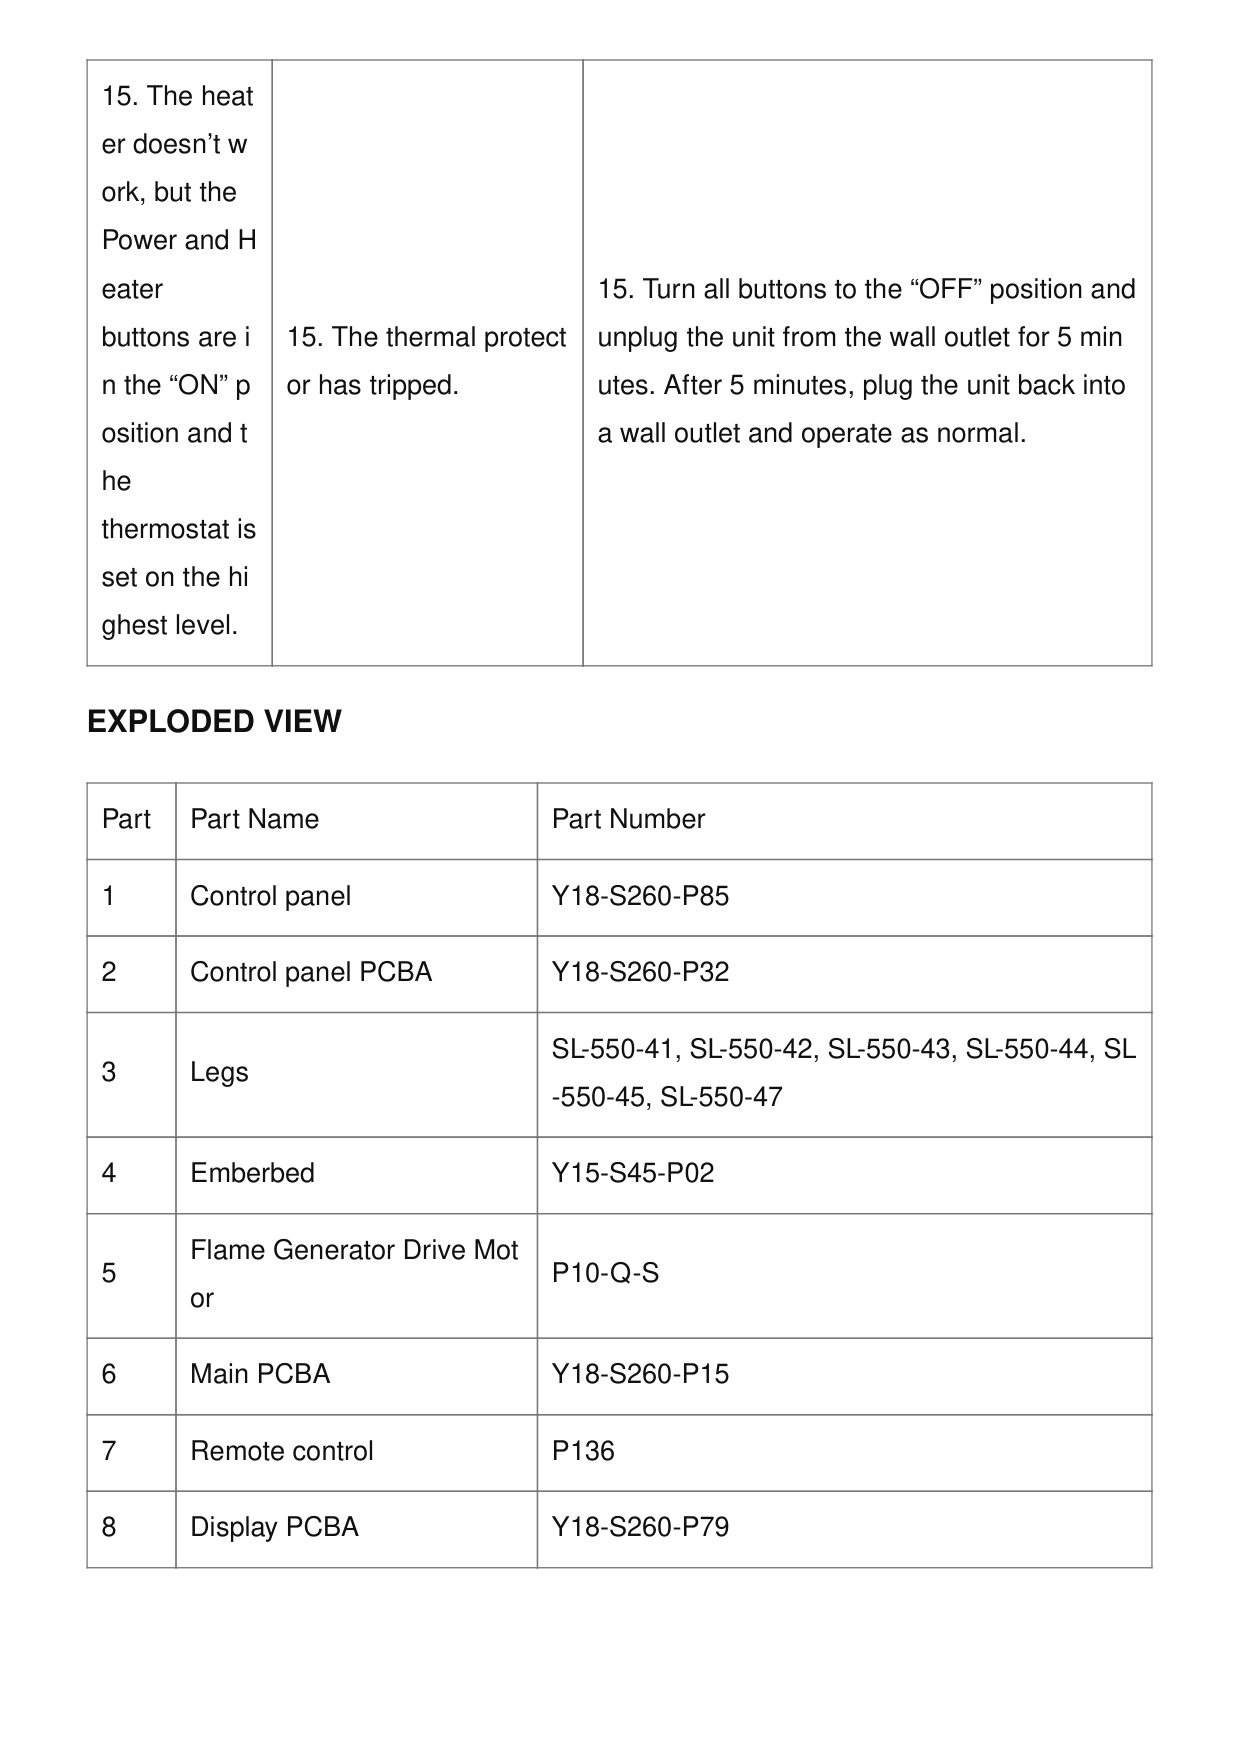
Exploded View
Part Part Name Part Number 1 Control panelY18-S260-P85
2 Control panel PCBAY18-S260-P32
3 LegsSl-550-41, Sl-550-42, Sl-550-43, Sl-550-44, Sl
-550-45, Sl-550-47
4 EmberbedY15-S45-P02
5 Flame Generator Drive Mot orP10-Q-S
6 Main PCBAY18-S260-P15
7 Remote controlP136
8 Display PCBAY18-S260-P79
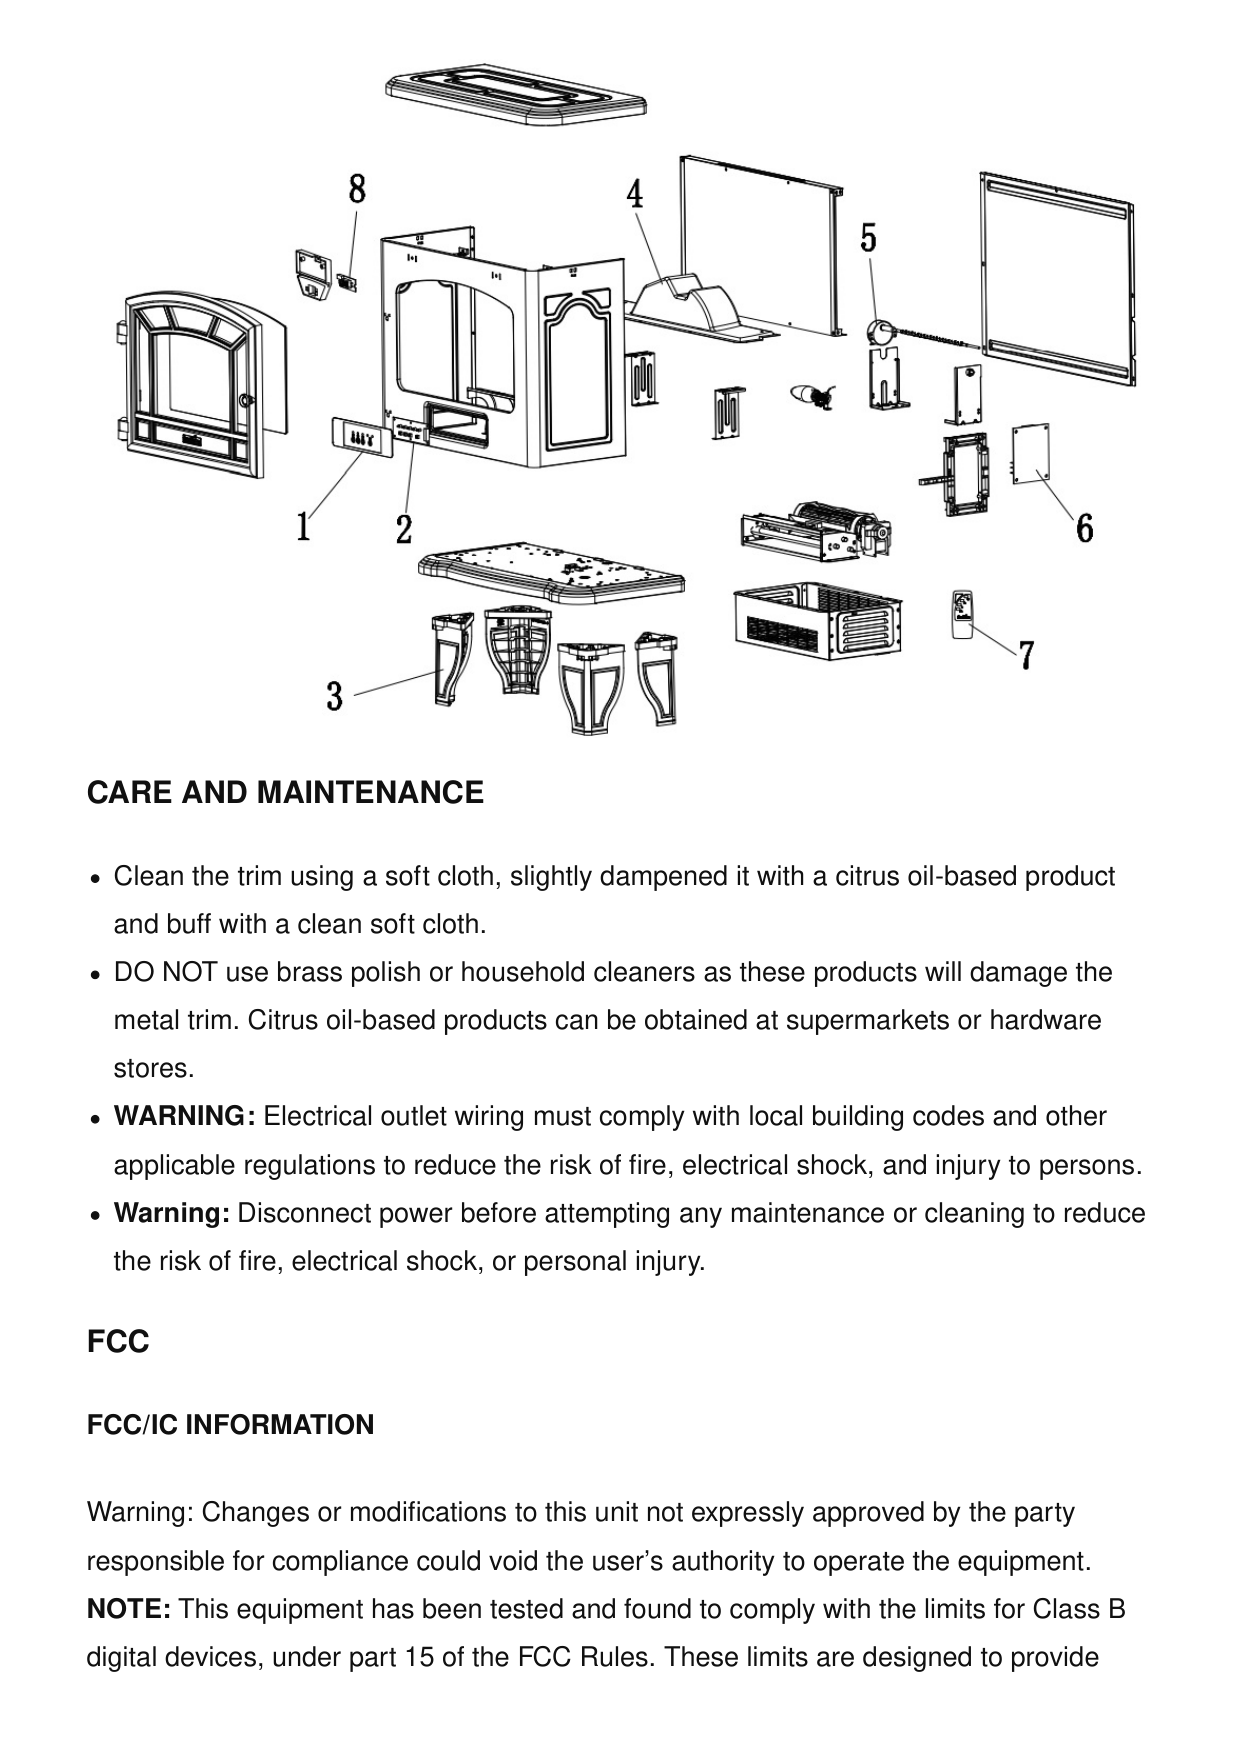
Care And Maintenance
Clean the trim using a soft cloth, slightly dampened it with a citrus oil-based product and buff with a clean soft cloth. DO NOT use brass polish or household cleaners as these products will damage the metal trim. Citrus oil-based products can be obtained at supermarkets or hardware stores. WARNING: Electrical outlet wiring must comply with local building codes and other applicable regulations to reduce the risk of fire, electrical shock, and injury to persons. Warning: Disconnect power before attempting any maintenance or cleaning to reduce the risk of fire, electrical shock, or personal injury.Fcc
Fcc/Ic Information
Warning: Changes or modifications to this unit not expressly approved by the party responsible for compliance could void the user’s authority to operate the equipment. NOTE: This equipment has been tested and found to comply with the limits for Class B digital devices, under part 15 of the FCC Rules. These limits are designed to provide
reasonable protection against harmful interference in a residential installation. This equipment generates, uses, and can radiate radio frequency energy and, if not installed and used by the instructions, may cause harmful interference to radio communications. However, there is no guarantee that interference will not occur in a particular installation. if this equipment does cause harmful interference to radio or television reception, which can be determined by turning the equipment off and on, the user is encouraged to try to correct the interference by one or more of the following measures. Reorient or relocate the receiving antenna. Increase the separation between the equipment and the receiver. Connect the equipment to an outlet on a circuit different from that to which the receiver is connected. Consult the dealer or an experienced radio/TV technician for help. This device complies with Part 15 of the FCC Rules. Operation is subject to the following two conditions:
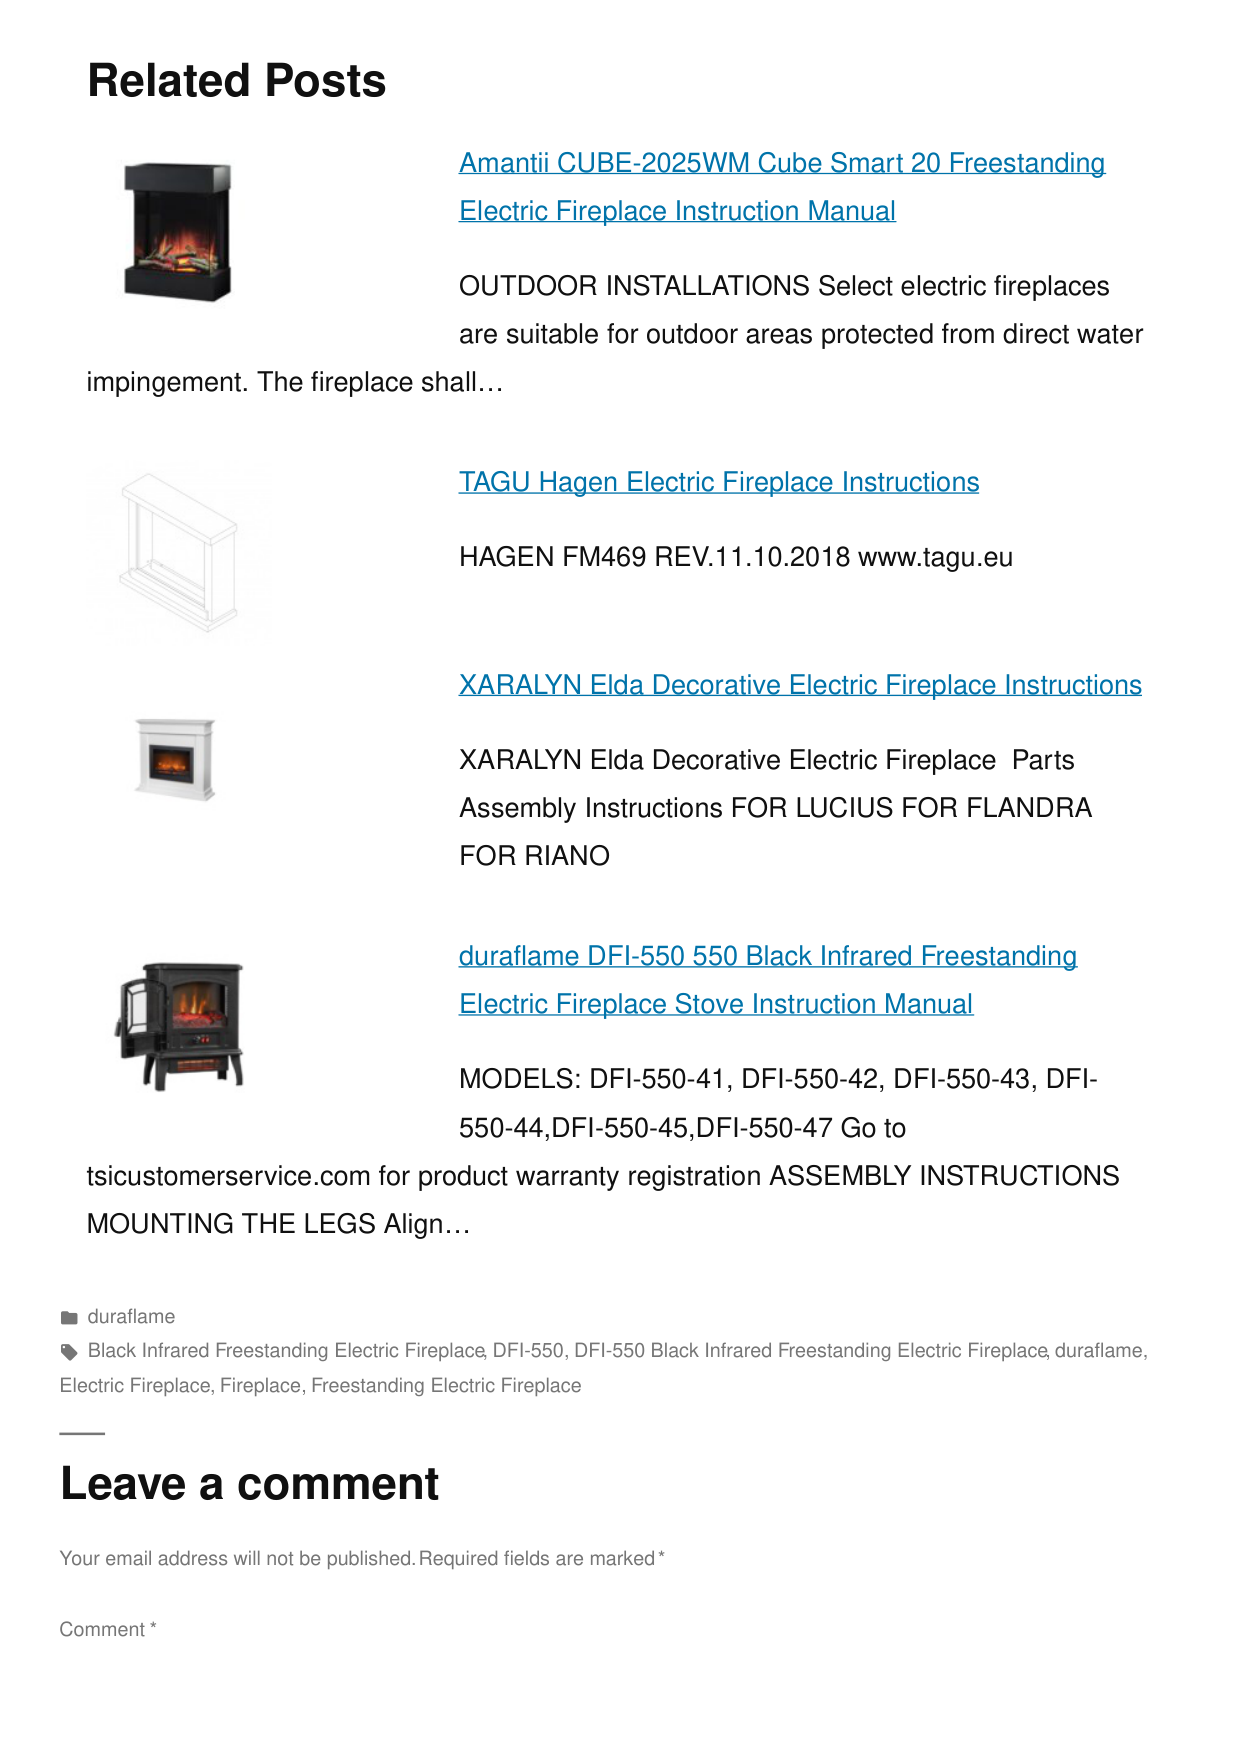
Amantii CUBE-2025WM Cube Smart 20 Freestanding Electric Fireplace Instruction Manual OUTDOOR INSTALLATIONS Select electric fireplaces are suitable for outdoor areas protected from direct water impingement. The fireplace shall… TAGU Hagen Electric Fireplace Instructions HAGEN FM469 REV.11.10.2018 www.tagu.eu XARALYN Elda Decorative Electric Fireplace Instructions XARALYN Elda Decorative Electric Fireplace Parts Assembly Instructions FOR LUCIUS FOR FLANDRA
For Riano
duraflame DFI-550 550 Black Infrared Freestanding Electric Fireplace Stove Instruction ManualModels: Dfi-550-41, Dfi-550-42, Dfi-550-43, Dfi-
550-44,DFI-550-45,DFI-550-47 Go to tsicustomerservice.com for product warranty registration ASSEMBLY INSTRUCTIONS MOUNTING THE LEGS Align… Related Posts duraflame Black Infrared Freestanding Electric Fireplace, DFI-550, DFI-550 Black Infrared Freestanding Electric Fireplace, duraflame, Electric Fireplace, Fireplace, Freestanding Electric Fireplace Leave a comment Your email address will not be published. Required fields are marked * Comment *
Search: e.g. whirlpool wrf535swhz
Search This website is an independent publication and is neither affiliated with nor endorsed by any of the trademark owners. The "Bluetooth®" word mark and logos are registered trademarks owned by Bluetooth SIG, Inc. The "Wi-Fi®" word mark and logos are registered trademarks owned by the Wi-Fi Alliance. Any use of these marks on this website does not imply any affiliation with or endorsement. Name Email Website Save my name, email, and website in this browser for the next time I comment. Post Comment