Ask AI
— answers from the official manualAnswers from the official manual.
Common questions
Common Questions
17 totalHow do I create a phone book entry for faxing?
Press the Setup button on the control panel, use the arrow buttons to select the Phone Book menu and press OK, select the Add/Edit menu and press OK, then enter the fax number and name and press OK.
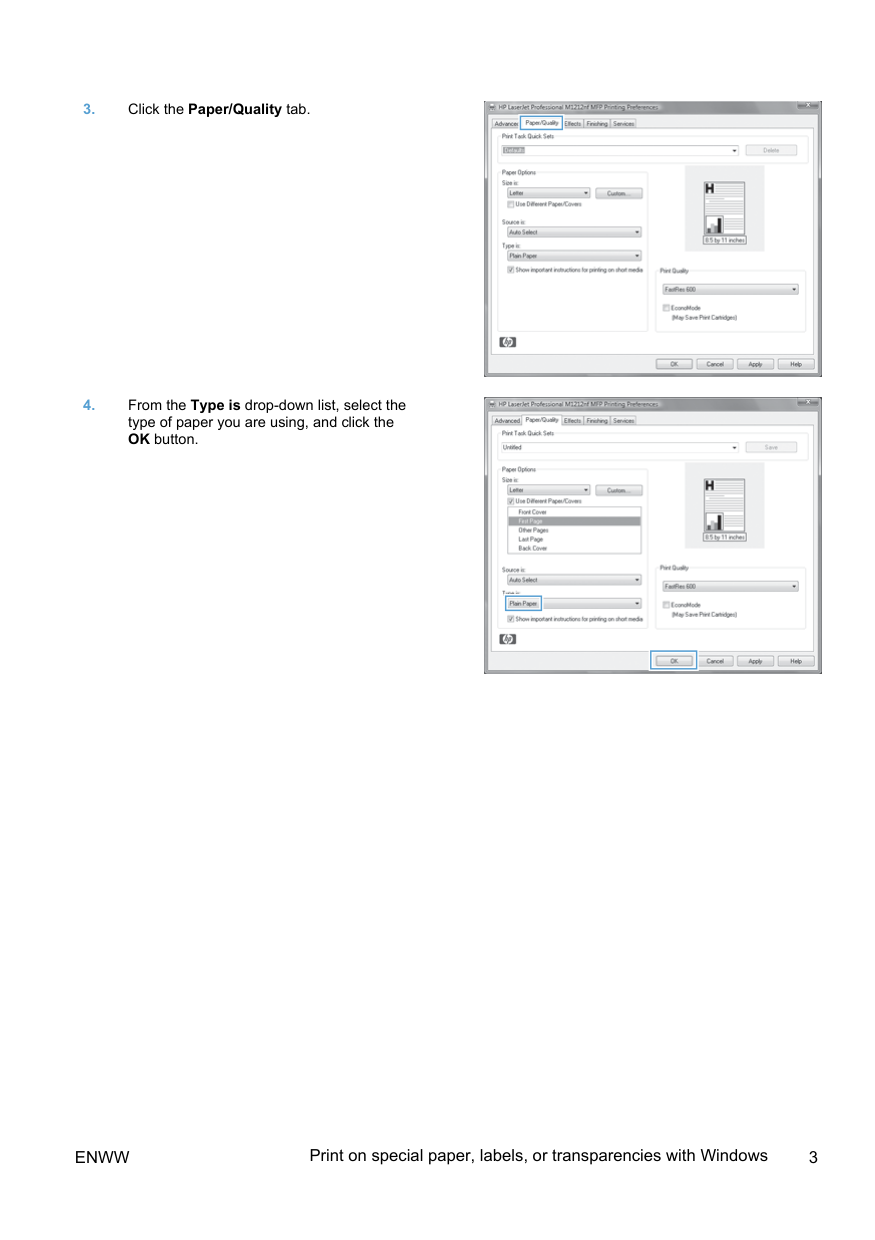
How do I print on special paper, labels, or transparencies with Windows?
Click File > Print in your software, select the product and click Properties or Preferences, click the Paper/Quality tab, select the paper type from the 'Type is' drop-down list, and click OK.
What is the document feeder capacity for faxing?
The document feeder capacity is up to 35 sheets of 75 g/m² or 20 lb media.
What types of documents should I avoid loading into the document feeder?
Do not load originals containing correction tape, correction fluid, paper clips, or staples into the document feeder. Additionally, do not load photographs, small originals, or fragile originals as they may damage the product.
How do I send a fax using the flatbed scanner?
Place the document face-down on the scanner glass, press the Setup button, select the Phone Book menu and press OK, select the phone book entry or dial the number using the keypad, and press the Send Fax button to start the fax job.
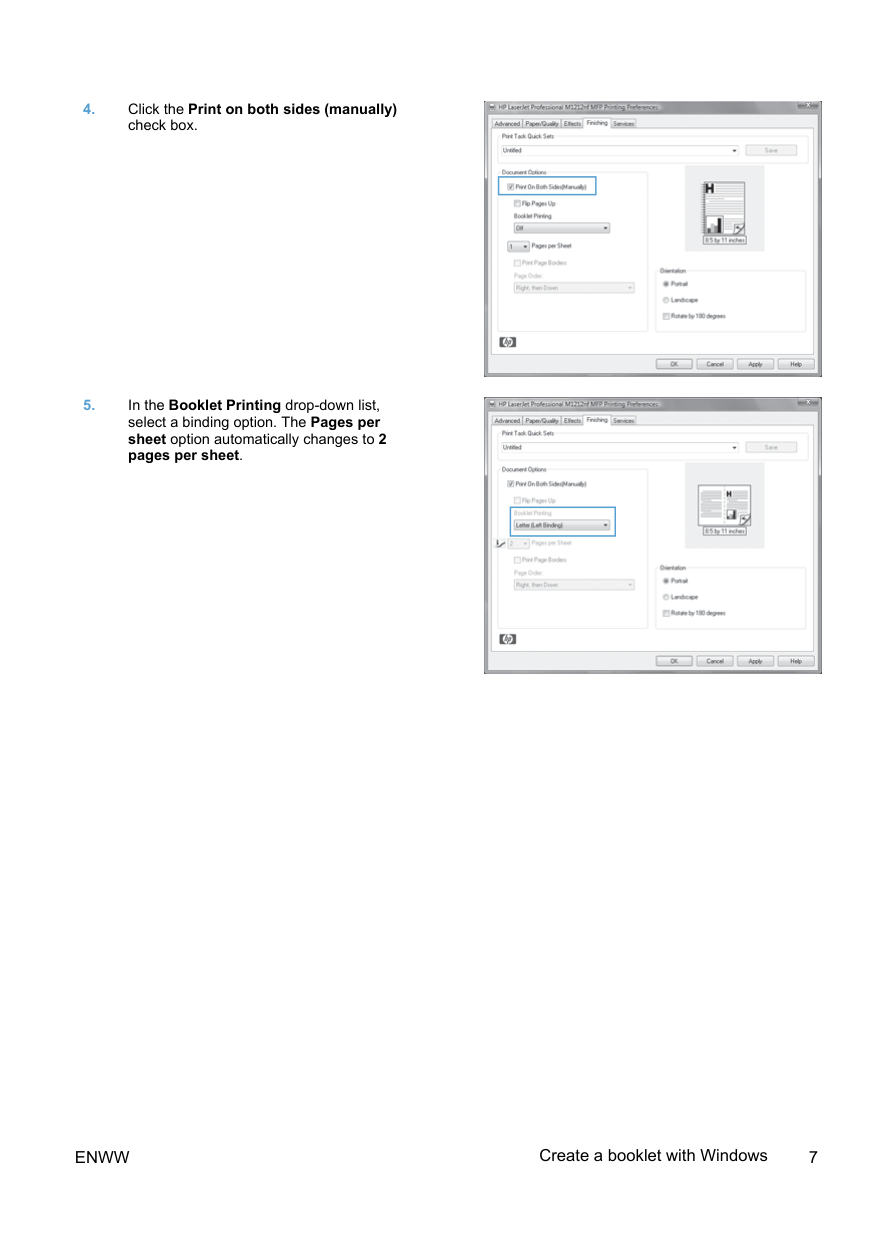
How do I create a booklet using Windows?
Go to File > Print, select the product, click Properties or Preferences, and navigate to the Finishing tab. Check the 'Print on both sides (manually)' box, then select a binding option from the Booklet Printing drop-down list — the Pages per sheet option will automatically change to 2 pages per sheet. (Page 6-7)
Show 11 more questions
How do I reduce or enlarge copies on the M1210 Series?
How do I add or edit entries in the fax phone book using the control panel?
How do I send a fax using the document feeder?
What types of originals should I avoid placing in the document feeder when faxing?
How do I print on special paper, labels, or transparencies using Windows?
How do I change the copy quality setting on the M1210 Series?
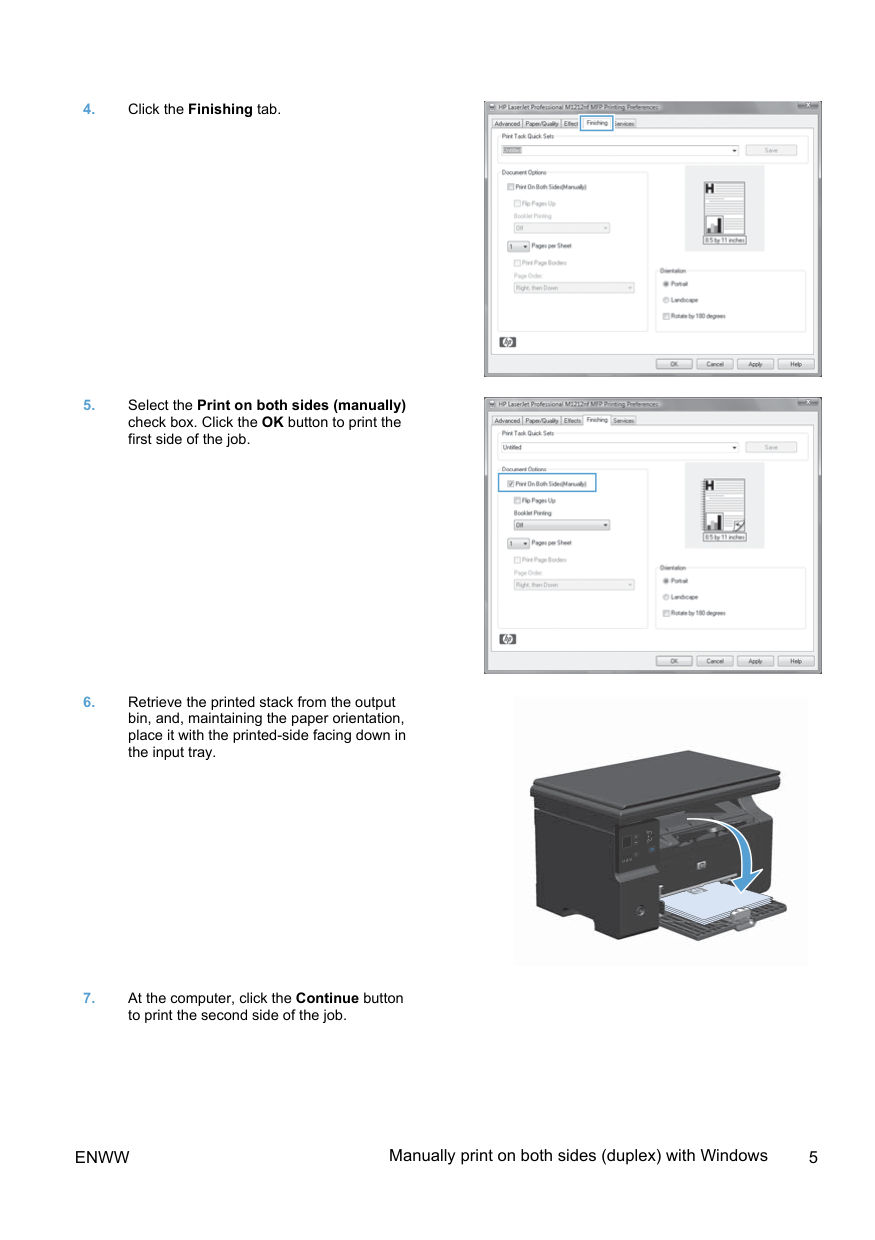
How do I manually print on both sides of the paper (duplex) using Windows?
How do I clean the scanner glass to improve scan quality?
What should I avoid using to clean the scanner on the M1130?
How do I print on both sides of paper manually with Windows?
How do I reduce or enlarge copies on the M1130 Series?
Full Manual
16 pages
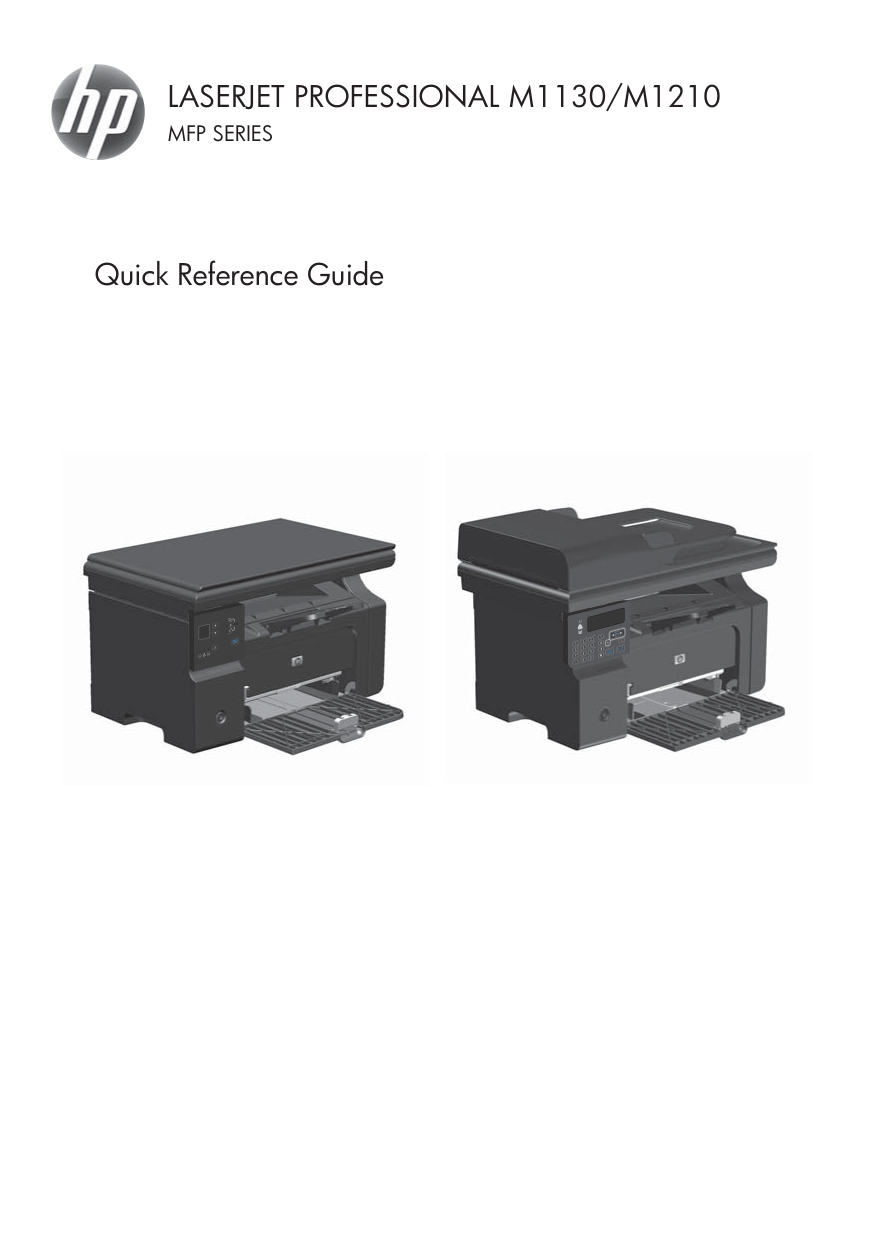
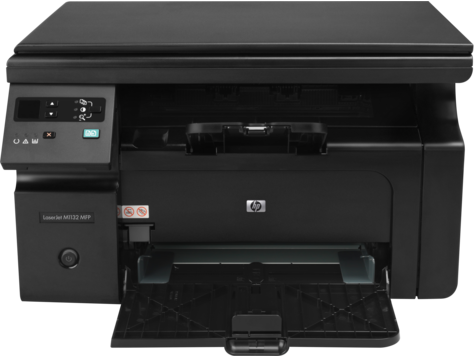
Laserjet Professional M1130/M1210
Mfp Series
Quick Reference Guide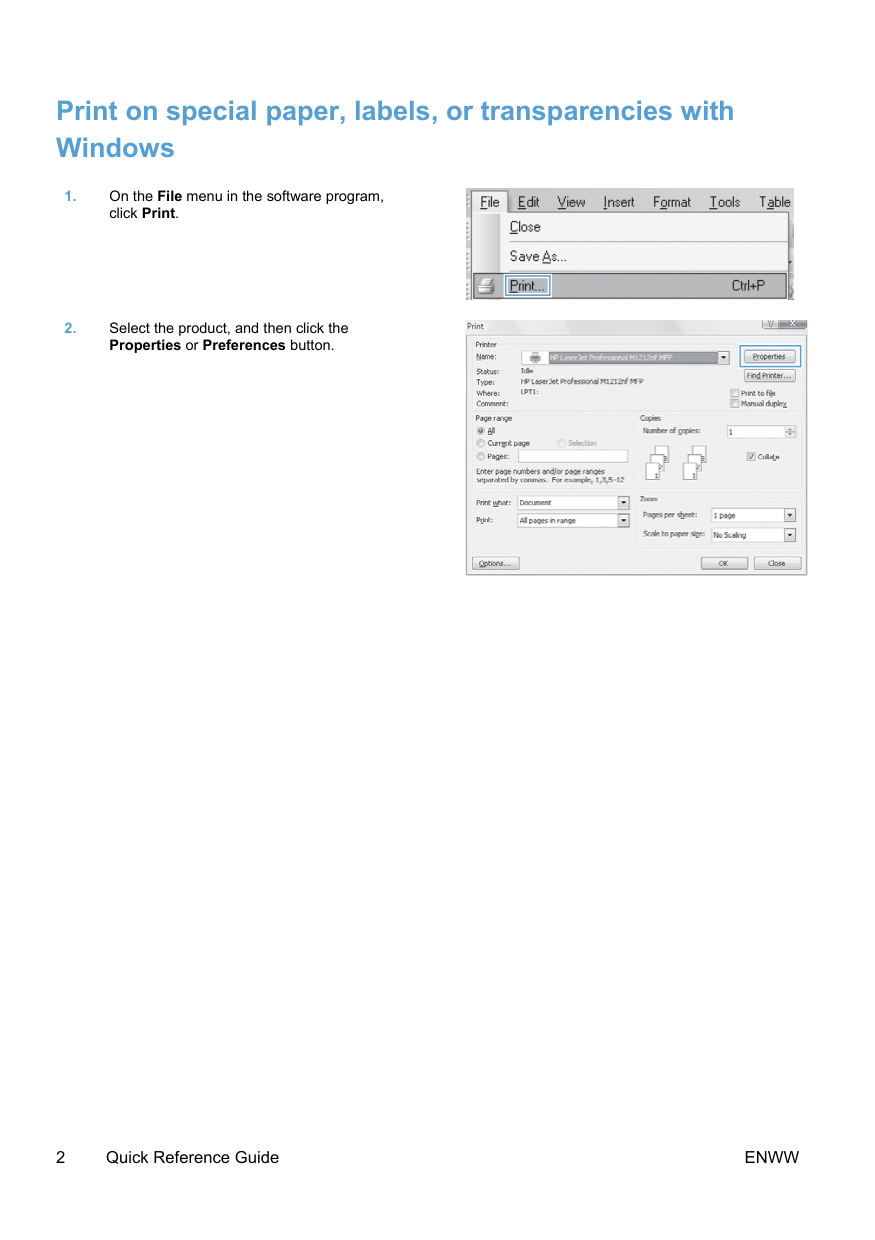
Print on special paper, labels, or transparencies with Windows
2 Quick Reference Guide
Enww
Enww
Print on special paper, labels, or transparencies with Windows 3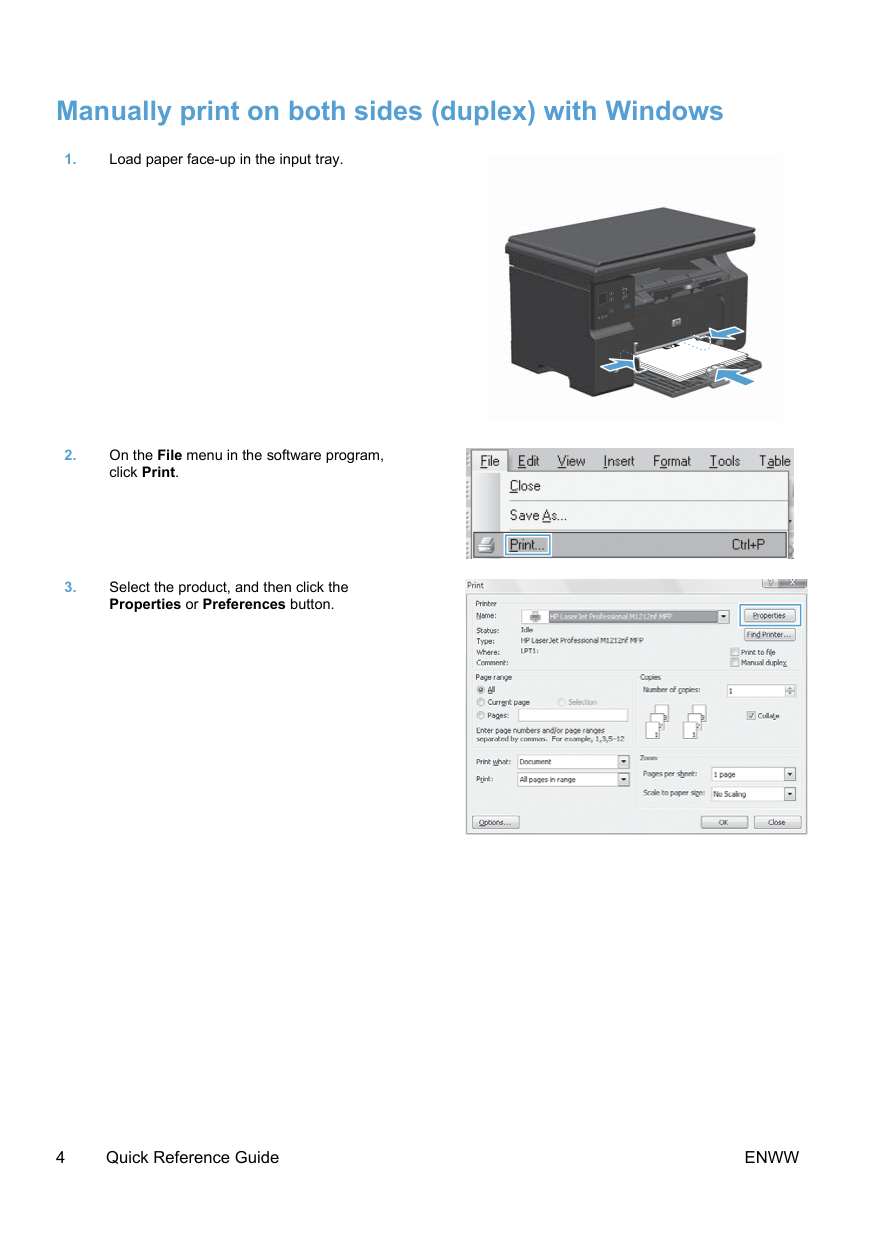
Manually print on both sides (duplex) with Windows
4 Quick Reference Guide
Enww
Enww
Manually print on both sides (duplex) with Windows 5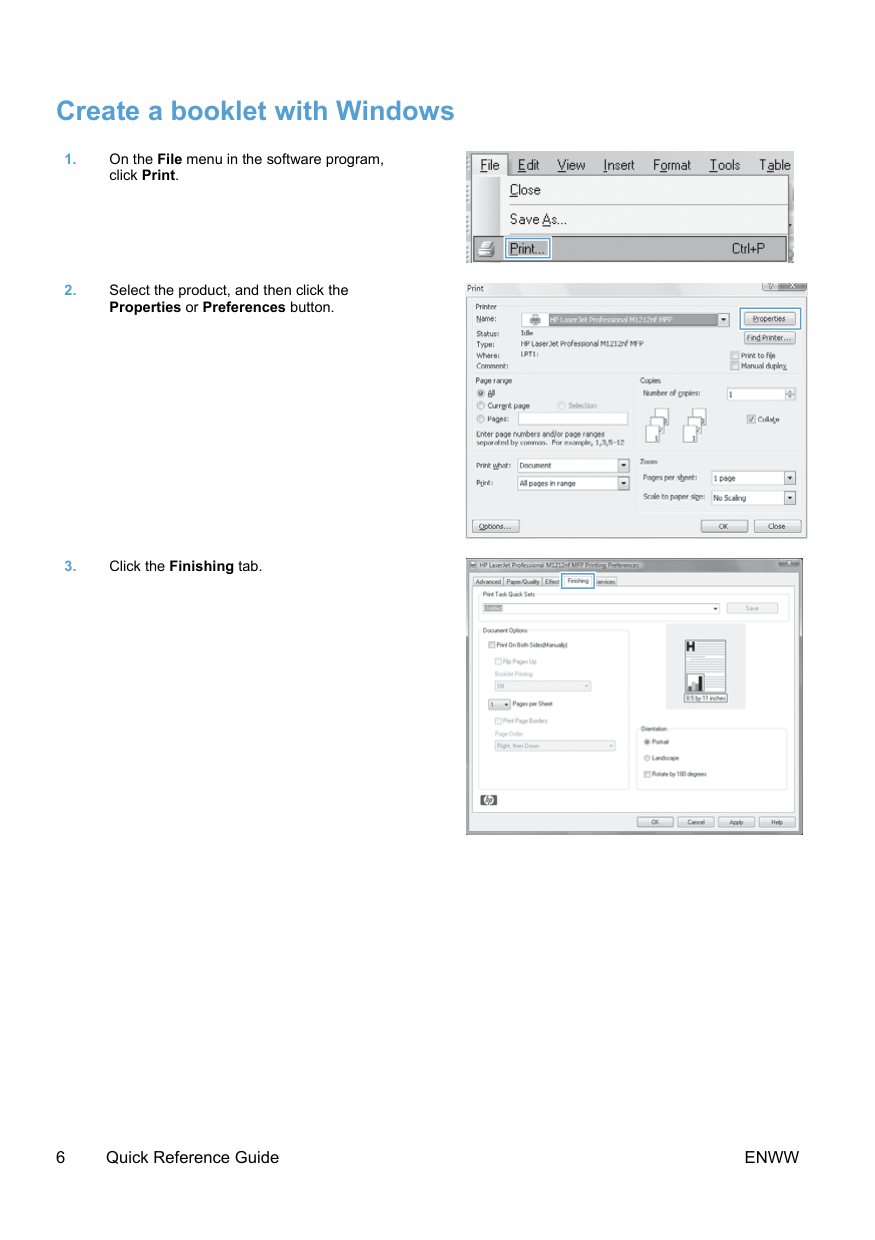
Create a booklet with Windows
6 Quick Reference Guide
Enww
Enww
Create a booklet with Windows 7
Reduce or enlarge copies (M1130 Series)
8 Quick Reference Guide
Enww
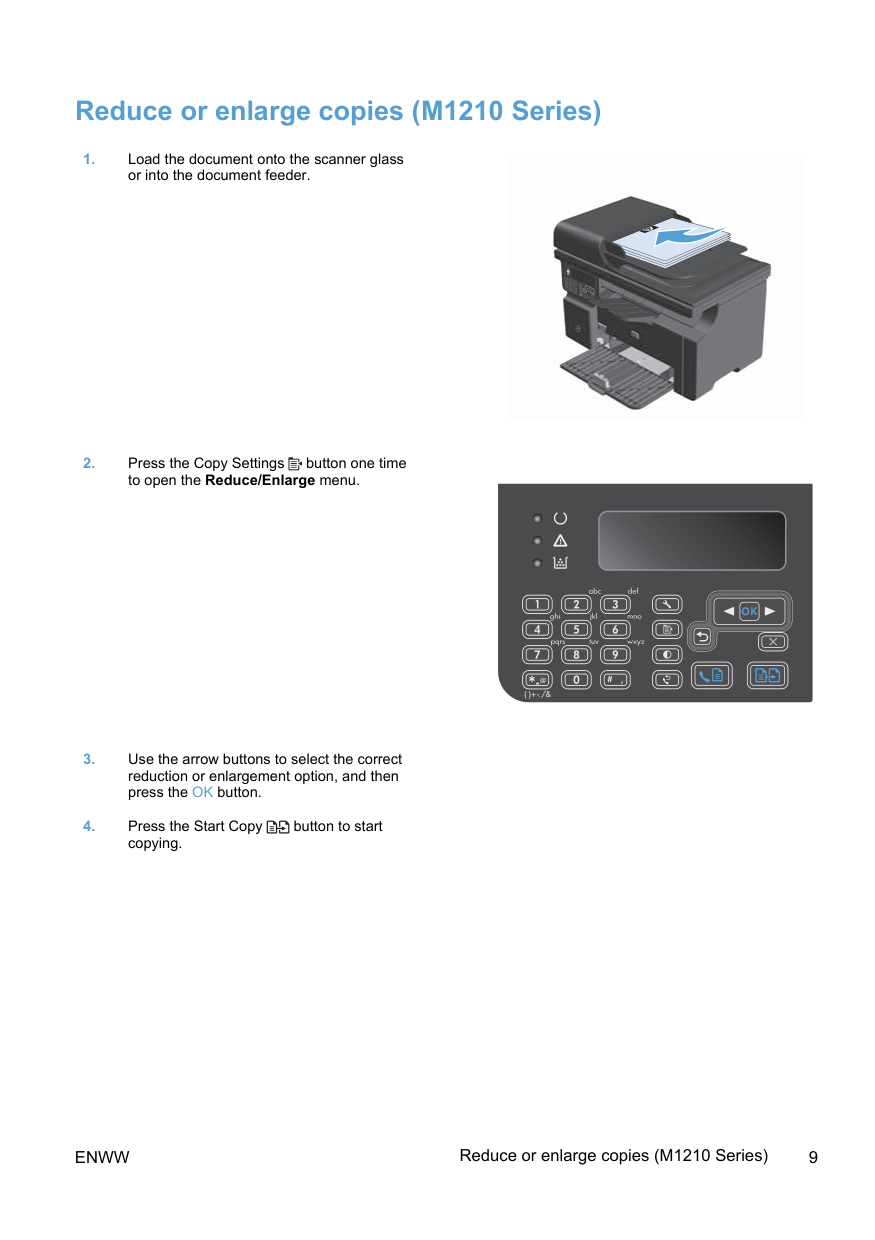
Reduce or enlarge copies (M1210 Series)
Enww
Reduce or enlarge copies (M1210 Series) 9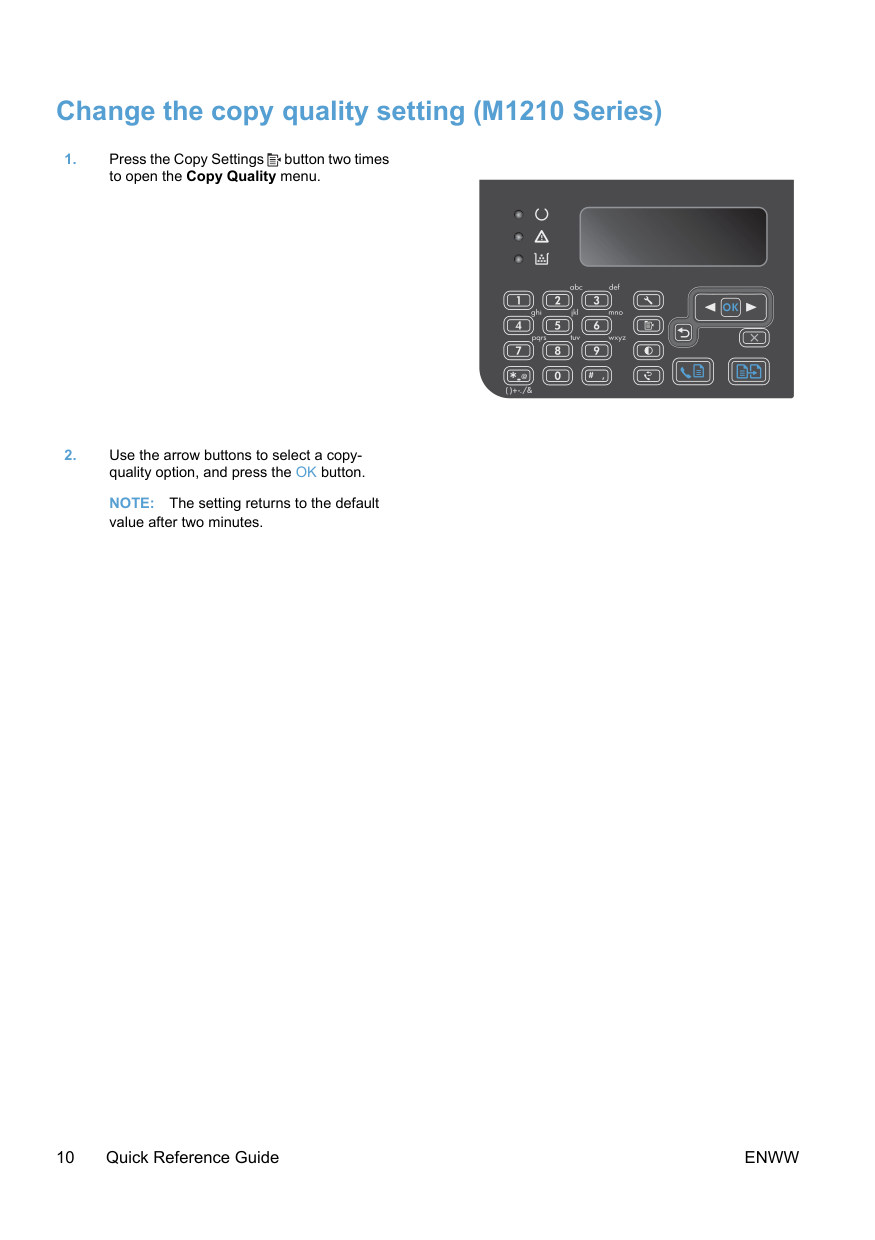
Change the copy quality setting (M1210 Series)
Note:
The setting returns to the default value after two minutes.10 Quick Reference Guide
Enww
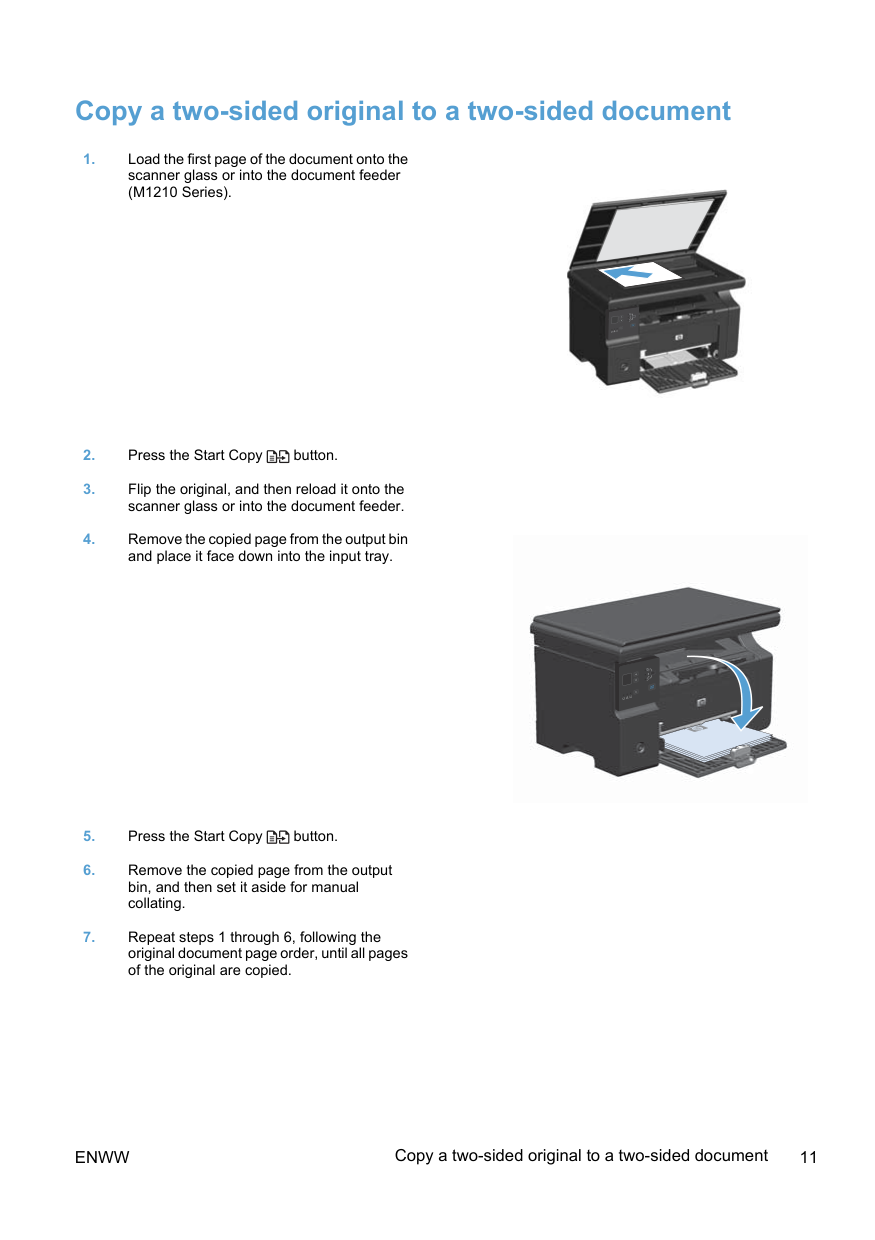
Copy a two-sided original to a two-sided document
Enww
Copy a two-sided original to a two-sided document 11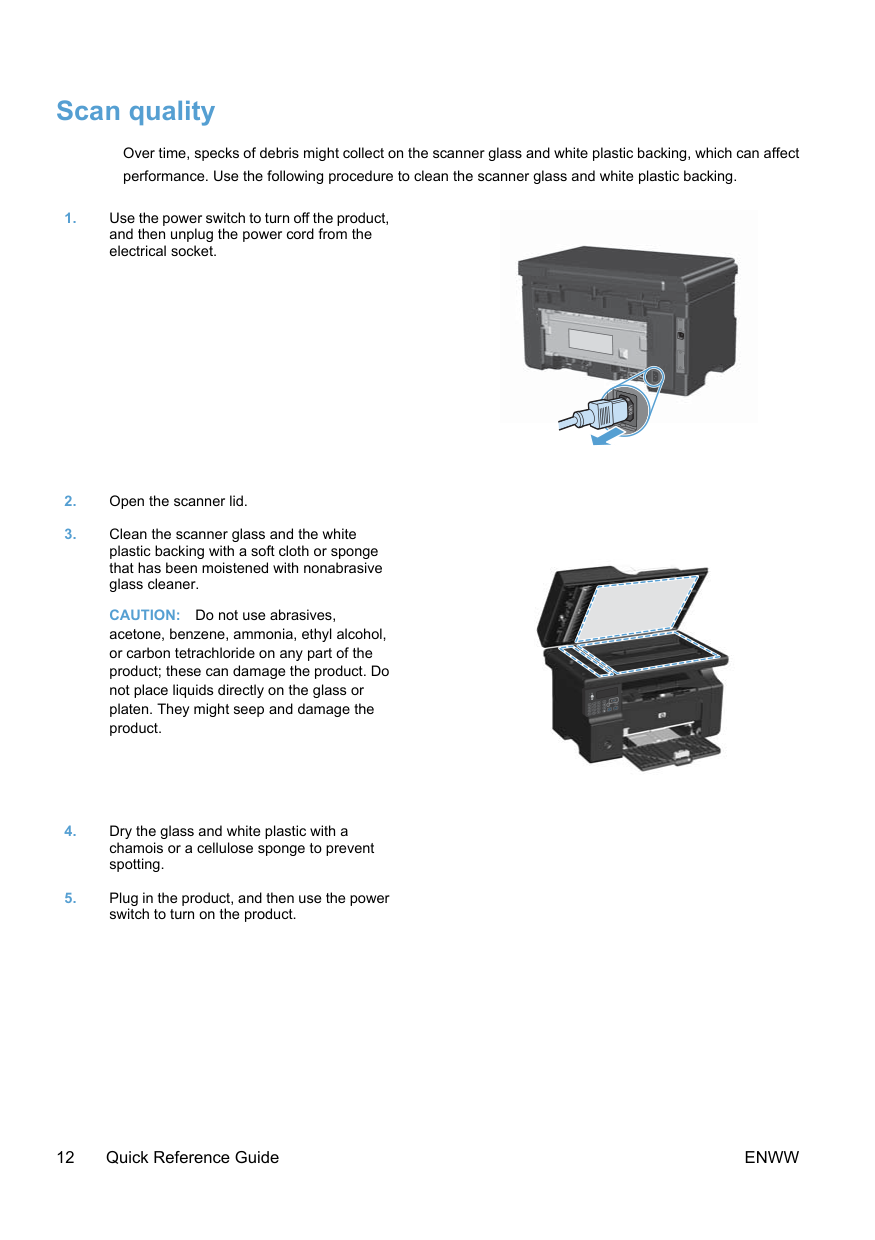
Scan quality Over time, specks of debris might collect on the scanner glass and white plastic backing, which can affect performance. Use the following procedure to clean the scanner glass and white plastic backing.
Caution:
Do not use abrasives, acetone, benzene, ammonia, ethyl alcohol, or carbon tetrachloride on any part of the product; these can damage the product. Do not place liquids directly on the glass or platen. They might seep and damage the product.12 Quick Reference Guide
Enww
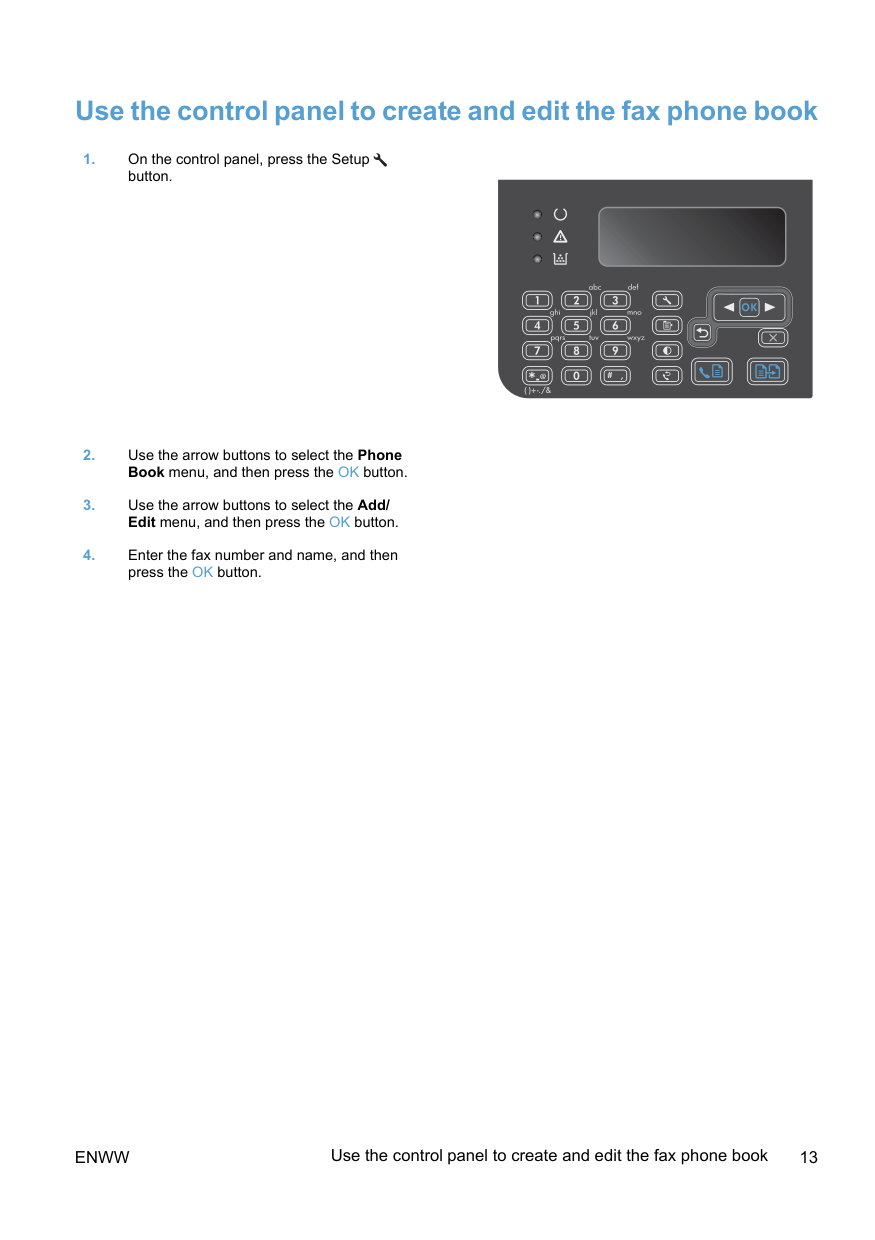
Use the control panel to create and edit the fax phone book
Enww
Use the control panel to create and edit the fax phone book 13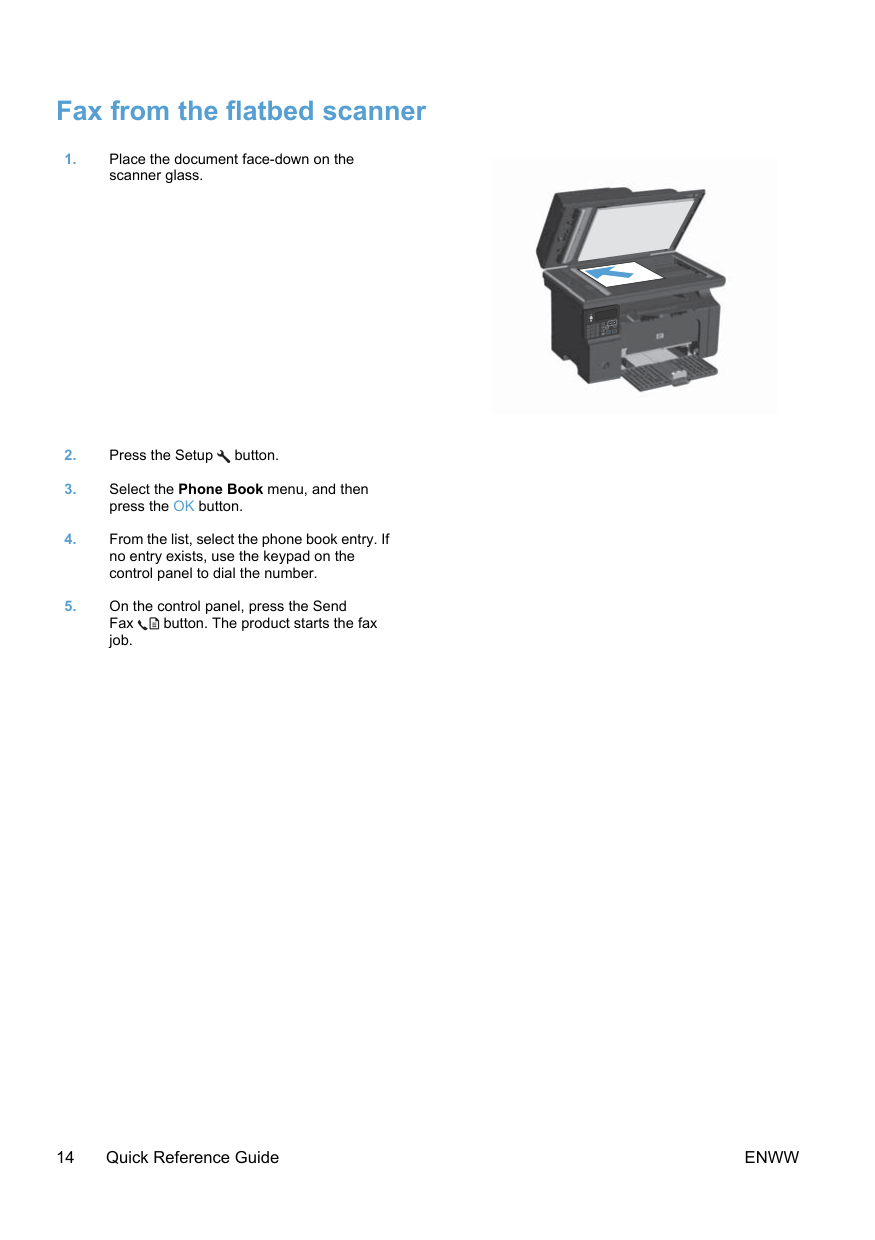
Fax from the flatbed scanner
14 Quick Reference Guide
Enww
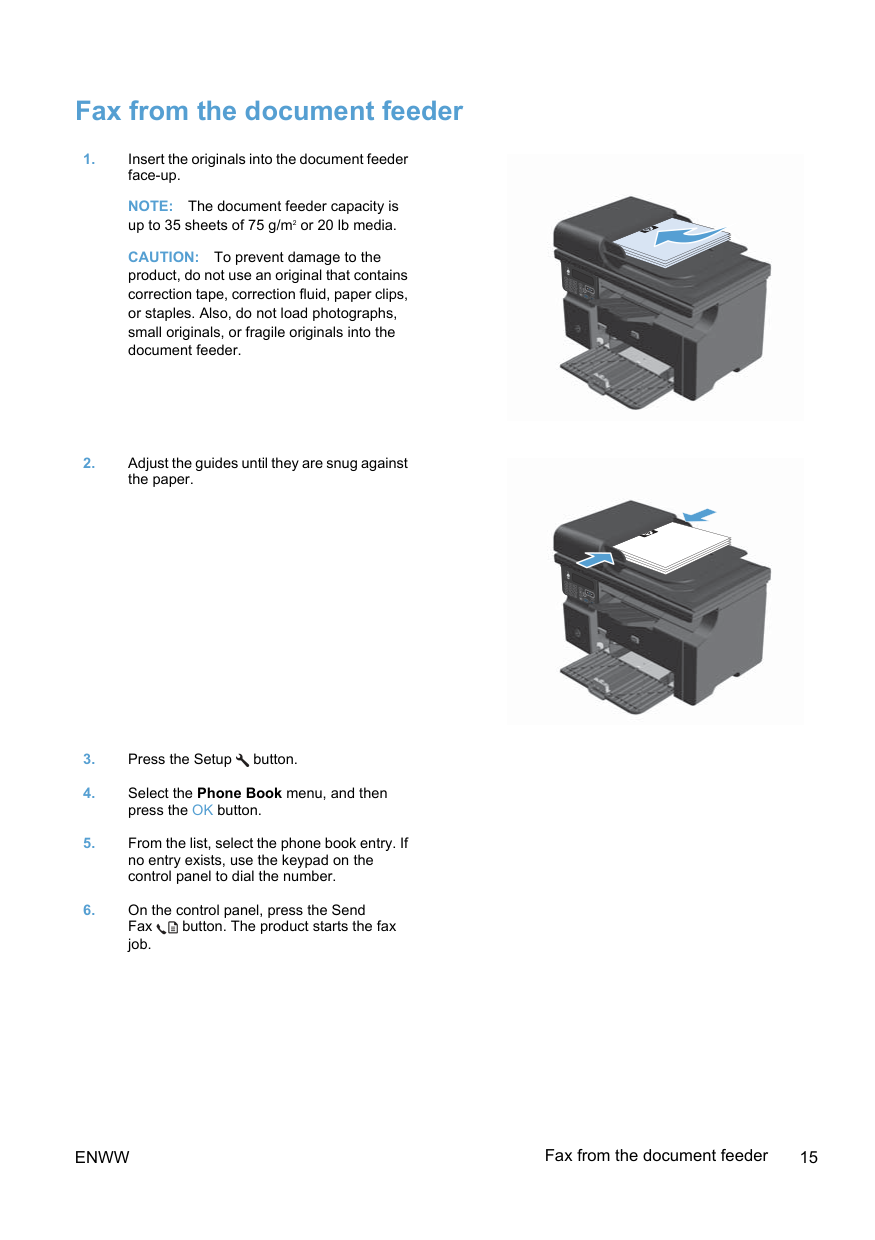
Fax from the document feeder
Note:
The document feeder capacity is up to 35 sheets of 75 g/m2 or 20 lb media.Caution:
To prevent damage to the product, do not use an original that contains correction tape, correction fluid, paper clips, or staples. Also, do not load photographs, small originals, or fragile originals into the document feeder.Enww
Fax from the document feeder 15
© 2016 Copyright HP Development Company, L.P. www.hp.com Edition 2, 2/2016 Part number: CE841-90941 Windows ® is a U.S. registered trademark of Microsoft Corporation. Reproduction, adaptation or translation without prior written permission is prohibited, except as allowed under the copyright laws. The information contained herein is subject to change without notice. The only warranties for HP products and services are set forth in the express warranty statements accompanying such products and services. Nothing herein should be construed as constituting an additional warranty. HP shall not be liable for technical or editorial errors or omissions contained herein.